
The Homeowner's Guide to Lighting Your Home: Start to Finish (2026)
The warm, plain-English capstone for the whole Lighting hub - how to light an Indian home from empty to done, in the order things actually happen, with the one rule that saves you the most money: decide the whole scheme before the electrician wires.
Lighting is the one part of a home you feel every single day and plan for almost never. Paint gets swatches, tiles get showrooms, the sofa gets three shop visits - and lighting gets "put a light there" scribbled on the electrician's plan at the last minute. Then you move in and the living room feels like a hospital, the kitchen counter sits in your own shadow, the bedroom has one harsh tube you can never dim, and there is no way to add the warm corner lamp you wanted because the point was never wired.
This is the capstone guide for the whole Lighting hub - the map that ties every other guide together. It walks you through lighting a home the way it actually happens, from an empty shell to a warm, finished place, and at each step it points you to the deep guide or the calculator that does the heavy lifting. You do not need to read all forty guides in the hub. Read this one, follow the order, and branch out where your home needs it.
Scope and how to read this. This is a design and planning guide - it helps you plan the scheme, choose fixtures, set the mood and specify what to buy. It is not a wiring manual. All electrical work - wiring, circuits, load, dimmer and switch installation, earthing - is safety-critical and must be done by a licensed electrician. Every lux figure, colour temperature and rupee band here is indicative to help you plan and brief a professional; confirm the exact numbers against IS 3646 (interior illumination), NBC (SP 7:2026) and product datasheets, and get local quotes for cost. Automation lives in the Smart Home hub; daylight lives in the Healthy Homes hub.
Step 1 - Think in layers (the one big idea)
If you take away a single thing from this hub, take this: a well-lit room is not one bright light, it is several soft ones doing different jobs. Designers call this layering, and it is the foundation everything else sits on. There are four layers:
- Ambient - the general glow that lets you walk in and see the whole room. Cove lighting, ceiling downlights, a central fitting.
- Task - focused light where you actually do things: the kitchen counter, the study desk, the bathroom mirror, the bedside for reading.
- Accent - light that highlights: a painting, a texture wall, a pooja niche, a plant. This is what makes a room feel designed rather than just lit.
- Decorative - the fitting that is itself an object: a pendant, a chandelier, a beautiful lamp. It looks good even before you switch it on.
A room with only ambient light is flat and dull. A room with all four layers, each on its own switch, can go from bright and practical in the morning to soft and intimate at night. The full idea is in the layered lighting guide and the ambient, task and accent breakdown - read those once and you will never look at a room the same way.
Step 2 - Plan room by room
Every room wants a different mix of those layers. A kitchen is mostly task; a bedroom leans soft and warm; a pooja room is about a calm, respectful glow. Walk your home plan and decide, for each space, what it needs to do at different times of day. The residential lighting design guide is the master method; then go deep where it matters:
| Room | The layer it lives on | Deep guide |
|---|---|---|
| Living room | Ambient + accent + a decorative anchor | Living room lighting |
| Bedroom | Warm ambient + bedside task | Bedroom lighting |
| Kitchen | Bright task under cabinets + ambient | Kitchen lighting |
| Bathroom | Shadow-free mirror task, damp-safe | Bathroom lighting |
| Dining | One warm pendant over the table | Dining room lighting |
| Pooja room | Gentle, warm, glare-free accent | Pooja room lighting |
| Stairs and corridors | Safe, even, two-way switched | Staircase and corridor lighting |
| Study and home office | Cool, steady task at the desk | Home office and study lighting |
While you are at it, skim the common lighting mistakes guide - it is the fastest way to learn from other people's regrets instead of your own.
Step 3 - Choose fixtures (the types and where they go)
Now you know what each room needs, pick the fixtures that deliver it. Fixtures are just tools - each does one layer well:
- Recessed downlights for clean, even ambient and task light - the workhorse of modern Indian ceilings. See the recessed and downlight guide.
- Cove and indirect lighting for that soft, hidden glow along the ceiling edge - the cove and indirect lighting guide covers it.
- Pendants over the dining table or kitchen island - the pendant lighting guide.
- Chandeliers as the statement over a double-height foyer - the chandeliers guide.
- Track and spotlights to aim accent light at art and shelves - track and spotlight lighting.
- Wall lights and sconces for warm mid-height glow - wall lights and sconces.
- Strip and profile lighting for wardrobes, under-counters and skirting - strip and profile lighting.
- Lamps and portable fittings - the easy, no-wiring layer you can add anytime - lamps and portable lighting.
Step 4 - Get the numbers right
This is where planning turns into specification. Three numbers make or break a room, and you do not have to guess any of them.
- Lux - how much light lands on a surface. A kitchen counter wants far more than a bedroom. Set the target with the lux level calculator, guided by IS 3646.
- Lumens - the total light a fitting produces (printed on every pack). Work out how many lumens a room needs with the lumen requirement calculator.
- Colour temperature (Kelvin) - warm (around 2700K-3000K) for living, bedrooms and pooja; neutral to cool (4000K+) for kitchens, bathrooms and studies. The colour temperature selector and the colour temperature and CRI deep-dive settle it.
Also mind the beam angle - a narrow beam spotlights, a wide one washes a room - and CRI (colour rendering), where 80+ is fine for general rooms and 90+ makes skin and food look true at the mirror and dining table.
Step 5 - Design control BEFORE you wire
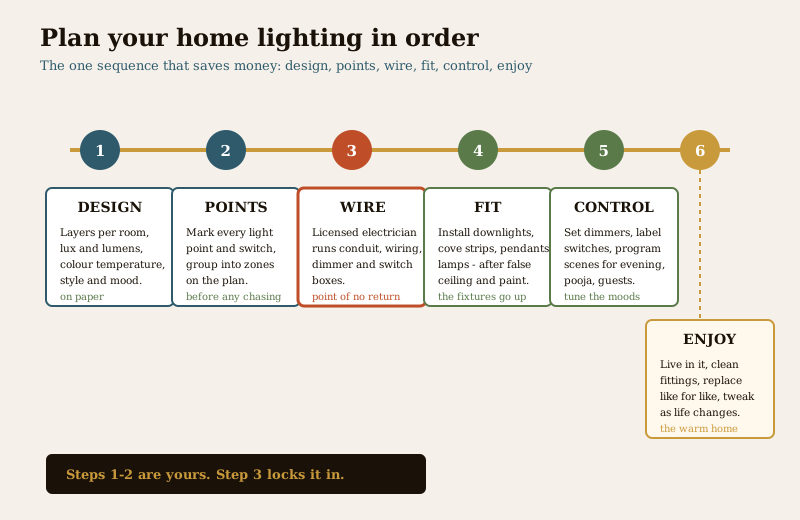
This is the make-or-break moment of the whole project, so read it twice. Decide your zones, dimmers and scenes before the electrician runs a single wire. Control is not something you bolt on later - it is decided in the wiring:
- Zoning - splitting a room's layers onto separate switches so you can light just the cove, just the reading corner, or everything.
- Dimming - the difference between one flat brightness and a room that shifts from working to relaxing. Dimmers need the right driver and switch, planned in advance.
- Scenes - one-touch settings like "evening", "movie", "pooja" or "guests" that recall a whole mix of layers and levels.
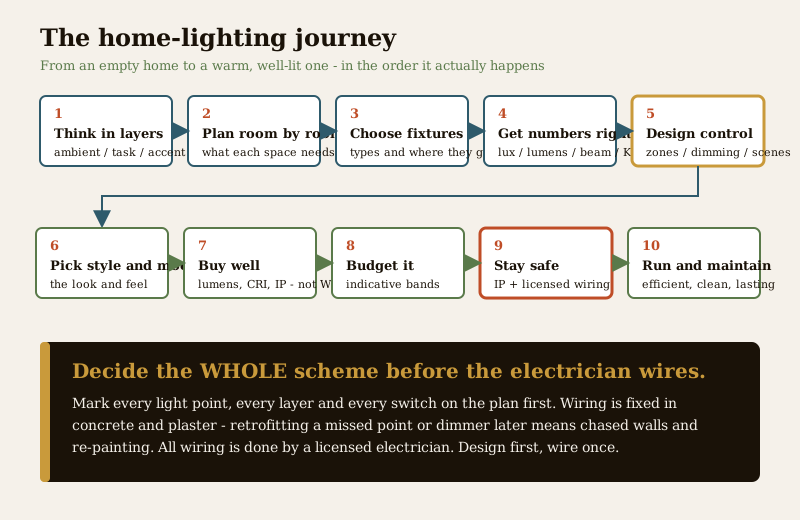
All of this is designed up front and detailed for the electrician in the lighting controls and dimming design guide. If you want app and voice control later, plan the wiring to allow it now - the smart lighting guide and choosing smart lighting show what to leave room for. Retrofitting a missed dimmer or an unwired corner lamp means chasing walls and repainting - which is exactly why the whole hub keeps saying: design first, wire once.
Step 6 - Pick a style and mood
With the function sorted, choose how it should look and feel. Your lighting should match the rest of the home - a minimalist flat and a traditional bungalow want very different fittings. Find your direction with how to choose a lighting style, then explore the one that fits: modern and contemporary, minimalist and Scandinavian, traditional Indian, luxury and statement or industrial and rustic. For the evening magic - the dimmed, layered, scene-set feeling that makes a home glow - read mood and scene lighting, and browse real rooms in the moodboards and living room design ideas.
Step 7 - Buy well
At the shop, ignore the salesperson's habits and read the pack yourself:
- Buy by lumens, not watts. Watts is the old way (how much power a bulb ate). LEDs use a fraction of the power, so lumens is the honest measure of brightness.
- Check the CRI - 80+ for general rooms, 90+ for mirrors, dressing and dining.
- Check the colour temperature in Kelvin matches the room from Step 4.
- Check the IP rating for wet and outdoor spots (more on this in Step 9).
- Look at the driver and warranty - a cheap driver is what usually fails first, not the LED.
The full method, brand-by-brand, is in the lighting buying guide, with the LED technicals in the LED lighting guide.
Step 8 - Budget it
Lighting is a surprisingly wide budget. A basic LED downlight and a designer pendant can differ ten-fold. Plan in indicative bands per room rather than a single number, and separate the fixture cost (one-time) from the running cost (every month). The lighting cost guide sets realistic bands for an Indian home, and the lighting cost calculator plus the LED savings calculator turn your fixture list into a figure you can sanity-check against local quotes.
Step 9 - Stay safe
Two safety points that are non-negotiable:
- IP ratings decide where a fitting can go. IP20 is fine in a dry living room; a bathroom near the shower needs IP44 or better; an outdoor or garden fitting needs IP65. Get this right using the lighting safety and IP ratings guide, which follows IS/IEC 60529.
- A licensed electrician does ALL the wiring. This guide helps you design and specify; it never asks you to touch a live circuit. Electrical work carries a real risk of shock and fire - wiring, circuits, load balancing, earthing and dimmer installation are the electrician's job, done to the National Electrical Code and certified. If a shop or contractor offers to "just wire it quickly", insist on a qualified, licensed electrician.
Step 10 - Run and maintain
The last layer is keeping it good. LEDs are efficient but not eternal - drivers fail, fittings gather dust, and a dim, yellowing light is usually just a dirty diffuser. Light efficiently (the energy-efficient lighting guide and the wider home energy management guide show how to cut the bill without cutting comfort), and keep it lasting with the lighting maintenance guide. When something fails, replace like-for-like from the model list you saved at purchase - mismatched colour temperatures in one room are the giveaway of a hasty replacement.
Plan your home lighting in order
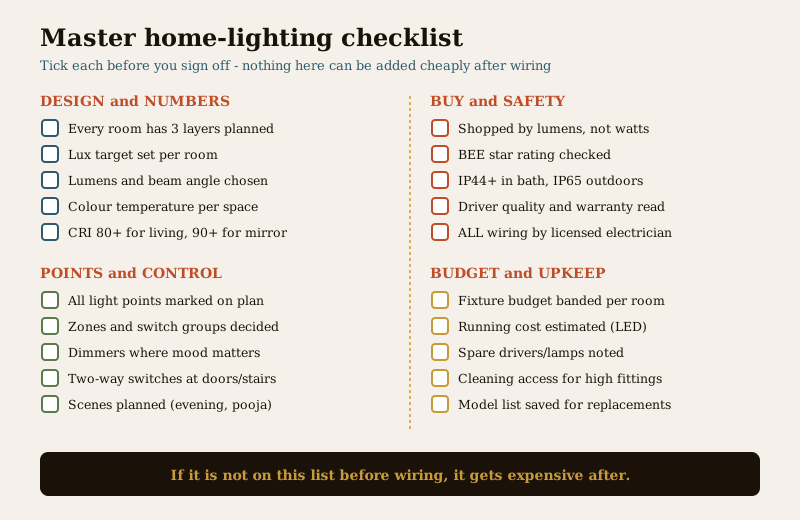
If you do these six stages in this sequence, you will not have to undo anything. Skip ahead - buy fittings before you know the numbers, or wire before you decide control - and you pay to fix it.
| Stage | What happens | Who | Get it from |
|---|---|---|---|
| 1. Design | Layers, lux, lumens, Kelvin, style per room | You | Layered lighting + lux calculator |
| 2. Points | Mark every light point and switch, group into zones | You | Residential lighting design |
| 3. Wire | Conduit, wiring, dimmer and switch boxes | Licensed electrician | Controls and dimming design |
| 4. Fit | Install downlights, cove, pendants, lamps | Electrician + you | Recessed + cove |
| 5. Control | Set dimmers, label switches, program scenes | You | Mood and scene lighting |
| 6. Enjoy | Live in it, clean, replace, tweak | You | Maintenance |
A master home-lighting checklist
Run this before you sign off the plan - none of it can be added cheaply after the wiring is done.
| Area | Check |
|---|---|
| Layers | Every room has ambient, task and accent planned |
| Numbers | Lux target, lumens, Kelvin and CRI set per room |
| Points | All light points and switches marked on the plan |
| Zones | Layers split onto separate switches / dimmers |
| Scenes | Evening, pooja, guest and movie settings decided |
| Buying | Shopped by lumens, checked CRI, Kelvin, IP, warranty |
| Safety | IP-matched fittings; all wiring by a licensed electrician |
| Budget | Fixture bands per room + estimated running cost |
| Upkeep | Cleaning access and a saved model list for replacements |
How it connects
- Start with the complete guide to lighting (the pillar) and the layered lighting guide - the two ideas everything else builds on.
- Plan each space with the residential lighting design guide and the room guides - living room, bedroom, kitchen and bathroom - and dodge the pitfalls in common lighting mistakes.
- Get the numbers with the lux level calculator, the lumen requirement calculator and the colour temperature selector.
- Nail control before wiring with lighting controls and dimming design, then choose the feel with how to choose a lighting style and mood and scene lighting.
- Buy, budget and keep it running with the lighting buying guide, the lighting cost guide and cost calculator, the energy-efficient lighting guide and the lighting maintenance guide.
- Stay safe with the lighting safety and IP ratings guide - and hand every wire to a licensed electrician.
Key takeaways
- Think in layers - ambient, task, accent and decorative, each on its own switch - and the whole home comes to life; this is the one idea behind every other guide.
- Follow the order: layers, rooms, fixtures, numbers, control, style, buy, budget, safe, maintain - each step narrows the next.
- Decide the whole scheme before the electrician wires - mark every point, layer and switch on the plan; retrofitting a missed point or dimmer is painful and costly.
- Get the three numbers right - lux, lumens and colour temperature - using the calculators, so no room ends up too dim, too harsh or the wrong warmth.
- Buy by lumens, not watts, check CRI, Kelvin, IP and the driver warranty, and budget fixtures and running cost separately.
- All wiring is a licensed electrician's job - this hub helps you design and specify; electrical work is safety-critical.
- Every lux, Kelvin and rupee figure here is indicative - confirm against IS 3646, NBC (SP 7:2026) and product datasheets, and get local quotes.
References
- IS 3646 - code of practice for interior illumination and recommended lux levels (named generally).
- NBC (SP 7:2026), Bureau of Indian Standards - general illumination and lighting provisions.
- National Lighting Code and IS 16107 - LED luminaire performance (named generally).
- IS 10322 / IEC 60598 - luminaire safety; IP ratings per IS/IEC 60529 (IP20 dry, IP44 splash, IP65 outdoor).
- ECBC lighting power density and BEE star rating for LED - energy efficiency benchmarks (named generally).
- Licensed electrician - all wiring, circuits, load, earthing and dimmer installation, to the National Electrical Code.
Every lux level, colour temperature, IP guidance and cost band here is an indicative planning aid only; confirm the governing values against IS 3646, NBC (SP 7:2026) and product datasheets, get local quotes for cost, and have all electrical work designed, installed and certified by a licensed electrician.
Export this guide
Related Guides — Deep-dive reading
Lighting Controls & Dimming Design: Zones, Scenes & Switches (2026)
How to plan lighting control so an Indian home's light is flexible — split each room's layers onto separate switches, choose dimmers that actually work with LEDs, add two-way switching where you need it, and layer scenes on top. The design decisions you must settle before the electrician wires.
LightingBathroom Lighting India: The Complete Guide to Layers, Lux, Colour Temperature & IP Safety Zones (2026)
How to light an Indian bathroom properly — the three layers of ambient, task and accent light, the right lux levels and a neutral ~4000K colour temperature for grooming, the IP safety zones near water that decide which fitting goes where, waterproof fixtures, dimming and scenes, mirror lighting done right, motion sensors and energy.
BathroomsLuxury & Statement Lighting: Drama, Sculpture & Scale (2026)
How to design lighting that actually feels luxurious in an Indian home — layered scenes, deep shadow-and-highlight contrast, hidden sources and premium materials — and how to place one sculptural statement fixture as the jewel of a room without over-lighting the whole thing.
LightingRelated Tools — Try Free
Circadian Light Meter
Patient-centric circadian lighting visualizer for Indian healthcare design — time-of-day × intensity → CCT, melanopic lux (EML / mEDI), melatonin suppression, and an alertness curve. Calibrated against WELL v2 L03 Circadian Lighting Design, CIE S 026:2018, Brainard 2001, and Lucas et al. 2014.
Circadian ToolBathroom Lighting Calculator
A lux-based bathroom lighting plan — total lumens, number of LED downlights, mirror task lighting and indicative wattage.
Bathroom CalculatorFull-Room BOQ — Living, Bedroom, Kitchen, Bath
Room-wise BOQ across living, bedrooms, kitchen, utility, and bathrooms with line-item pricing.
Full-Room BOQ