
 Lesson 6.1
Lesson 6.1 · Interiors with Generative AI
Restyling Interiors from a Photo
Keep the room, change the scheme - img2img and inpainting on a real space
You already have the room. Now change everything but the room.
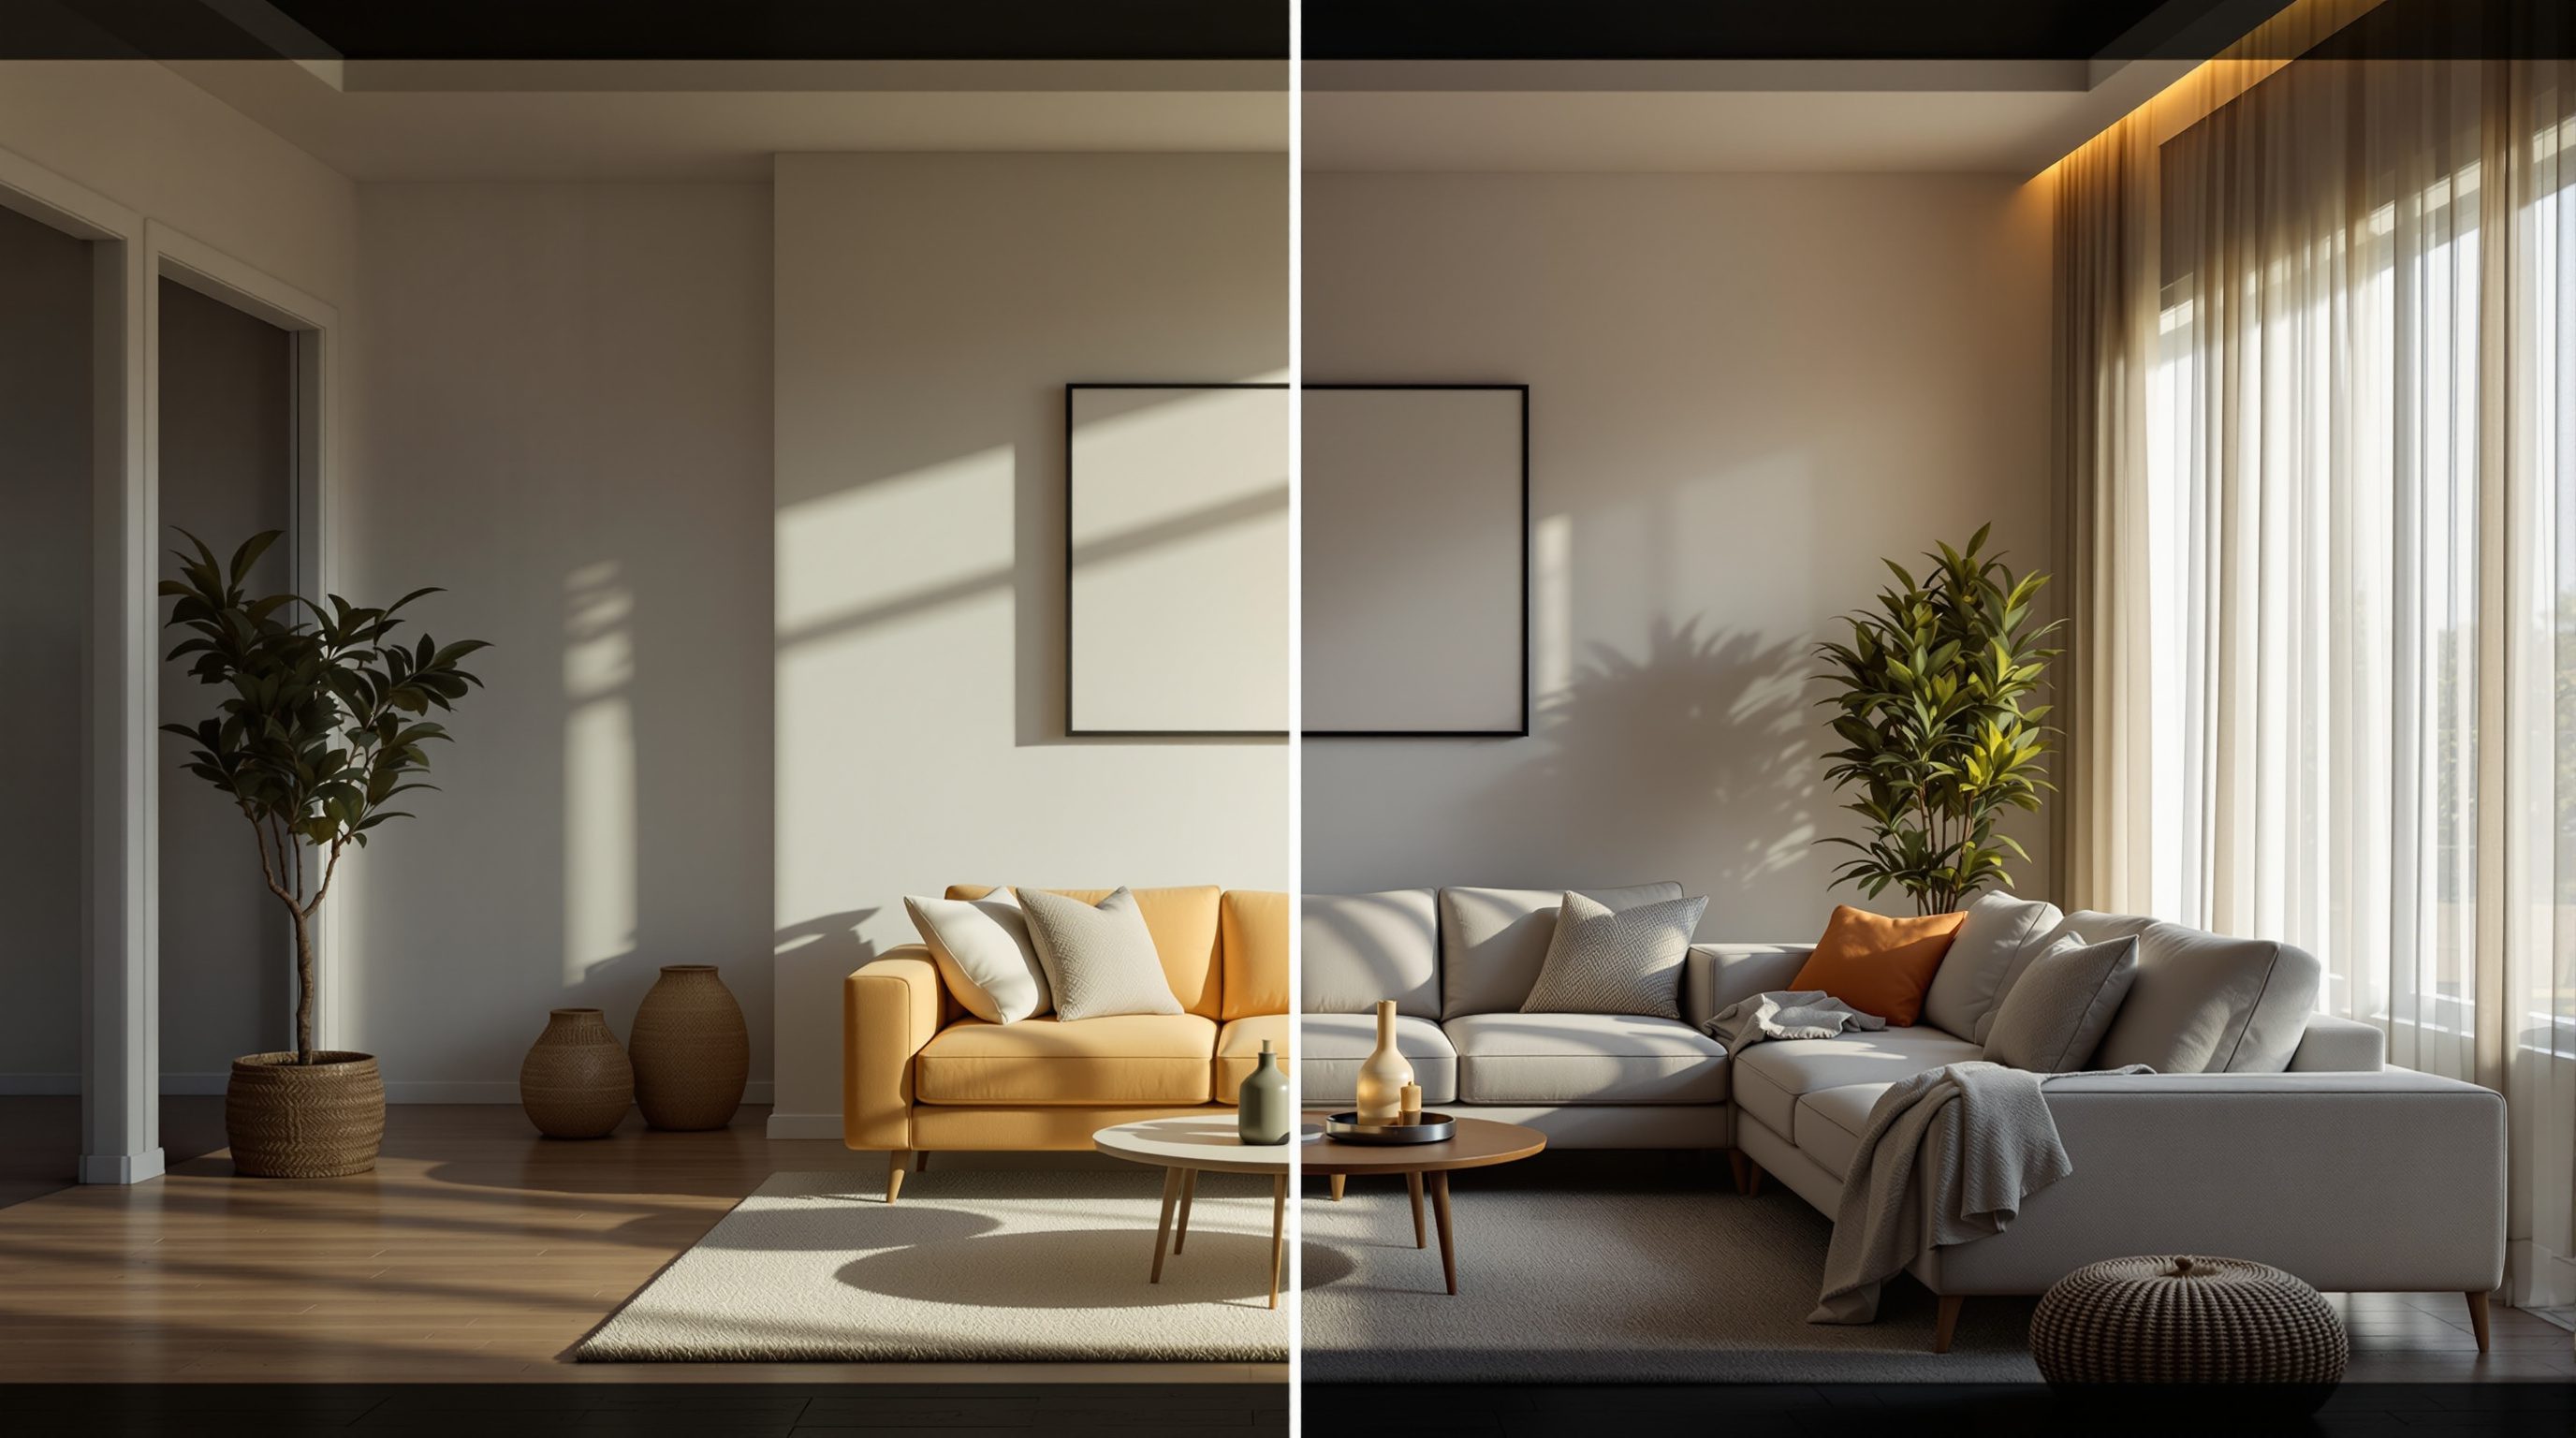
The most useful interior trick in the whole course is not generating a room from nothing - it is taking a photo of a room that already exists and re-dressing it in a new scheme while the walls, windows and proportions stay exactly where they are. That is restyling, and it is a different act from text-to-image: you are editing reality, not inventing it. Get the one dial right and a client sees their own living room, believably transformed, in ninety seconds.
Draw one room box twice: label the left 'strength 0.4 - still my room' and the right 'strength 0.8 - a stranger's room'.
Text-to-image invents; restyle edits
Everything you have done so far started from noise and a sentence. Restyling starts from a picture - your photograph of a real room - and asks the model to repaint it while respecting what is already there. Under the hood this is img2img: instead of seeding the diffusion process with pure random noise, the tool seeds it with a noised version of your photo, so the final image is pulled back toward the original composition.
The difference matters enormously for practice. A text-to-image render of 'a warm minimalist living room' is a beautiful stranger - it is not your client's room, so it proves nothing about their space. A restyle keeps the client's window on the left, the same ceiling beam, the same awkward column, and shows what a new scheme would do to that exact space. It moves the conversation from 'here is a nice picture' to 'here is your room, reconsidered.' That is the leap from mood to proposal.
The control that makes this possible is a single number, variously called denoising strength, image weight, or img2img strength. It runs from 0 to 1 and answers one question: how much of the original do we keep? Near 0, the output is almost identical to the input - a faint retouch. Near 1, the photo is little more than a loose suggestion and you are effectively back to text-to-image. Restyling lives in the middle band, and learning where the sweet spot sits for your tool is the whole skill of this lesson.
The denoising-strength dial, in feel
Numbers are abstract until you have watched them move an image, so here is the map you will confirm in the workshop. At roughly 0.2 to 0.3, you are polishing - the model tidies clutter, warms the light, maybe swaps a cushion, but the room is unmistakably the same and every hard edge holds. This is the range for a light refresh or virtual tidying.
At roughly 0.4 to 0.55 is the restyle sweet spot. The architecture stays legible - walls, openings and ceiling read as the original - while finishes, furniture, textiles and palette change wholesale. A beige rental becomes Japandi; a cluttered flat becomes calm and material-rich. This is where most of your client-facing work will sit, and it is worth finding the exact figure your tool likes, because tools differ by a tenth or two.
Above about 0.65, the room starts to drift. The model feels free to move a window, invent a doorway, change the ceiling height. Sometimes that is what you want - a radical 'what if we opened this wall' study - but you have stopped restyling and started re-designing, and you can no longer promise the client it is their room. Knowing that boundary is what separates a credible proposal from a pretty lie. The honest move is to name which mode you are in whenever you show the result: refresh, restyle, or reimagine.
Inpainting: change one thing, keep the rest
Denoising strength is a blunt instrument - it acts on the whole frame at once. Often you want the opposite: keep ninety percent of the room untouched and change one region. That is inpainting - you paint a mask over just the sofa, or just the back wall, and the model regenerates only inside the mask while everything outside is frozen pixel-for-pixel.
This is how professionals actually restyle. You do not restyle a room in one heroic generation; you do it in passes. Mask the flooring and prompt 'Kota stone'; accept it. Mask the sofa and prompt 'low walnut-frame sofa, handloom upholstery'; accept it. Mask the blank wall and add 'lime-plaster finish, one framed textile'. Each pass is small, controllable, and reversible, and because the untouched pixels never move, the room stays coherent across passes. It is the difference between rolling the dice on the whole room and directing it surface by surface.
Inpainting is also your repair tool. When a restyle is ninety percent right but the model has mangled a chair leg or melted a lamp, you do not re-roll the whole image and lose the good ninety percent - you mask the broken object and regenerate only that. Lesson 6.3 leans hard on this for furniture. For now, hold the two-tool mental model: denoising strength restyles the whole room; inpainting edits a chosen part of it. Reach for whichever the task wants, and expect to use both in a single job.
Holding the architecture on purpose
The promise of restyling - 'this is still your room' - is only as good as your ability to stop the model from wandering. Three habits protect the shell. First, keep denoising in the restyle band and resist the temptation to crank it when a scheme feels timid; a timid restyle is fixable, a drifted room is not the client's room any more.
Second, when the geometry absolutely must hold, condition on it. ControlNet (Module 3) can read the structure of your photo - the lines of walls, windows and the depth of the space - and force every generation to obey that skeleton no matter how high you push the style. A depth or line-based ControlNet layered under an img2img restyle is the studio-grade way to say 'change anything you like about the finishes, but the box is fixed.' You already own this technique; here it earns its keep.
Third, be honest in the negative prompt and the framing. Add the things you never want the model to invent - 'no new windows, no extra doors, no skylight' - and shoot your source photo straight-on where you can, because extreme angles give the model more excuse to reinterpret. None of this is about fighting the tool; it is about telling it clearly which decisions are yours and which are its to fill. The architecture is yours. The scheme is the conversation. Restyling works when that line stays bright.
Restyling in the client conversation
The reason to master this craft is what it does to a meeting. A traditional design conversation asks the client to imagine - to look at a beige rental and trust that oak, lime plaster and soft north light will transform it. Most clients cannot do that, and the ones who can often imagine something different from what you meant. A restyle removes the imagining. You show them their room, the one they live in, re-dressed in the direction you are proposing, and the abstract becomes concrete in a single image.
The honest way to use that power is to show options, not a single verdict. Three restyles of the same room - a calm Japandi, a warm Indian modern, a cooler minimalist - turn the meeting from 'do you like this?' into 'which of these is you?', which is a far better question and a far faster decision. Because each starts from the same photo at the same denoising strength, the three read as fair comparisons rather than one loaded pitch. That fairness is a design ethic as much as a technique.
And it is fast enough to do live. When a client says 'but what if the floor were darker?', you can inpaint the floor and answer in ninety seconds, in the room, together. That responsiveness changes your standing - you become someone who shows rather than promises. The one discipline that protects your credibility is the labelling from earlier: always say whether a result is a refresh, a restyle, or a reimagine, and never let a high-strength 'what if we opened this wall' study be mistaken for a costed proposal. Shown honestly, restyling is the most persuasive tool in an interior designer's kit precisely because it is grounded in the client's own space.
img2img (image-to-image)
Seeds diffusion from your photo instead of pure noise
The foundation of restyling; the denoising-strength value is your keep-vs-change dial.
Inpainting (masked regeneration)
Regenerates only inside a painted mask, freezing the rest
How you restyle surface by surface and repair a single broken object without losing the good frame.
Denoising strength
0-1 control for how much of the source survives
~0.2-0.3 refresh, ~0.4-0.55 restyle, >0.65 the room drifts. Find your tool's sweet spot once.
ControlNet (depth / lines) under img2img
Forces the output to obey the room's structure
Studio-grade way to keep the exact geometry while pushing the style hard.
Workshop - restyle your own room, believably
You will take one photo of a real room and produce a credible restyle that a client would accept as their own space. The point is to feel the denoising dial and the inpainting passes, not to make one lucky image.
Any img2img + inpainting tool: a Stable Diffusion interface (Automatic1111 or ComfyUI) with an inpainting model, a hosted img2img app, or Studio Matrx DesignAI. A ControlNet depth/line model is a bonus for locking geometry.
Goal: a believable before-and-after of ONE real room
Inputs: a straight-on photo of a room you can shoot + any img2img/inpainting tool (a Stable Diffusion UI, or DesignAI)
Time: ~45 minutes
- 1Shoot one room straight-on in even light. This is your 'before' and your img2img input - keep it.
- 2Sweep the dial: run the same style prompt ('warm minimalist, oak and lime plaster, soft daylight') at denoising 0.3, 0.45 and 0.7. Lay the three side by side and mark where the room stops being the same room. Note your tool's sweet-spot number.
- 3At your sweet-spot strength, generate the whole-room restyle. Add a negative like 'no new windows, no extra doors' to protect the shell.
- 4Switch to inpainting: mask only the floor and re-prompt it ('Kota stone'); accept. Then mask one wall and add a finish. Then mask the main sofa and name a specific piece. Keep each pass small.
- 5If any object comes out broken, mask just that object and regenerate it alone - do not re-roll the whole image.
You’ll walk away with
A labelled before-and-after: the original photo, the three-strength sweep with the sweet spot circled, and the final restyle - plus one line naming the denoising value and each mask you used.
Three altitudes on the same idea
Read the band that fits you — or all three.
Restyling is your fastest interior-option generator, but guard the geometry. For built work you can defend, pin the shell with a depth or line ControlNet under the img2img pass so finishes change while the survey stays true - never let denoising strength quietly move a window you dimensioned. Use it to show a client three material directions on their space in an afternoon, then draw the one they choose properly.
This is the everyday tool of the trade - virtual restyling on a client's own room photo. Work in inpainting passes: floor, then walls, then the key furniture, accepting each before the next, so the room stays coherent and you keep the parts you love. Live in the 0.4-0.55 band for the whole-room feel, then refine surfaces one mask at a time. The deliverable clients adore is a believable before-and-after of their living room.
Restyling is the single most portfolio-ready skill in this module - and you can practise it tonight on your own room. A clean before-and-after strip, with a line on what denoising strength you used and what you masked, reads as method, not luck. Learn where the sweet spot sits in your tool by sweeping the dial once; that muscle memory is what makes every later job fast.
“To restyle a room you just describe the new look and generate a fresh image.”
Do it yourself
Small experiments that build the restyle instinct fast.
- 1Run one room at denoising 0.35 and 0.6 with the identical prompt. Write the one sentence that describes what the extra 0.25 cost you in fidelity.
- 2Restyle a room in a single whole-frame pass, then restyle the same room in three inpainting passes. Which reads as more coherent, and why?
- 3Take a restyle you like and mask only the window wall; prompt 'no change' style words. Confirm inpainting truly freezes everything outside the mask.
- 4Add a depth ControlNet under an aggressive 0.7 restyle. Does the geometry now hold where it drifted before?
- 5Photograph a cluttered corner and restyle it at 0.3 - can AI 'tidy' a room without redesigning it?
What you can now do
Peer-reviewed journals & authoritative standards
- 01Rombach, R., Blattmann, A., Lorenz, D., Esser, P., & Ommer, B. - High-Resolution Image Synthesis with Latent Diffusion Models — IEEE/CVF Conference on Computer Vision and Pattern Recognition (CVPR), 2022.
- 02Zhang, L., Rao, A., & Agrawala, M. - Adding Conditional Control to Text-to-Image Diffusion Models (ControlNet) — IEEE/CVF International Conference on Computer Vision (ICCV), 2023.
- 03Hugging Face - Diffusers: State-of-the-art diffusion models (img2img & inpainting pipelines) — Hugging Face documentation, 2026.
- 04Midjourney - Official Documentation (image prompts, style reference, parameters) — Midjourney, Inc., 2026.
You can hold a room and change its scheme - but where does the scheme itself come from? Next, 6.2 builds coherent moodboards and palettes so the 'new look' you feed a restyle is a considered, repeatable direction rather than a guess.
The author
Amogh N P
Architect, interior designer, and creative polymath. Studio Matrx began in his notebooks — his vision of design made honest, useful, and open to everyone. Its Academy is written and taught in his memory, and free, forever.
More about Amogh →