
How to Plan Your Dream Home Before Meeting an Architect
The homeowner's pre-architect playbook — clarify needs, budget, site and brief so your first meeting starts ten steps ahead
Ramesh and Sujata had saved for fourteen years. They had the plot in Whitefield, a Pinterest board with 340 saved images, and a date with an architect on Saturday. They walked in, opened the board, and said the three words that quietly cost them eleven lakh and eight months: "We like this." The architect — a good one — designed exactly what they pointed at: a soaring double-height living room copied from a Los Angeles villa. It looked stunning in the render. It was also impossible to cool in a Bengaluru summer, swallowed half their FAR, and left them with a master bedroom so small that Sujata's mother, who moved in two years later, could not fit a hospital-style bed. They are still paying off the changes.
This guide is the conversation Ramesh and Sujata never had — with themselves — before that Saturday. It walks you through everything a homeowner in India should clarify, decide and write down before the first architect meeting: how your family actually lives, what you can really afford, what your site or apartment will and will not allow, and how to turn all of that into a brief an architect can build from. It covers the players, the timeline, the questions to ask and the red flags to watch.
The single most important idea is this: the quality of your home is decided largely before the architect draws a line — by how well YOU prepare. An architect is a translator, not a mind-reader. Hand over a vague wish and you get a beautiful guess. Hand over a clear brief, a real budget and a understood site, and you get a home that fits your life. The preparation is free. The lack of it is the most expensive thing in the whole project.
Why preparation decides everything
There is a curve every architect knows and most homeowners learn the hard way. A decision is almost free to change while it lives on a sheet of paper. It gets costlier as it moves into drawings, expensive once it is being built, and ruinous once concrete has cured around it.

Moving a bathroom on a drawing is a five-minute eraser job. Moving it after the plumbing is cast into the slab means breaking the slab, re-routing the stack, re-waterproofing and re-tiling — easily ₹1.5–₹3 lakh and a fortnight, for a change you could have made for free in week one. Multiply that across the dozen "actually, can we…" moments that hit every project, and you understand why unprepared homeowners routinely overshoot budgets by 20–35%.
The lesson is not that changes are bad. It is that changes are cheap early and brutal late, so the work is to make as many decisions as possible while they are still cheap. That work is yours, and it happens before you ever sit across from an architect.
Here is the full roadmap of what "prepared" looks like.

The rest of this guide is that roadmap, stage by stage. None of it requires technical knowledge. All of it requires honesty.
A home is not built from images of other people's houses. It is built from a clear understanding of your own life. Bring that understanding to the architect, and the design almost writes itself.
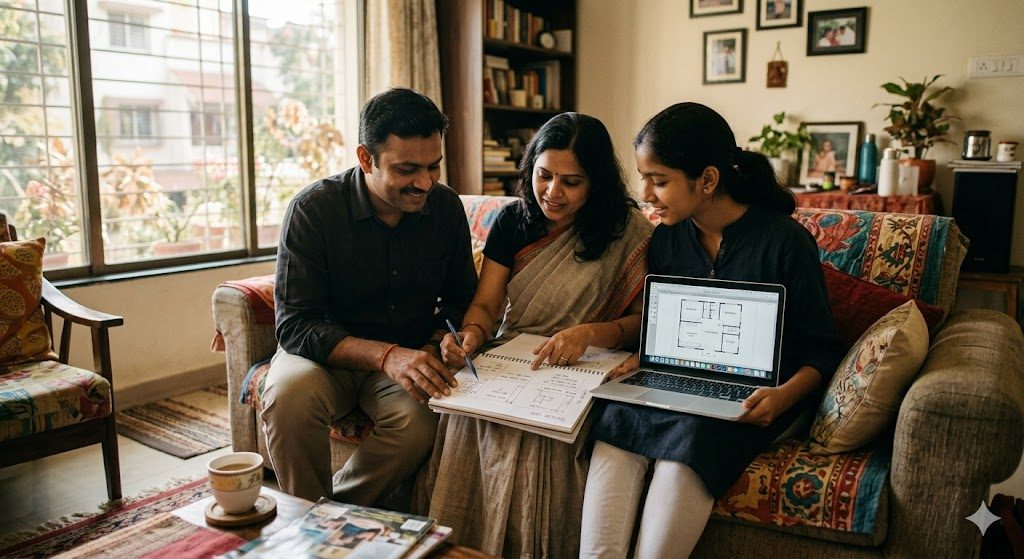
Stage 1 — Clarify how your family actually lives
Most briefs describe a fantasy family: one that entertains lavishly, never has clutter, and whose children stay the same age forever. Real design starts from your real life. Run a lifestyle audit before you think about a single room.
Ask the unglamorous questions, because they shape the plan more than any mood board:
| Question | Why it changes the design |
|---|---|
| Do you cook fresh meals daily, with tadka and frying? | Open kitchens look great and smell of haldi for hours. You may need an enclosed or semi-enclosed kitchen with a utility. |
| Who is home during the day, and doing what? | Work-from-home needs a real room or alcove, not "a corner of the bedroom". |
| Will elders live with you, now or within ten years? | Drives a ground-floor bedroom, step-free access, grab-bar-ready bathrooms, wider doors. |
| How many people gather for festivals and functions? | Sizes the living-dining and the parking, not the everyday count. |
| Shoes on or off? Where does the maid enter? | Shapes the entry, foyer and a service/utility flow most plans forget. |
| Where will children study, and where will they be in ten years? | A nursery becomes a teenager's room; plan for the room it grows into. |
Then go room by room and write what each space must do, not just its name. "Living room" is a label; "a space where six of us watch TV on weeknights and twenty sit at Diwali, with the pooja visible from the entrance" is a brief. The spoke guide on the first 30 decisions when building a home sequences these calls in the order an architect will actually need them.
Two patterns matter especially in Indian homes and deserve early thought: planning for a multi-generational household so elders and a young couple can share a home without friction, and future-proofing the design so it absorbs a growing family, ageing parents and changing work lives without a renovation every five years.
Stage 2 — Set a realistic total budget
The most common budgeting mistake is anchoring on construction cost alone and forgetting the four other buckets that the money disappears into. Your total home budget has five parts, and the one people skip — contingency — is the one that saves the project.

Construction cost is the figure most quoted, so anchor it with realistic 2026 per-square-foot bands for built-up area on an independent home. These vary by city, soil, spec and how much you finish versus leave grey-shell.
| Build quality | Typical 2026 cost (₹/sqft, built-up) | What it buys |
|---|---|---|
| Basic / economy | ₹1,600 – ₹2,000 | Vitrified tiles, basic CP fittings, no false ceiling, laminate doors |
| Standard | ₹2,000 – ₹2,800 | Branded fittings, some false ceiling, granite kitchen, decent joinery |
| Premium | ₹2,800 – ₹3,800 | Imported tiles, designer fittings, full false ceiling, veneer joinery |
| Luxury | ₹3,800 – ₹5,500+ | Stone, smart home, lift, landscape, bespoke everything |
City tiers shift the whole table. Mumbai, Bengaluru and Delhi-NCR run 10–20% above these for the same spec because of labour and logistics; tier-2 cities like Indore, Coimbatore or Lucknow can sit at the lower end; tier-3 towns often go below it. Land, of course, swings the most — a metro plot can be 60% of the total, a tier-3 plot barely 20%.
A few budgeting rules that survive contact with reality:
- Budget the total, then work backwards. Decide your all-in number first, subtract land and statutory costs, and only the remainder is available for construction-plus-interiors. Many people do this backwards and end up with a shell they cannot furnish.
- Keep interiors in the headline number. A finished house is not the same as a liveable one. Modular kitchen, wardrobes, lighting and furniture are 12–18% of the total and arrive exactly when you are most tired and most broke.
- Hold 8–10% as contingency and do not touch it. It is not a slush fund for upgrades. It is the reserve for the soil surprise, the GST change, the price of steel in month nine.
- Account for statutory costs. Sanction fees, betterment charges, NOCs, registration, GST on under-construction property, and professional fees together are a real 3–5%.
Use the budget allocation tool to split a total figure across these buckets, and the cost calculator to sanity-check the construction band for your city and spec. If you are weighing whether to renovate or rebuild, the renovation-versus-new calculator frames that fork. For the full money picture of an independent build, the complete guide to building a house in India goes deeper on financing and milestones.
Stage 3 — Understand your site or shell
You cannot design for a plot you do not understand, and you cannot brief an architect on constraints you have not discovered. Whether you are building on land or buying an apartment, the site sets hard limits that no amount of design talent can override.
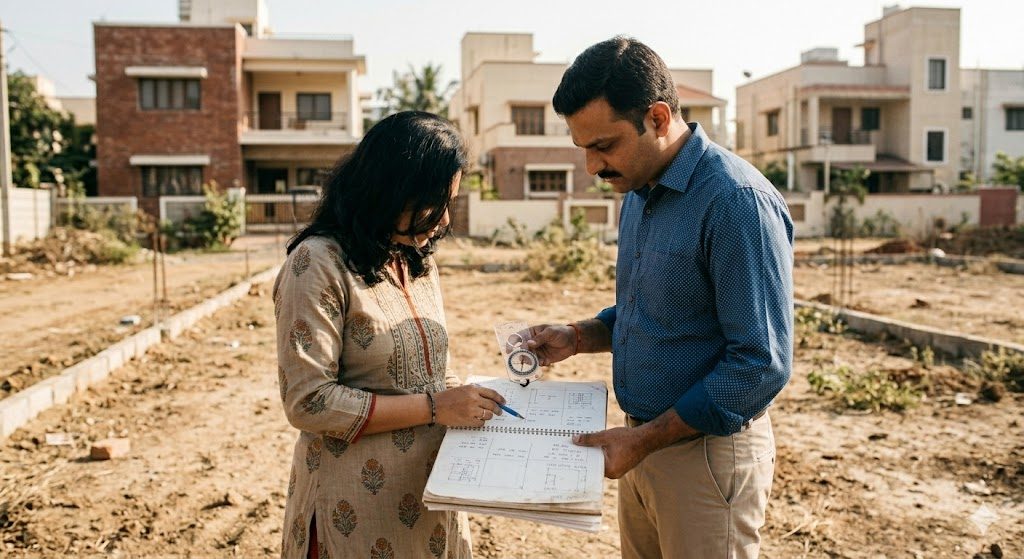
If you are building on a plot, understand these before the first meeting:
| Site factor | What to find out | Where it bites |
|---|---|---|
| Orientation | Which way the plot faces; sun path; prevailing breeze | A west wall bakes; a north-light studio is a gift. East-facing has its own planning logic. |
| FAR / FSI | The buildable ratio your municipality allows | Caps your total built-up area. A 2,400 sqft plot at 1.75 FSI gives ~4,200 sqft built. |
| Setbacks | Mandatory gaps from each boundary (front, rear, sides) | Shrinks the footprint, especially on small plots. |
| Soil & water table | Soil-bearing capacity; depth to water | Decides foundation type and cost; clay or filled land needs deeper, costlier footings. |
| Road & access | Width of the abutting road; corner plot rules | Affects permissible height and, sometimes, FAR bonuses. |
| Approvals path | Which authority sanctions; NOCs needed | Determines timeline; a fire NOC or AAI height clearance adds months. |
Your climate zone should drive orientation and openings as much as Vastu does — and if Vastu matters to your family, settle the Vastu plan logic before, not after, the layout locks. The plot evaluation tool and the FAR/FSI calculator let you test what a piece of land can actually hold.
If you are buying an apartment or builder floor, the constraints are different but just as real: you inherit a structural shell you cannot move. Columns, beams, shafts, the dry/wet wall layout and the society's rules on facade and balcony changes are fixed. Your design freedom is in finishes, joinery and non-structural partitions. Before you commit, learn how to evaluate a builder floor before buying and walk the apartment interior planning checklist. And whatever you buy, confirm the project's RERA registration and read the carpet-versus-super-area maths before you sign.
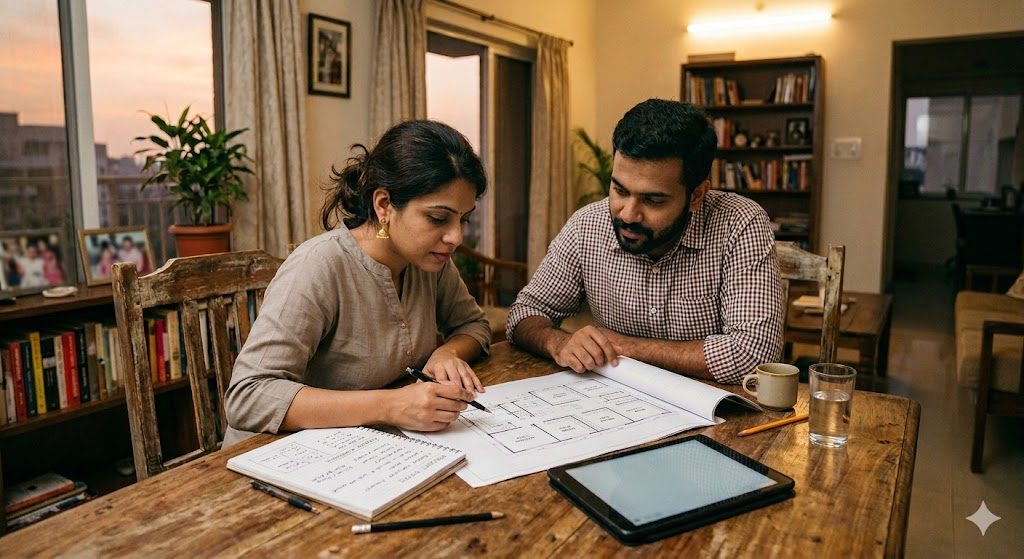
Stage 4 — Write the design brief
If you do only one thing from this guide, do this one. A written design brief is the single most valuable document a homeowner can bring to an architect. It converts a year of fuzzy wishes into clear instructions, and it is the reference both sides return to when, six months later, memories diverge.

A good brief is not architectural and does not pretend to be. It is honest, plain and specific. Two pages is plenty. It should contain:
1. Who lives here — every resident, ages, who works from home, elders, pets, frequent guests, and who is likely to join in five to ten years.
2. How you actually live — daily rhythms, cooking, prayer, entertaining, where children study, the small rituals that shape a home.
3. The rooms you need — a list with each room's purpose, a rough size, and a priority tag: must-have, nice-to-have, or drop-if-tight.
4. Must-haves and deal-breakers — the non-negotiables and the absolute no-gos. This single section saves whole rounds of wasted concepts.
5. Budget and priorities — a real number, plus where you would spend your last lakh versus where you would happily cut.
6. Site and constraints — everything from Stage 3, so the architect designs within reality from line one.
7. Style direction and the why — references, each annotated with what you like and the reason (the light, the storage, the calm), not just "this".
8. Timeline and non-negotiables — move-in target, any festival deadline, phasing plans, and Vastu requirements if they apply.
This is the homeowner's counterpart to the professional client-brief-to-concept process that architects run from their side — write yours well and you make their job, and your house, far better. Two tools draft it for you: the client brief builder and the design brief generator. Fill one out before the first meeting and you arrive with the rarest thing an architect sees: a client who knows what they want.
Stage 5 — Collect references the right way
Reference images are good. The way most people collect them is not. A board of 300 saved pictures with no annotation tells an architect almost nothing — or worse, tells them you want a house stitched together from thirty incompatible styles.
The fix is one discipline: for every image you save, write WHY you saved it — and make the reason about function, not just looks. "I like this kitchen" is noise. "I like that this kitchen keeps the cooking hidden but the cook can still see the kids" is signal. The architect cannot give you that LA villa, but they can absolutely give you the daylight, the calm or the storage logic you were actually responding to.
| Instead of saving for… | Tag the real reason |
|---|---|
| "This living room looks luxurious" | "Low furniture and one big window make it feel calm and open" |
| "Love this bedroom" | "Storage is hidden so the room feels uncluttered" |
| "This facade is gorgeous" | "The deep shading keeps glare out — useful for our west side" |
| "Beautiful staircase" | "It doubles as display and lets light down to the ground floor" |
Keep references to 8–12 strong, annotated images, not 300 unsorted ones. A tight, reasoned set communicates taste without dictating a copy. If your home will be small, the discipline matters even more — study how compact luxury small homes achieve richness through proportion and material, not square footage, and learn why so many Indian homes feel cluttered despite costing a fortune. The style finder can help you name the direction you keep gravitating towards.
Stage 6 — Understand the players, then shortlist your architect
Before you hire anyone, know who does what. Homeowners routinely confuse these roles, hire the wrong one for a scope, or leave a gap where no one owns the work.

In short: the architect designs the form and space and gets it sanctioned; the structural engineer makes it stand and stay safe; the interior designer handles finishes, joinery, lighting and how it feels inside; the contractor builds to the drawings; and an optional project management consultant (PMC) coordinates them and represents you on site. On small projects one firm may wear two hats, but write down who owns each scope so nothing falls through the gap. The guide on scope boundaries between architect, designer and contractor maps this in detail.
When shortlisting an architect, check the things that actually predict a good outcome:
- COA registration. Only a Council of Architecture registered architect can legally use the title and sign sanction drawings. Verify it.
- Portfolio fit, not just polish. Have they done homes like yours — your budget band, your plot type, your city's approval regime? A resort-villa specialist may not be your best 2BHK architect.
- References you actually call. Ask for two past clients and phone them. Ask about budget discipline, site presence and how changes were handled.
- Fee clarity. Understand whether the fee is a percentage of cost, per square foot, or lump sum, and exactly what each stage delivers.
The guide to choosing a designer walks the selection and contracting process end to end.
The realistic timeline
Set expectations now and you avoid the slow disappointment of a project that "feels stuck". For an independent G+1 home in a tier-1 city, land-to-move-in is typically 18–24 months. Here is the shape of it.
| Phase | Typical duration | What is happening |
|---|---|---|
| Your preparation (Stages 1–6) | 1 – 3 months | Brief, budget, site study, shortlist — mostly your homework |
| Architect: brief to drawings | 2 – 4 months | Concept, design development, working drawings, BOQ |
| Plan approval & NOCs | 1 – 3 months | Municipal sanction plus fire/AAI/environmental as needed |
| Contractor hire & budget lock | 2 – 4 weeks | Tender, BOQ negotiation, contract |
| Foundation & structure | 3 – 5 months | Excavation, footings, columns, slabs |
| Brickwork, plumbing, electrical | 3 – 4 months | Walls, concealed services, waterproofing |
| Finishing & interiors | 3 – 5 months | Plaster, flooring, paint, joinery, kitchen, fittings |
| Snagging, OC & move-in | 1 – 2 months | Punch list, completion certificate, utilities, housewarming |
Apartment buyers compress most of this — you are buying a finished or near-finished shell — but the interiors phase (2–4 months) and your own preparation still apply in full.
The first meeting — and the red flags
If you have done Stages 1–6, the first meeting is no longer a hopeful chat; it is a working session. Bring your brief, your budget, your site information and your annotated references. Then ask the questions that reveal whether this is the right architect:
- Have you designed homes in this budget band and on plots like mine? Can I see them?
- Who from your office will run my project day to day, and how often will you visit site?
- What exactly do your fees include, and what is billed separately?
- How do you handle changes once drawings are approved?
- How do you balance my Vastu / climate / accessibility needs with the design?
- Can you give me two recent client references I can call?
And watch for the red flags that predict pain:
| Red flag | What it usually means |
|---|---|
| Shows renders before asking how you live | Selling a look, not designing for you |
| Vague or "we'll see" on fees | Scope and cost surprises later |
| Cannot or will not share references | Thin or unhappy past clients |
| Dismisses your budget as "we'll manage" | Budget overruns are coming |
| No COA registration | Cannot legally sanction your drawings |
| Pressures you to decide on the spot | Prioritising their pipeline over your home |
The nine deep dives
This pillar is the map. These nine spoke guides are the terrain — each takes one part of the journey and goes deep. Read this page first, then follow the thread you need.

- The first 30 decisions when building a home in India — the calls you must make first, sequenced in the order they actually matter.
- Why Indian homes feel cluttered — the design and storage reasons homes feel messy despite costing a fortune, and how to design clutter out.
- How to design a home that ages well — material, layout and style choices that still look right in fifteen years.
- Future-proof home design for Indian families — designing for a growing family, ageing parents and changing work lives without a renovation every five years.
- Multi-generational home design — letting elders, a young couple and children share a home with privacy, dignity and accessibility.
- A beginner's guide to reading floor plans — decode the drawings so you can judge a plan instead of nodding along to it.
- How to evaluate a builder floor before buying — what to inspect, question and verify before you commit to a builder floor.
- Compact luxury for small homes — how small homes achieve richness through proportion, light and material rather than square footage.
- Space-planning mistakes that make homes feel smaller — the layout errors that shrink a home, and the principles that open it up.
Get it right, in order
1. Run the lifestyle audit first. Write down how your family actually lives before you think about a single room.
2. Fix the total budget. Land plus construction plus interiors plus statutory plus 8–10% contingency — then design within it.
3. Study your site or shell. Orientation, FAR/FSI, setbacks and soil for a plot; structure, shafts and society rules for an apartment.
4. Write the two-page brief. Eight sections, plain language, honest priorities. This is your most valuable document.
5. Annotate your references. Keep 8–12 images, each tagged with the functional reason you saved it.
6. Learn the players and shortlist. Know who owns each scope; verify COA registration, portfolio fit and references.
7. Walk in prepared. Bring the brief, budget, site and references — and the questions that reveal the right architect.
8. Decide early, change rarely. Every decision you settle on paper is one you are not paying ten times over to change in concrete.
Do this homework and your first architect meeting starts ten steps ahead — and your home will fit your life instead of someone else's render.
If you would rather not start from a blank page, DesignAI does the heavy lifting of preparation for you. Describe how your family lives, your plot or apartment, and your budget, and it drafts a structured design brief, a room-by-room area programme, indicative layouts and an itemised budget allocation you can take straight into your first architect meeting. It turns a year of fuzzy wishes into the clear, written brief this entire guide is about — in an afternoon.
References
- National Building Code of India 2016 (NBC 2016), Bureau of Indian Standards — the governing code for setbacks, room sizes, ventilation, fire safety and accessibility in Indian buildings.
- Real Estate (Regulation and Development) Act, 2016 (RERA) and your state RERA portal — registration, carpet-area definitions and buyer protections for under-construction homes.
- Council of Architecture (CoA), India — the statutory body governing architectural registration and conduct; verify any architect's registration here.
- IS 875 and IS 1893 (Bureau of Indian Standards) — structural loading and seismic design codes your engineer works to.
- Francis D. K. Ching, Architecture: Form, Space and Order — the standard reference on how space, proportion and circulation actually work.
- Christopher Alexander, A Pattern Language — a homeowner-friendly classic on the small spatial decisions that make houses feel like homes.
- Your local municipal development control regulations (DCR / building bye-laws) — the binding source for FAR/FSI, setbacks and approvals in your specific city.
Continue with the first 30 decisions when building a home, learn to read a floor plan before you judge one, and avoid the space-planning mistakes that quietly shrink a home.
Export this guide
Related Guides — Deep-dive reading
The Complete Guide to Planning Your Home Before You Spend a Rupee
Why the cheapest, most powerful work happens on paper — a planning playbook for Indian homeowners before any money moves
Home PlanningStorage Planning Before Interior Design
Why storage must be planned first — audited, budgeted and given its floor area — before a single layout, colour or sofa is chosen. The homeowner's plan-it-first master guide for Indian homes.
StorageSpace-Efficient Homes — A 2026 Working Reference for Compact Indian Apartments
Five spatial multipliers · Floor plan tricks · Dual-purpose furniture
Room PlanningRelated Tools — Try Free
Cross-Ventilation Analyzer
Estimate airflow and air changes per hour (ACH) from room size, window areas, layout, and local wind — with NBC 2016 Part 8 compliance check.
Ventilation CalculatorApartment Interior Planning Checklist
51-item checklist across structural, ceiling, lighting, furniture, storage, electrical, kitchen, bathroom.
ChecklistFalse Ceiling Cost Estimator
Live ₹/sqft across 8 ceiling types — POP, gypsum, designer, metal, PVC, wooden — with cove and spot lighting for 20 Indian cities.
Cost Calculator