
Smart Lock Installation India 2026: Retrofit DIY Guide
A step-by-step homeowner's guide to checking compatibility, fitting, aligning, calibrating and pairing a retrofit smart lock on an Indian door.
A smart lock installation is one of the few electronic-door upgrades a confident homeowner can do in an afternoon — but only after one honest checklist passes: does the lock physically fit your door? Most returns and most wobbly, mis-aligned locks come down to skipping the compatibility step. This guide walks you through verifying door thickness, backset, handing, the mortise cavity and stile width, then fitting the lock onto a typical Indian mortise or cylindrical door, aligning the deadbolt, calibrating the motor, and pairing the app and Wi-Fi. We will also be straight about when to stop and call the dealer.
Smart lock installation starts with the fit check
Before you order, measure. A retrofit smart lock has to match your door's geometry or it will bind, fail to throw the bolt, or not mount flush. Run our smart-lock compatibility checker with these five numbers in hand, and read choosing a smart lock before you buy.
The five measurements
- Door thickness: measure the leaf edge. Most Indian smart locks suit 35–60 mm; flush doors are often 35–45 mm, solid teak/engineered up to 55 mm. Too thin and the spindle/screws over-reach; too thick and they will not engage.
- Backset: the horizontal distance from the door edge to the centre of the handle/spindle bore. Common Indian backsets are 60 mm and 85 mm (mortise) or 60/70 mm (cylindrical, tubular). The lock body must match.
- Handing (handedness): which way the door swings and which side the hinges sit — left-hand vs right-hand, inswing vs outswing. Many locks are reversible in software during calibration; some are mechanically fixed, so confirm before buying.
- Mortise cavity: for mortise doors, the pocket cut into the leaf edge. A smart-mortise body needs a cavity of the right height, depth and width; an existing standard mortise lock cavity often accepts a same-backset smart body, but check the faceplate footprint.
- Stile width: the solid timber/section of the leaf either side of the lock. Narrow stiles (common on glass-flush and slim aluminium doors) may not give enough material for the body and screws.
| Measurement | Typical Indian range | Why it matters |
|---|---|---|
| Door thickness | 35–60 mm | Spindle length, screw reach, flush mounting |
| Backset | 60 / 70 / 85 mm | Lock body must match the bore centre |
| Stile width | =>90 mm preferred | Enough material to hold the body and screws |
| Cross-bore (cylindrical) | 54 mm (2-1/8") | Standard hole for the lock cylinder |
| Edge-bore | 25 mm (1") | Houses the latch/bolt |
If any number falls outside the lock's spec sheet, do not force it — pick a different model or convert the door (a dealer job). For the wider buying decision see smart vs traditional locks and best smart lock brands.
Mortise vs cylindrical: two different fits
Indian main doors are mostly mortise (a rectangular lock body sunk into the edge of a solid leaf — Godrej Advantis, Yale, Dorset). Internal and many flush doors take cylindrical/tubular locks (round cross-bore). The install differs:
- Mortise smart lock: usually replaces the entire mortise body, or a deadbolt-style unit mounts over the existing cavity. More cutting/chiselling if the cavity does not match. Strong, multi-point on multipoint locking doors.
- Cylindrical/retrofit-over-deadbolt: the gentlest DIY — many "interior side only" retrofit kits clamp onto your existing deadbolt thumb-turn, leaving the outside key untouched. No new holes. Check the thumb-turn shape fits the adapter.
Tools and what is in the box
| Item | Use |
|---|---|
| Phillips + flat screwdrivers | Mounting plates, faceplate |
| Cordless drill + bits | New pilot/bore holes (mortise) |
| 25 mm spade/Forstner bit | Edge-bore for bolt (if needed) |
| Chisel + mallet | Trim cavity / mortise the strike |
| Measuring tape, pencil, spirit level | Marking, alignment |
| Masking tape + template | Locate bores accurately |
| AA/AAA cells or Li-ion pack | Power the lock |
| Smartphone with the brand app | Pairing and calibration |
Most retrofit kits ship with a paper drilling template, mounting plate, spindle/tailpiece, screws, strike plate, batteries and a mechanical-key override cylinder. Lay the parts out and read the brand manual first.
Step-by-step: fitting a retrofit smart lock
'''
Safety first: this is low-voltage, battery-powered work. There is no mains
electrician needed for a standalone smart lock. If your lock ties into a
wired access-control panel, maglock or door operator, isolate that power
and see door-automation wiring before touching it.
'''
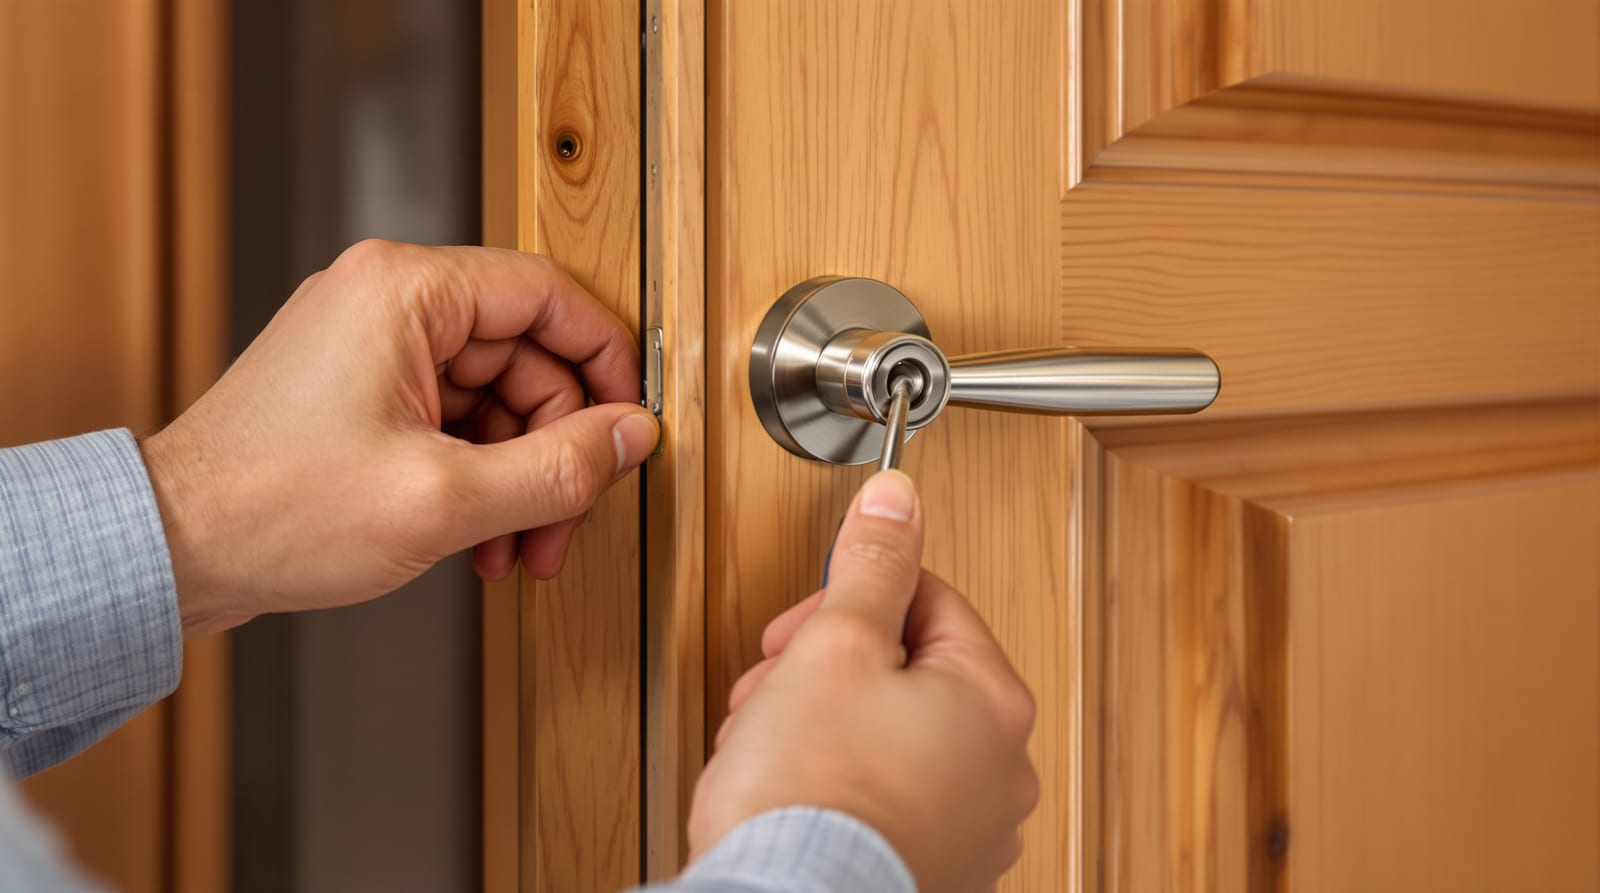
1. Remove the old lock. Unscrew the existing handle/lock set and lift out the mortise body or knob. Keep the screws. Inspect the cavity and bores.
2. Dry-fit and mark. Tape the template to the door at the correct backset and height (handle centre usually 900–1050 mm from floor). Mark any new bores. Confirm handing matches.
3. Drill/chisel only if required. For a clean cavity match, no cutting. If the new backset differs, drill the spindle bore and edge-bore, then pare the cavity with a chisel. Go slow; over-cutting weakens the stile.
4. Mount the outside escutcheon. Pass the spindle/tailpiece and the connector cable through the door. Do not pinch the ribbon cable in the bore — route it through the slot provided.
5. Fit the interior unit. Connect the cable, seat the battery housing, and screw the back plate to the mounting plate. Keep it square with the spirit level so the bolt runs true.
6. Install/adjust the strike plate. On the frame, mortise the strike so the deadbolt seats cleanly without forcing the door.
7. Insert batteries and the override cylinder. Keep the mechanical key somewhere outside the home as well — power-cut lock-out is real in India.
Aligning the bolt and calibrating
This is where DIY jobs succeed or fail. With the door open, throw and retract the bolt by app or keypad and watch it move freely. Then close the door and throw it again:
- If the bolt scrapes or stalls, the strike is mis-aligned. Mark where it hits, enlarge the strike mortise slightly, or shim the plate. The motor should never strain to lock.
- Run the brand's auto-calibration: the lock learns the open/closed positions, the throw distance and the door handing. Most apps step you through "open the door, press calibrate, close, lock, unlock."
- Set auto-lock delay sensibly (10–30 s) and enable a door-position sensor if included so it will not lock against a half-open door.
A correctly aligned lock locks and unlocks in one smooth motion, with quiet motor sound. Grinding or repeated retries means alignment, not the motor — fix the strike. For deeper diagnostics see automatic-door troubleshooting.
App setup and Wi-Fi pairing
1. Create the account in the brand app (Godrej, Yale/Qubo, Ozone, Atomberg, etc.) and enable Bluetooth.
2. Add the device — usually hold the lock in pairing mode and scan the QR/serial. Bluetooth links it to your phone first.
3. Connect to Wi-Fi or a bridge. Many locks need a 2.4 GHz network or a separate Wi-Fi bridge/hub for remote access; 5 GHz-only routers will not pair. See smart-lock Wi-Fi connectivity for band, range and bridge placement.
4. Enrol credentials. Add fingerprints, PINs, RFID cards and OTP/temporary codes; assign admin vs guest roles.
5. Set notifications and check logs so you see who unlocked when. For the full method survey read keyless entry systems and smart door locks.
Common fit problems and fixes
| Symptom | Likely cause | Fix |
|---|---|---|
| Bolt will not throw fully | Strike mis-aligned / door sag | Re-mortise strike, tighten hinges |
| Motor strains, retries | Tight bolt or wrong calibration | Re-calibrate, ease the strike |
| Lock not flush, wobbles | Backset/thickness mismatch | Wrong model — change lock |
| Wi-Fi will not pair | 5 GHz-only router, weak signal | Use 2.4 GHz / move bridge closer |
| Fast battery drain | Cold-start retries, poor align | Fix alignment; see battery guide |
| Outside unit loose | Cable pinched, screws short | Re-route cable, correct screws |
For draining cells and replacement timing, read the smart-lock battery guide. For the security trade-offs of going connected, see smart-lock security risks.
DIY or call the dealer?
DIY makes sense for retrofit-over-deadbolt kits and like-for-like mortise swaps where the cavity and backset already match — minimal cutting, an hour of work. Call the dealer/integrator when: the backset or thickness needs new bores, the stile is narrow, the door is metal or frameless glass, or the lock must tie into a wired panel, magnetic door lock, electric strike or a building access system. Professional fitting typically adds ₹500–2,000 for a standalone lock; integrated jobs are quote-driven and worth it. Estimate the full spend with the smart-lock cost calculator before you commit.
Life-safety must: any access-controlled or maglocked door on a fire-escape route must allow free egress without a phone, PIN or power — NBC 2016 requires people to get out instantly. Never fit a lock that traps occupants. Where this guide is part of a bigger project, start from the complete door guide and the door automation guide.
Frequently asked questions
Can I install a smart lock without drilling new holes?
Often yes. Retrofit-over-deadbolt kits clamp onto your existing interior thumb-turn and need no new holes — the outside key stays. Full mortise replacements may need drilling only if the backset or cavity differs from the original.
How do I know if my door is compatible?
Measure door thickness, backset, stile width and the existing bore/cavity, then match them to the lock's spec sheet. Our smart-lock compatibility checker flags mismatches before you buy.
What if the Wi-Fi will not connect?
Most smart locks need a 2.4 GHz network or a separate bridge; a 5 GHz-only router will not pair. Move the bridge closer to the door, confirm the band, and pair over Bluetooth first.
Will it lock me out during a power cut?
The lock runs on batteries, so a grid cut alone will not lock you out — but flat batteries can. Keep the mechanical override key off-site, watch low-battery alerts, and read the smart-lock battery guide.
Is the bolt always jamming a calibration or alignment problem?
Almost always alignment. Open the door and throw the bolt: if it moves freely, the strike on the frame is mis-positioned — re-mortise or shim it. The motor should never strain to seat the bolt.
How long does a DIY install take?
A retrofit-over-deadbolt kit takes 30–60 minutes including pairing. A mortise swap that needs new bores can take 2–3 hours. If much cutting is involved, a dealer is faster and cleaner.
Export this guide
Related Guides — Deep-dive reading
Door Trades Coordination: Fitting Sequence on Site (India 2026)
How carpenter, mason, electrician and painter hand off work in the right order so doors fit without rework on an Indian site.
Home Doors & EntrancesFail-Safe vs Fail-Secure Locks: The Guide (India 2026)
Why fail-safe vs fail-secure is the single most important access-control decision, and how to get it right for every door.
Home Doors & EntrancesMortise Lock Guide for Indian Homes: How They Work, Cylinders & Security (2026)
Why the mortise lock — body sunk inside the door leaf — is the standard for Indian main and bedroom doors, and how to choose the cylinder, handle set and brand.
Home Doors & EntrancesRelated Tools — Try Free
Door Lock Selector
Answer a few questions and get the right lock type — mortise, multipoint, deadbolt, privacy or smart — for any door.
Door ToolDoor Security Rating Calculator
Score your main door out of 100 across leaf, frame, lock and hardware — and see the top upgrades.
Security ToolSmart Lock Cost Calculator
Estimate smart door lock cost by access type, tier and number of doors — and compare it to a mechanical lock.
Door Calculator