
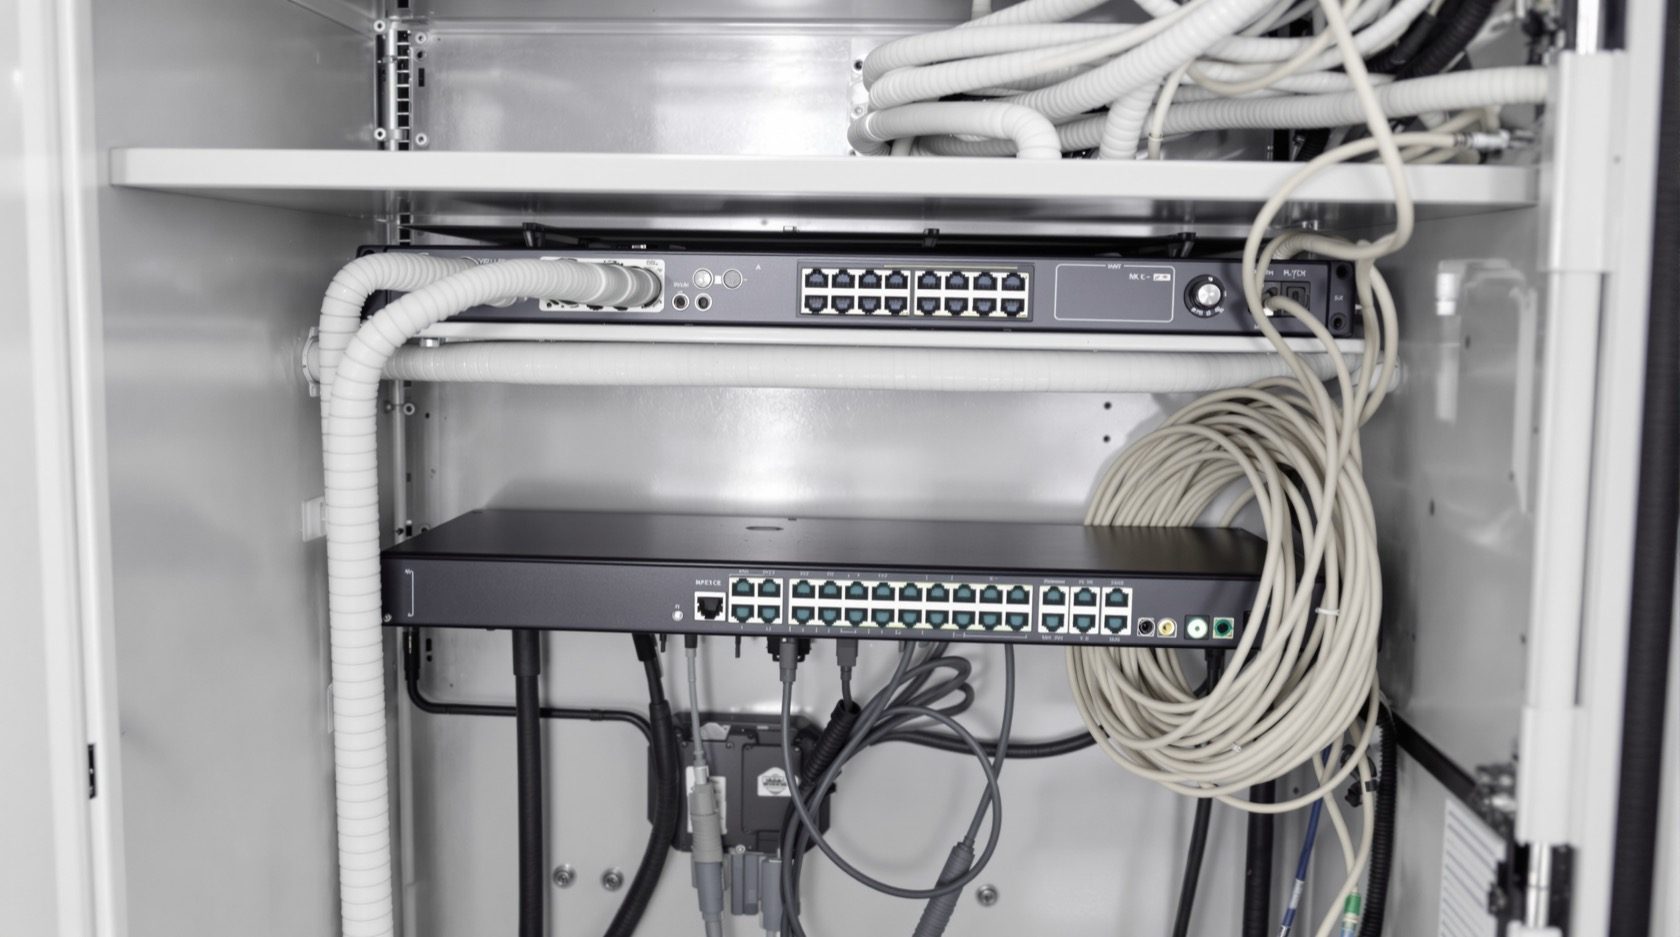
Security Future Expansion Planning for Growing Indian Homes
Design a security system that grows without a rip-and-replace: build in spare cable drops, ports, channels, storage and power headroom on day one, choose modular open-standard kit, phase the build-out, and document it so any future installer can extend it.
Most home security systems are built for the day they are installed and no other. Two years later the family adds a car and wants the driveway covered, or builds a floor, or puts up a second gate — and discovers the recorder is full, the switch is out of ports, and there is no cable to the new corner. What should have been a plug-in becomes a rip-and-replace: walls chased again, a bigger recorder bought, the old one thrown away. The waste is not the hardware; it is the failure to plan for growth that was entirely predictable.
Future-expansion planning is the discipline of designing today's system as stage one of a bigger plan you have already sketched. It costs very little at the outset — a few spare cable runs, a slightly larger switch, an empty disk bay — and it saves a great deal later. This guide shows you how to build headroom into every part of the system, choose kit that will not trap you, phase the build-out sensibly, and document the design so whoever extends it next can pick up exactly where you left off. It builds on the home security risk assessment that told you what to protect, and sits alongside the security budget planning guide that decides what to spend.
Scope & safety. This is a defensive planning guide. It helps you specify a system that can grow — never how to defeat one. Mains-electrical work (new circuits, the UPS supply, electric locks) and any structural change is qualified work: specify it, then have a licensed electrician or installer fit and certify it. Nothing you add for growth may ever obstruct a fire-escape route or block egress.
Why headroom is the cheapest thing you will ever buy
The single idea behind future-proofing is spare capacity. Every countable thing in a security system — cable drops, switch ports, recorder channels, disk bays, backup-power watts, physical space on the board — has a quantity today and a maximum it can hold. If you fill it to the brim on day one, the next addition forces you to replace the whole item. If you leave 30 to 50 percent free, the next addition is a plug-in.
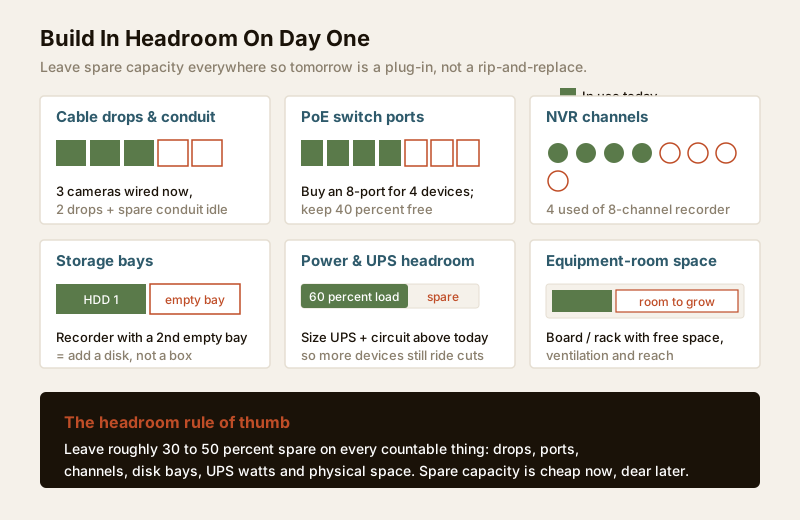
The economics are lopsided. A spare cable run pulled while the electrician is already on site and the wall is open costs a few hundred rupees of extra cable. The same run added later — after the wall is plastered and painted — means chasing, conduit, patching and repainting, often ten times the cost and a weekend of dust. An 8-port PoE switch instead of a 4-port might cost a little more today; a second switch bought later costs more than that and eats another power point. This is the whole game: buy the next size up, leave the spare, and let the future be a configuration change rather than a construction project.
The future-proofing provisions table
Here is where to leave headroom, how much, and why. Treat it as a checklist when you specify the system with your installer.
| System element | Spare capacity to leave | Why it matters later |
|---|---|---|
| Cable drops | 1 spare drop to each façade / likely-camera corner | A new camera becomes a plug-in, not a wall-chasing job |
| Conduit / raceway | Run empty conduit to the gate, roof and any planned extension | Pull new cable through later with no civil work |
| PoE switch ports | Buy the next size up; keep ~40 percent free | Add cameras, a doorbell or an access panel without a new switch |
| NVR / recorder channels | 8-channel for 4 cameras; 16 for 8 | Add cameras by licence/config, not by replacing the recorder |
| Storage | A recorder with a second (empty) disk bay | Add a disk for more retention days, not a whole new box |
| Backup power (UPS) | Size 40 to 50 percent above today's load | New devices still ride through power cuts |
| Mains circuit | A dedicated circuit with spare capacity | Add powered devices without overloading; keep it clean |
| Network / IP range | Reserve an address block and a spare router LAN port | Room for more cameras, a hub, a second recorder |
| Equipment-room space | Free board / rack space, ventilation, reach | Mount new gear where it belongs, not on a random shelf |
Two of these deserve extra care. Cabling is the one thing that is genuinely painful to add after the fact, so over-provision it hardest — see the security cabling requirements guide and plan the runs with the cabling and PoE planner. And power is what most people forget: read the security power supply requirements guide and size the UPS for the system you will have in three years, not the one you have today.
Choose kit that will not trap you: open standards over lock-in
Headroom is wasted if the hardware itself boxes you in. The second pillar of future-proofing is choosing modular, standards-based, interoperable equipment so that when you expand, you can buy the best or cheapest device available then — not whatever one vendor still sells.
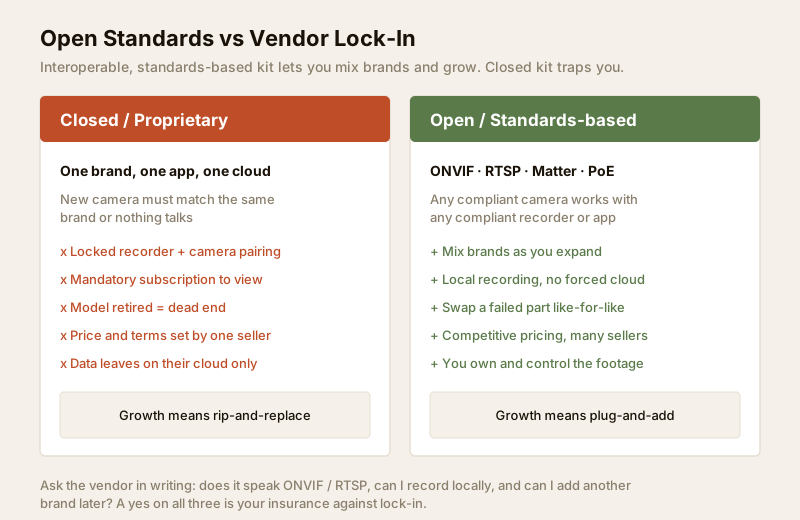
The trap is a system where the camera only works with that brand's recorder, the recorder only shows footage through that brand's app, and the app only works with a paid subscription. Each of those is a rope tying you to one seller's prices, roadmap and survival. When a proprietary model is discontinued, your expansion path dies with it.
The escape is to insist on a few open standards, in writing, before you buy:
- ONVIF — the interoperability standard for IP cameras and recorders. An ONVIF-compliant camera will work with an ONVIF-compliant recorder from a different brand. This alone protects most of your investment.
- RTSP — the streaming protocol that lets you pull a camera feed into recorders and software of your choice, including open local recording, rather than being forced through one cloud.
- PoE — power-over-Ethernet, so one standard cable carries both data and power; any PoE device works with any PoE switch.
- Matter — the cross-vendor standard worth asking about for the smart-home side (locks, sensors, hubs). Where a device supports it, you keep the freedom to change ecosystems later. See the smart security systems guide and the home-automation integration guide for how this ties together.
Prefer local recording you own over cloud-only footage: it keeps your data on your premises (a good habit under India's DPDP Act 2023 and simpler for a household to reason about), avoids a monthly fee that rises with every camera, and means expansion is not gated by a subscription tier. Plan the storage growth path deliberately with the security data storage planning guide.
Phase the build-out: today's system is stage one
You do not have to build everything at once, and for most Indian households you should not. The right approach is a phased build-out: draw the full design, then install it in stages your budget can absorb, with each stage plugging cleanly into the last because the headroom was reserved up front.
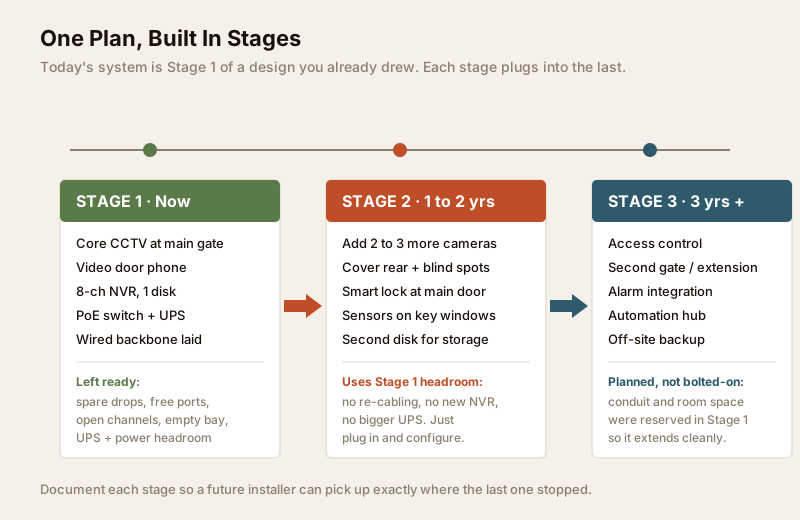
A sensible three-stage plan for a typical growing home:
- Stage 1 — the backbone and core (now). Install the parts that are hardest to add later and that everything else hangs off: the wired cable backbone with spare drops, the switch, the recorder, the UPS, and the highest-priority cameras (gate and main door) plus a video door phone. Lay conduit to every place you might later put a device. This stage is deliberately over-provisioned.
- Stage 2 — fill the gaps (one to two years). Add the next cameras for the rear, side passage and any blind spots your risk assessment flagged, a smart lock, and sensors on key windows. Because Stage 1 left spare drops, ports, channels and power, this stage is plug-and-configure with no civil work.
- Stage 3 — bigger additions (three years and beyond). Access control, a second gate, alarm integration, an automation hub, off-site backup, or coverage for an extension or new floor. These were anticipated in Stage 1's conduit and room space, so they extend the system rather than replacing it.
If you are building or renovating now, fold the whole roadmap into the construction drawings — retrofitting conduit into a finished house is exactly the pain this planning avoids. The security planning guide for new homes covers how to brief your architect, and the equipment-room planning guide makes sure the hub has room to grow.
Anticipate the likely additions
Good headroom is targeted headroom. You cannot provision for everything, but the additions Indian homes actually make are predictable, so provision for those:
- More cameras — almost universal. Households start with two or three and drift to six or eight as they notice blind spots. Provision drops, ports and channels for roughly double your Stage 1 camera count.
- Access control — a keypad, RFID or smart lock at the main gate or door, especially as domestic help, drivers and delivery riders become routine. Leave a cable drop and power at the gate and main door.
- A second gate or entrance — common when a family formalises a service entrance or adds parking. Run conduit to it now even if it is a bare wall today.
- An extension or extra floor — very common in Indian homes as families grow. Reserve conduit up to the roof/terrace and a spare address block so a new floor is wired, not chased.
- Automation and alarms — a hub, sensors, sirens and integration with lighting. This lands on the network and the equipment room, so keep both with spare capacity. Coordinate it via the network-readiness assessment.
- Off-site or redundant storage — as footage becomes valuable, households add a backup copy or a second recorder. Keep a spare LAN port and shelf for it.
Match the depth of these provisions to your assessed risk and budget — the security system cost estimator helps you sequence the spend across stages without over-buying today.
Document the design so it can actually be extended
A future-proof system that lives only in the original installer's head is not future-proof — the next technician will guess, mis-wire, or start over. Documentation is the deliverable that makes expansion possible. Ask your installer to hand over, and keep with the equipment:
- A cabling schedule — every drop numbered, where it runs from and to, which are spare, and where the empty conduit leads.
- A device and network list — each camera and device, its IP address, the reserved address range, switch port map, and login/credential custody (kept securely, not taped to the wall).
- The full-design drawing — the staged roadmap itself, so the next person sees Stage 2 and 3 were always the plan and where they attach.
- Model and standard notes — that cameras are ONVIF/RTSP, the switch is PoE, spare capacity figures, and warranty details.
The security vendor and installer evaluation guide explains how to make this documentation a contractual deliverable, so you are not left dependent on one firm to extend your own system.
Expansion-readiness checklist
Run this before you sign off Stage 1. If most rows are green, your system can grow without a rip-and-replace.
| Readiness check | Ready when... | Not ready if... |
|---|---|---|
| Cabling | Spare drop to each façade; empty conduit to gate, roof, extension | Only exactly the runs used today were pulled |
| Switch ports | ~40 percent of ports free | Switch is fully populated |
| Recorder channels | Channels free for double today's cameras | Recorder is at maximum channels |
| Storage | A second disk bay sits empty and ready | Single sealed drive, no bay to add to |
| Backup power | UPS sized 40 to 50 percent above current load | UPS runs near its limit today |
| Standards | Cameras ONVIF/RTSP; devices Matter where relevant | Proprietary, single-brand, cloud-locked kit |
| Recording ownership | Footage recorded and owned locally | Cloud-only, subscription-gated viewing |
| Network | Address block and a spare LAN port reserved | No headroom; router fully used |
| Room | Free board / rack space, ventilation, access | Hub crammed with no room to mount more |
| Documentation | Cabling schedule, device list and roadmap handed over | Design lives only in the installer's head |
When to bring in a professional
Do the planning yourself — the roadmap, the headroom targets, the standards checklist are all homeowner decisions. But hand the physical work to qualified people: a licensed electrician for the UPS supply, any new mains circuit and electric-lock wiring; a competent installer for cable pulls inside walls, the recorder and network configuration, and any structural work for a new gate or grille. Insist that they deliver the documentation above. For larger properties, a housing society, or a phased build across a compound, a one-off professional design review at Stage 1 pays for itself many times over — a mistake in the backbone is the expensive one to unwind. Architects can build the whole roadmap into the drawings using the new-homes security planning guide.
Key takeaways
- Headroom is the cheapest thing you will ever buy. Leave roughly 30 to 50 percent spare on every countable thing — drops, ports, channels, disk bays, UPS watts and room space — so the next addition is a plug-in, not a rebuild.
- Over-provision cabling and power hardest, because those are the genuinely painful things to add after walls are finished.
- Choose open, modular, standards-based kit — ONVIF, RTSP, PoE, and Matter where relevant — and prefer local recording you own, to escape vendor lock-in and subscription gates.
- Phase the build-out so today's core system is deliberately stage one of a full design you have already drawn, with later stages plugging into reserved capacity.
- Anticipate the predictable additions — more cameras, access control, a second gate, an extension — and provision conduit and space specifically for them.
- Document the design — cabling schedule, device list and staged roadmap — so any future installer can extend it, and route mains, structural and electric-lock work to licensed professionals.
Plan your headroom against your assessed needs with the security risk assessment guide and the cabling and PoE planner, then browse the full security guides collection to detail each stage.
This is an educational planning guide. It is strictly defensive and does not describe how to defeat any security measure. Mains-electrical, electric-lock and structural work is qualified professional work — engage licensed installers, keep all security hardware clear of fire-escape and egress routes, and verify any applicable National Building Code or municipal bye-law requirement for your project.
Export this guide
Related Guides — Deep-dive reading
Security Planning for New Homes in India: Build It In From Scratch
The cheapest, cleanest security you will ever buy is the security you design into a house while it is still being built. A build-stage playbook for Indian homes — CPTED site planning, structural and cabling provisions, and a checklist keyed to construction milestones.
SecurityElectrical Safety for Security Systems in India (2026): Powering It Without Peril
A homeowner's guide to the power side of home and RWA security systems, CCTV, alarms, gates, access control and NVRs, done so it protects you instead of quietly becoming a shock or fire hazard. What makes a supply safe, what to insist on, and why the mains work belongs to a licensed electrician.
SecurityLocal versus Cloud Security for Security Systems in India (2026): Where Should Your Footage Live?
The most important cyber choice you make about a camera or alarm is where its footage and control actually live: on-site in your hands, in a vendor's cloud, or both. This even-handed guide weighs privacy, resilience in India's outages, convenience and cost, and shows why a hybrid design is often the safest home answer.
SecurityRelated Tools — Try Free
CCTV Cloud vs Local Cost Calculator
Compare cloud CCTV subscription against a local NVR + HDD — upfront, 5-year total, monthly fee and break-even.
Cloud vs LocalCCTV Camera Coverage & Count Calculator
Estimate how many CCTV cameras you need, the NVR channels, storage in TB for your retention period, and an indicative all-in cost with GST.
CCTV CalculatorSecurity System Cost Estimator
Estimate the all-in capex with GST, annual running cost and 5-year total cost of ownership of a home or building security system.
Cost Estimator