
Security Planning for New Homes in India: Build It In From Scratch
The cheapest, cleanest security you will ever buy is the security you design into a house while it is still being built. A build-stage playbook for Indian homes — CPTED site planning, structural and cabling provisions, and a checklist keyed to construction milestones.
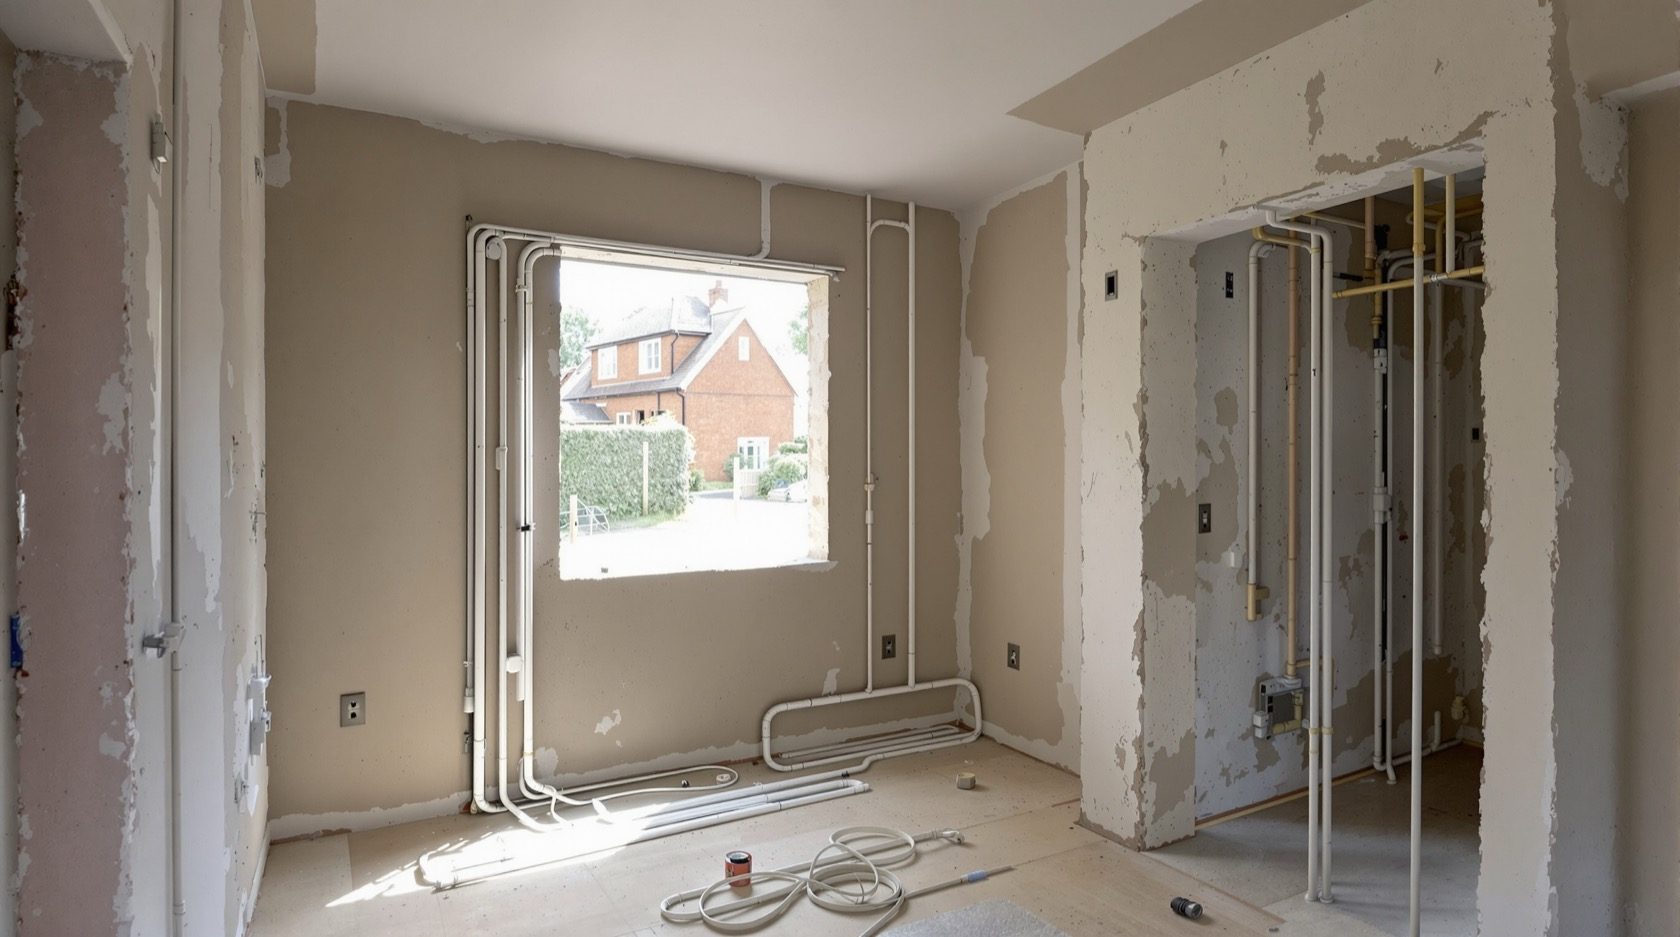
Most people bolt security onto a finished house. They drill through fresh plaster to chase a camera cable, surface-mount ugly trunking along a painted wall, and pay a premium for wireless gadgets because pulling a wire is now a demolition job. It works, but it is the expensive, disruptive, second-best way to do it.
There is a far better moment, and it comes only once: while the house is still being built. At that stage a conduit is a length of pipe worth a few rupees, a camera back-box is set flush before the plaster goes on, and a Cat6 run to the eaves is an afternoon's work for the electrician who is already on site. Design security in at the build stage and you spend almost nothing, hide everything, and leave yourself free to add or upgrade devices for the next twenty years without lifting a chisel.
This is the build-stage guide in the Security Knowledge Hub. Its companion, the ultimate home security guide, covers the whole subject; this one is specifically about the decisions you make with a plot, a plan and a contractor — before the house exists. It will help you plan, decide and coordinate. It will not turn you into an electrician or a structural engineer: the actual cabling, mains work, grille fixing and any structural element are qualified trades you specify and supervise, never DIY.
Scope & safety. This guide helps you plan and coordinate provisions. Mains electrical work, structural elements (grille anchoring, gates, safe rooms, reinforced stores) and life-safety systems (fire detection, electric locks) are licensed professional work. Specify what you want, hand the execution to qualified trades, and supervise — do not attempt it yourself.
Why build-stage is the right moment
The logic is simple: provisions are cheap and invisible now; retrofits are costly and disruptive later.
- Conduit and cable cost almost nothing during construction. The pipes get buried in walls and slabs that are being built anyway. Adding them later means breaking finished surfaces.
- You get clean, concealed runs. No surface trunking, no exposed cable, no compromise on how the house looks.
- You future-proof for free. A few spare empty conduits with draw-wires mean you can add a camera, a sensor or a new panel years later by simply pulling a cable — no civil work.
- You coordinate trades once. The architect, electrician and (if used) a security consultant plan together, so the provisions land in the right place the first time.
A useful rule of thumb: the earlier a provision has to go in, the more it costs to add afterwards. A sleeve through an RCC beam is trivial to cast in and near-impossible to retrofit. A surface camera is the reverse. Plan from the hardest-to-retrofit backwards.
Start with the site: CPTED basics
Long before any cable, security begins with how the plot and the building are arranged. The discipline that studies this is CPTED — Crime Prevention Through Environmental Design — and its principles cost nothing because they are just good planning decisions made with security in mind.
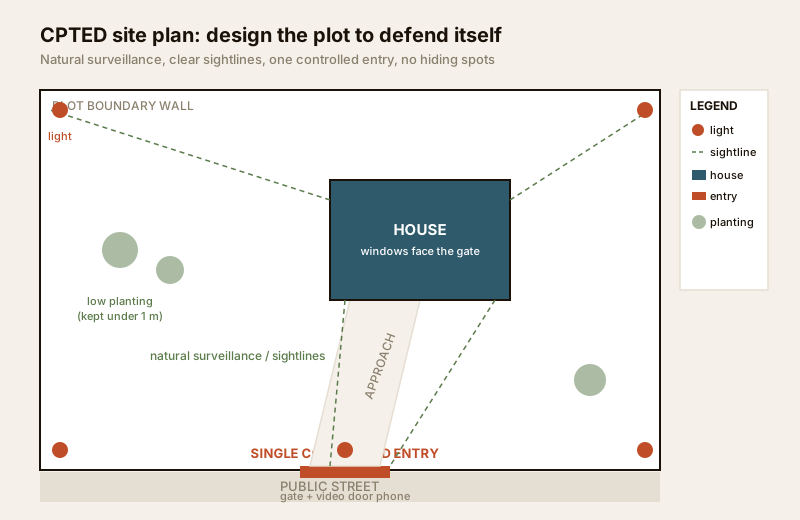
The four ideas that matter for an Indian home:
1. Natural surveillance. Arrange windows, balconies and the main living spaces so people inside can see the gate, the approach and the boundary. A house that overlooks its own entry is watched for free, all day.
2. Clear sightlines. Keep the approach open. Avoid deep recesses, blind corners beside the gate, and tall solid structures near entry points where someone could wait unseen.
3. A single controlled entry. One well-defined, well-lit gate that everyone uses — rather than several casual ways in — concentrates your attention, your cameras and your video door phone on one point.
4. Landscape that does not hide people. Design planting so mature shrubs near the boundary and entry stay low (roughly knee-to-waist height); keep tree canopies high and clear of walls. Beautiful gardens and good sightlines are not in conflict — they just need planning.
Lighting belongs here too. Plan for even perimeter and entry lighting at the design stage so the wiring and fixtures are part of the electrical layout, not an afterthought. Well-lit, overlooked, hard-to-hide-in — that is most of residential deterrence, and it is decided on paper. Do a proper security risk assessment of the site first; it tells you where to concentrate everything that follows.
Structural provisions during construction
With the layout set, the build-stage job is to install the empty provisions that finished devices will later plug into. Think of it as laying the nervous system of the house before you decide which organs to attach.
The core provisions for a typical Indian home:
- Camera back-boxes and conduits at the eaves. Set flush-mounted back-boxes at the roofline corners and over the main entry, each fed by a conduit down to a central cabinet. Add a weatherproof power point at each eave for cameras or floodlights.
- A small security cabinet. A ventilated, lockable recess (often near the electrical or data point) that houses the NVR/DVR, the PoE switch and a small UPS. Every camera and sensor conduit routes back here.
- Network / PoE runs. Cat6 cable in conduit from the cabinet to each camera and to the router/ONT position, so cameras draw power and data over one cable (Power over Ethernet).
- Provisions for gate automation and video door phone. A power feed and a control conduit to the gate for a future automatic opener, and a cable run to the door for a video door phone and the indoor monitor.
- Sensor drops. Back-boxes and conduit for door/window contacts, motion sensors (ceiling or corner) and, if wanted, glass-break sensors — feeding the alarm panel position.
- Window grille anchoring. Cast-in or grouted fixing points so grilles bolt into structure, not just plaster. (The grilles themselves are structural — a fabricator's job, specified for safety.)
- A strong main-door frame. A hardwood or steel frame with proper grouted hold-fasts, sized for a solid door and a good multi-point lock, decided before the opening is finished.
- Optional safe room / reinforced store. If wanted, a small room or store with a reinforced RCC shell, a solid-core door and its own communications, planned into the structure — it cannot be added meaningfully later.
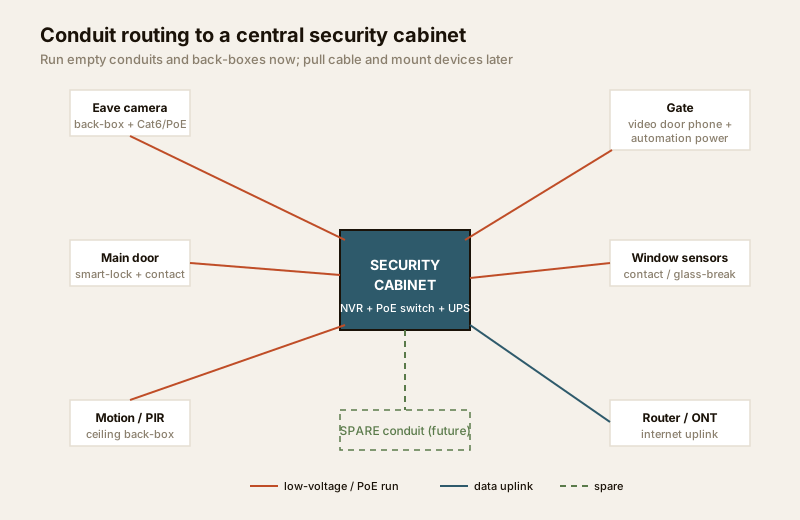
None of this commits you to a brand or even a device today. It commits you to the pipe and the point — the two things that are painful to add later.
What to run where — the cabling table
The single most useful thing to hand your electrician is a clear map of which cable and provision goes to which point. This is a generic starting spec for a small-to-mid Indian home; your consultant or electrician adapts the quantities.
| Point | Provision | Cable / feed | Notes |
|---|---|---|---|
| Eave cameras (4–6) | Flush back-box + conduit + power point | Cat6 (PoE) to cabinet | One per corner + over entry; weatherproof point |
| Gate | Control conduit + power feed | Cat6 + 3-core power | For future automation + intercom |
| Main door | Door-phone conduit + lock provision | Cat6 / door-phone cable | Video door phone + smart-lock wiring |
| Windows (ground floor) | Sensor back-box + conduit | Alarm cable to panel | Contact / glass-break sensors |
| Living / hall | Motion-sensor back-box | Alarm cable to panel | Ceiling or corner mount |
| Security cabinet | Ventilated lockable recess | Mains + UPS circuit + data | Houses NVR, PoE switch, UPS |
| Router / ONT | Data conduit to cabinet | Cat6 uplink | Internet backbone for remote viewing |
| Spare (x2–3) | Empty conduit + draw-wire | none yet | Future cameras / sensors / upgrades |
The spare conduits are the cheapest insurance in the whole table. Pull two or three empty runs with a draw-wire from the cabinet to likely future points — a rear boundary, a top floor, a car porch — and next decade's upgrade is a cable pull, not a renovation.
A checklist keyed to build milestones
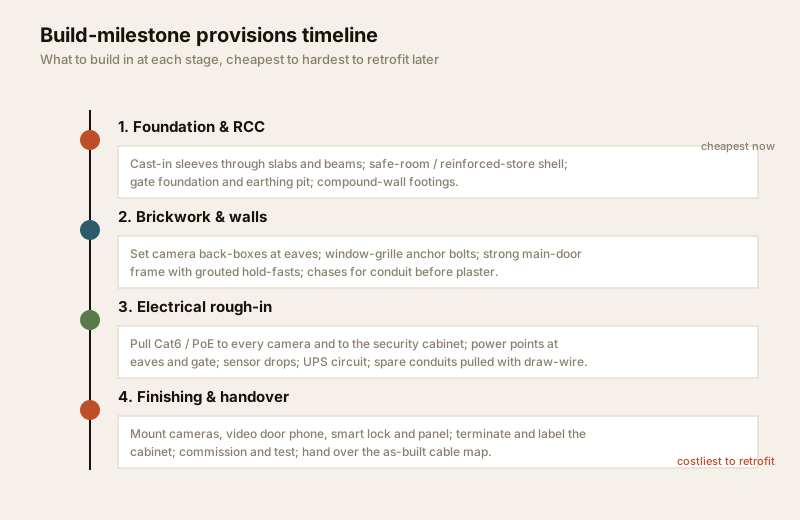
Provisions have to go in at the right stage, because each construction milestone closes a window. Miss the electrical rough-in and your clean concealed run becomes surface trunking. Use this as a coordination checklist with your architect and contractor.
| Milestone | Provisions to lock in | Why now |
|---|---|---|
| Foundation & RCC | Cast-in sleeves through slabs/beams; safe-room / reinforced-store shell; gate foundation; earthing pit; compound-wall footings | These are structural — effectively impossible to add later |
| Brickwork & walls | Camera back-boxes at eaves; grille anchor points; strong door frames with hold-fasts; conduit chases before plaster | Set into masonry before it is closed and finished |
| Electrical rough-in | Pull Cat6/PoE to cameras and cabinet; power points at eaves and gate; sensor drops; UPS circuit; spare conduits with draw-wire | The only clean-concealment window for cabling |
| Finishing & handover | Mount cameras, video door phone, smart lock, panel; terminate and label the cabinet; commission and test; get the as-built cable map | Devices go on last; insist on a labelled cable map |
The final line matters more than it looks: insist on a labelled as-built cable map at handover. An un-labelled cabinet full of identical black cables will cost you every time you add or fix a device. A ten-minute labelling job now saves hours forever.
Coordinating the trades
Build-stage security only works if the right people talk to each other before work starts.
- The architect places the CPTED decisions — sightlines, single entry, lighting, the safe room — and marks device positions and the security cabinet on the drawings.
- The electrician runs the conduits, cables and power points during rough-in, to that marked-up drawing.
- A security consultant (worth it for larger homes, villas or higher-risk sites) sizes the camera coverage, specifies the panel and cabinet, and writes the cable schedule the electrician follows.
- The RWA or builder matters in flats and gated communities — society bye-laws may govern gate hardware, common-area cameras and what you can fix to shared structure. Check before you plan, not after.
Get these four aligned around one marked-up drawing and the whole system lands correctly the first time. For a professional-side view of the same coordination, see the security design guide for architects.
Future-proofing: plan for the house you will have, not the one you have now
The devices you buy today will be obsolete in a decade; the pipes and points you lay will still be perfect. So over-provide on the cheap, permanent parts:
- Spare empty conduits from the cabinet to likely future zones, each with a draw-wire.
- Extra power points at eaves, gate and cabinet — you always want one more than you planned.
- A slightly oversized cabinet with spare ports on the switch and room to grow.
- A conduit to any future gate, outbuilding or top floor even if unbuilt today.
This is the same philosophy as designing a smart home or a well-planned electrical layout from scratch: the wiring infrastructure is the long-lived asset, and it is almost free to be generous with it at the build stage.
When to bring in a professional
Planning and coordinating is yours. Execution is not. Hand these to licensed trades and specify + supervise rather than DIY:
- All mains electrical work, power points and the UPS/cabinet circuit — a licensed electrician.
- Structural provisions — grille anchoring, gate structure, a safe room or reinforced store — an engineer and fabricator, because these carry loads and protect people.
- Fire detection, alarm and any electric-lock / access-control wiring — life-safety-critical systems for a qualified installer, per the National Building Code fire and life-safety provisions and local municipal bye-laws.
- Network and camera cabling — a low-voltage/AV specialist or your electrician, terminated and tested properly.
Your job is to know what you want, mark it on the drawings, and check it went in correctly. Run the numbers on where to concentrate effort with the home security risk scorecard, and if the house already exists, switch to the upgrade guide for existing homes instead.
Key takeaways
- Build-stage is the cheapest, cleanest time to secure a home — conduits, cabling and back-boxes cost almost nothing now and are disruptive to add later.
- Security starts with the site, not the gadgets: CPTED gives you natural surveillance, clear sightlines, a single controlled entry and hiding-spot-free landscaping for free.
- Lay the empty nervous system — camera back-boxes and power at the eaves, PoE runs to a central security cabinet, and provisions for gate automation, a video door phone and sensors — then add devices whenever you like.
- Key each provision to a build milestone (foundation/RCC, brickwork, electrical rough-in, finishing) so no window closes on you, and insist on a labelled as-built cable map at handover.
- Coordinate architect, electrician and (if needed) a security consultant around one marked-up drawing, over-provide on spare conduits and power points, and route all life-safety and structural work to licensed professionals.
References
- National Building Code of India (SP 7), Bureau of Indian Standards — Part 4 (Fire & Life Safety) and Part 8 (Building Services); verify the current edition via the BIS catalogue: https://www.services.bis.gov.in/
- Crime Prevention Through Environmental Design (CPTED) — general design principles for natural surveillance, access control and territoriality.
- Local municipal building bye-laws and Resident Welfare Association / housing-society regulations govern gate hardware, boundary walls, common-area cameras and shared-structure fixings — check yours before planning.
This is an educational planning overview. Mains electrical work, structural elements, and fire, alarm and access-control systems are qualified professional work — engage licensed trades and, where useful, a security consultant, and verify any standard's current status via the BIS catalogue before relying on it.
Export this guide
Related Guides — Deep-dive reading
Smart Home Planning Guide India: New Build & Existing Homes
The decisions that make or break a smart home are taken at the plan stage — before a wall goes up or a switch box is chased. Here is how to plan conduits, neutrals, network backbone and device points for an Indian home that stays smart for a decade.
Smart HomeSecurity Design Guide for Architects (India)
How to design real security into an Indian home or mixed-use project without a fortress aesthetic — CPTED principles, invisible layered defence, and the drawing-and-BOQ provisions that turn intent into a built, coordinated system.
SecurityPoE vs Wi-Fi CCTV: Which Home Security Cameras Are Better?
One camera type runs power and video down a single Cat6 cable to an NVR and almost never drops out; the other clips to a wall in minutes and streams over your home Wi-Fi. This guide settles PoE vs Wi-Fi CCTV for Indian homes — reliability, video quality and bandwidth, cabling and power, retrofit versus new-build effort, NVR versus SD and cloud storage, hacking risk, real rupee costs, scalability and outdoor use — and gives a clear verdict for each kind of home.
Smart HomeRelated Tools — Try Free
Home Security Risk Scorecard
Score your home across six security layers — perimeter, entry points, lighting, detection, alarm and habits — and get a prioritised action plan.
Security ScorecardSecurity Cabling & PoE Planner
Estimate cable length, drops, PoE power budget, the right switch, conduit and cost for a CCTV/security cabling plan.
Cabling PlannerApartment Video Door System Planner
Enter flats, entrances, floors and guard desk for a first-pass building intercom plan — door stations, indoor monitors, guard station, the right architecture and an indicative cost band.
Building Planner