
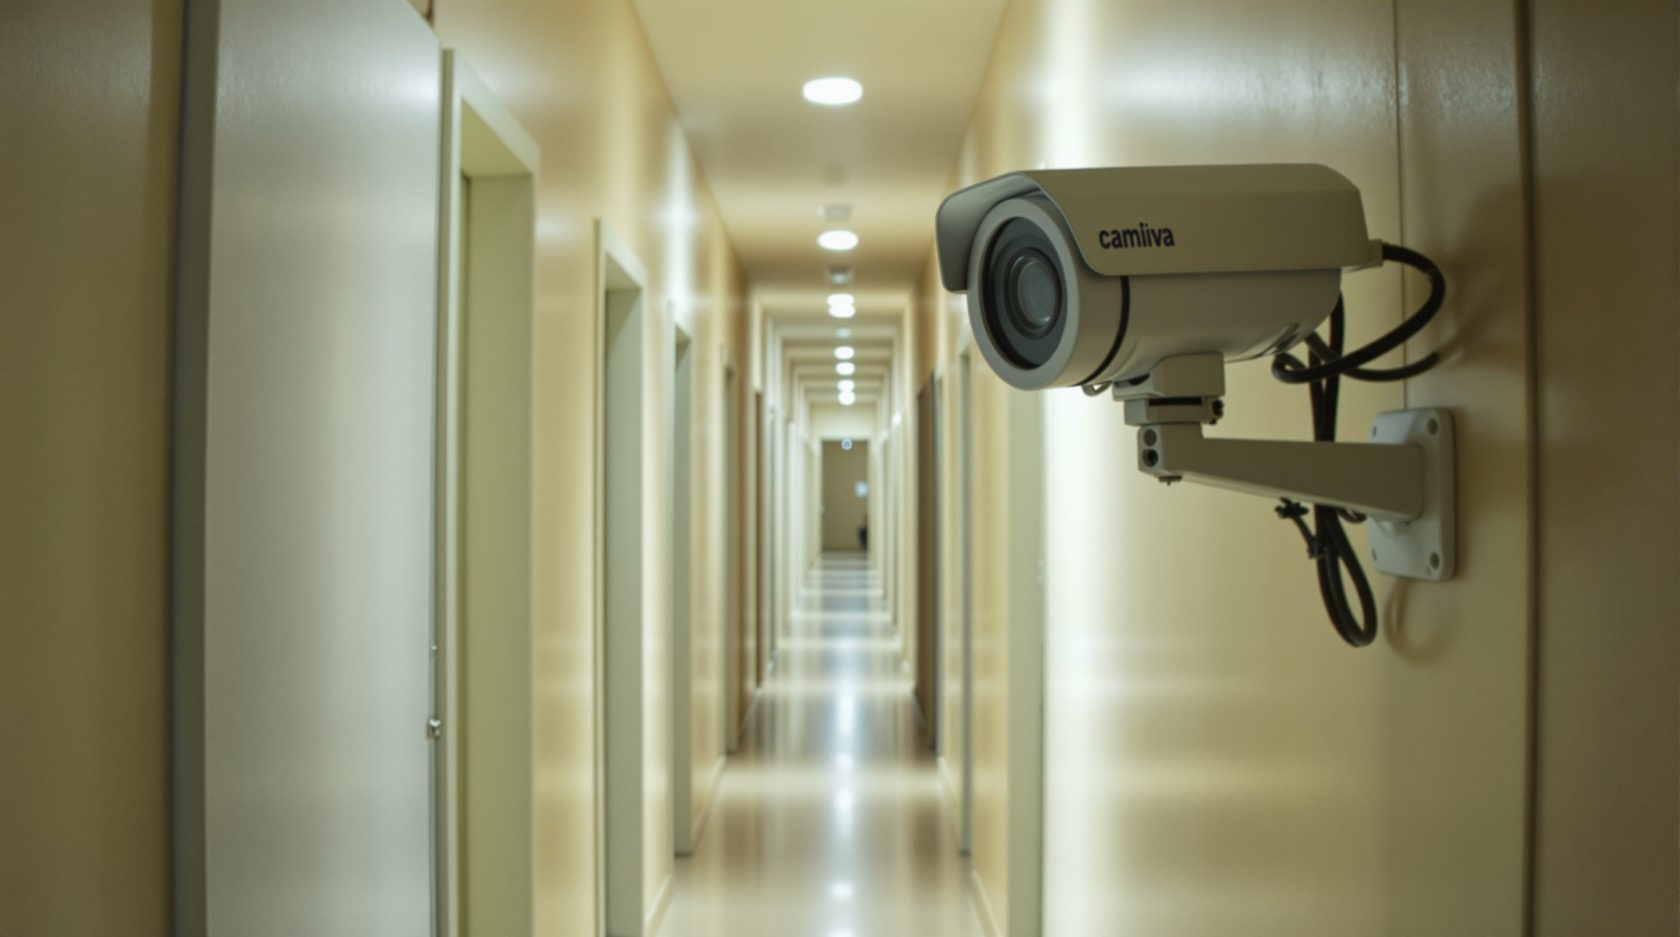
CCTV Placement for Corridors and Passages in India (2026): See the Length, Not the Wall
Mount one camera at the end of the corridor facing down its length, add a second at the far end for two-way coverage, catch doors as they open into frame, and never let hardware block a fire-escape passage.
A corridor is the odd one out among the zones you will cover. A gate, a lobby or a driveway is a roughly square space you watch from a corner. A corridor is long and thin — sometimes 15 or 20 metres of narrow passage lined with flat doors — and that shape changes everything about where the camera goes. Get it right and a single camera owns the whole run; get it wrong and you have a camera watching a one-metre slice of wall while people flit past unseen.
This is the zone guide for internal corridors and passages in Studio Matrx's CCTV hub. It applies the general rules from the camera placement principles guide to this one specific shape. For the connected spaces a corridor leads to, see the sibling guides on the lift lobby and the staircase — together they cover the common circulation of an apartment block.
Scope & safety. This guide helps you plan positions and brief an installer. Mounting at height, running cabling and any mains-electrical work belong to licensed professionals. A corridor is very often a designated fire-escape route — a camera, its bracket, cabling or junction box must NEVER project into or obstruct the clear escape width, and must never sit over a fire door or extinguisher. In a shared society corridor, get RWA consent, respect residents' privacy under the spirit of the DPDP Act, 2023, and never aim into any flat's open doorway. This is not legal advice.
The one rule that matters: look down the length
The single most important decision in a corridor is which way the camera faces. There is a right answer and it is almost always the same:
Mount the camera high in a corner at the end of the corridor, and aim it straight down the length of the passage.
Never mount it on a side wall pointing across the corridor. A cross-corridor camera sees a slice barely a metre deep; anyone walking through crosses that slice in a single frame and is gone, usually as a blurred side profile you could never identify. A camera looking down the length sees every person walking toward or away from it for the full run of the corridor — you get seconds of footage per person and a clean, head-on view of faces.
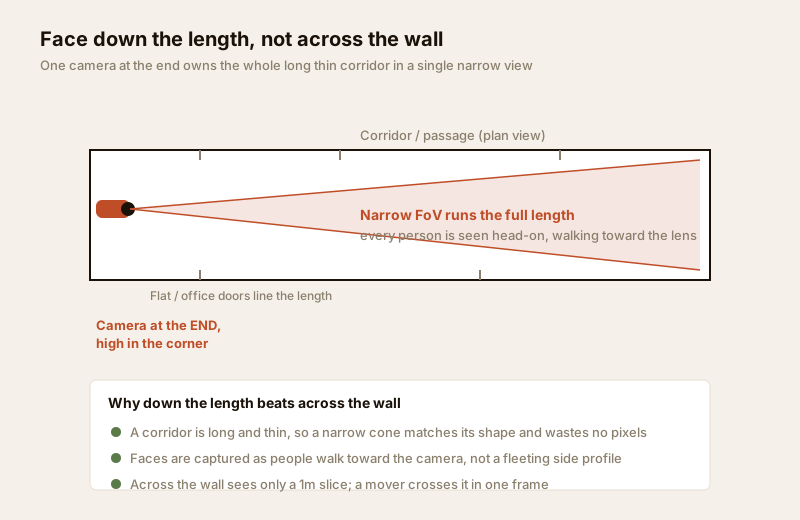
Because the space is narrow, you also want a narrow field of view to match it. A wide-angle lens spreads its pixels across walls and ceiling and leaves the far end of the corridor a smear. Many cameras offer a corridor mode (also called corridor format or 9:16) that rotates the sensor to a tall, narrow portrait frame — a perfect fit for a passage, capturing the length while ignoring the walls on either side. A modest 3.6mm or a varifocal lens dialled in tighter suits most residential corridors better than a wide 2.8mm.
Two ends beat one: the blind spot behind the camera
A single end-mounted camera has one weakness: it cannot see the ground directly below and behind itself. Someone standing right under the camera, or tampering with it, is in its blind spot. For a short corridor — say under about 10 metres, with the whole run visible — that rarely matters, and one camera is enough.
For a long corridor, an L-shaped or dog-legged passage, or one where identifying who tampers with the camera matters, put a second camera at the far end facing back. The two cones cross in the middle and overlap: every point is covered from at least one direction, the blind spot vanishes, and each camera watches the other's back.
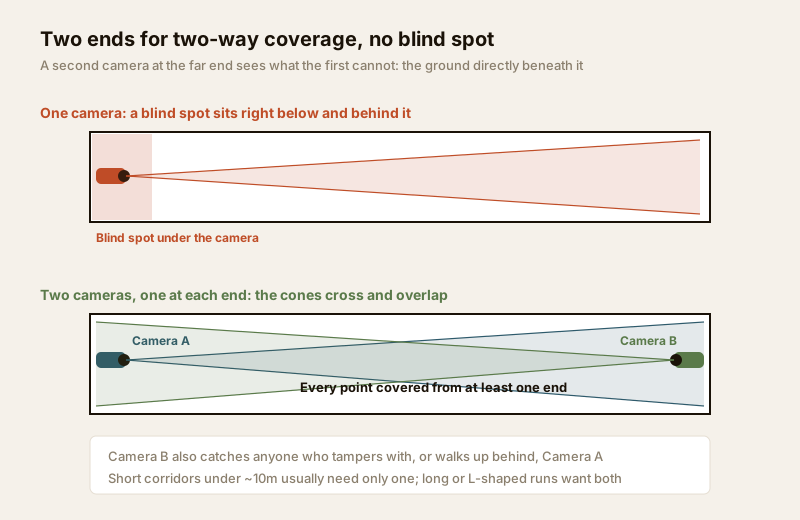
An L-shaped corridor is really two corridors meeting at a corner — treat each leg as its own run and put a camera at the outer end of each, so between them they see around the bend that neither could cover alone.
Camera choice for a corridor
Corridors are indoors, out of the rain, and usually reachable from below, so the priorities differ from an outdoor gate camera. Discretion and tamper-resistance matter more than long-range weatherproofing.
| Camera type | Fit for a corridor | Why |
|---|---|---|
| Turret / dome | Best | Low-profile, corner-friendly, no protruding barrel to grab or turn |
| Vandal dome (IK10) | Best for shared blocks | Rated against knocks and tampering in an accessible common area |
| Corridor-mode capable IP | Ideal | Tall 9:16 frame matches the passage; wastes no pixels on the walls |
| Bullet | Usually poor | The barrel is conspicuous and easy to reach and turn indoors |
| PTZ | Overkill | A corridor is a fixed line; a motorised sweep adds cost, not value |
For a shared society corridor that anyone can walk up to, weight tamper resistance: an IK-rated vandal-proof dome mounted out of easy reach is the sensible default. For the shape trade-offs in general, the camera type selector walks through it view by view.
Mounting spec — heights and angles
| Item | Typical spec | Note |
|---|---|---|
| Position | End corner, at the junction of wall and ceiling | Owns the length from a height nobody can reach |
| Mounting height | 2.4 – 3.0 m (or ceiling) | Above reach; tilt down so faces, not the ceiling, fill the frame |
| Downward tilt | About 10–15 degrees | Enough to read faces along the run without losing the far end |
| Lens / mode | 3.6mm or varifocal; corridor mode if available | Narrow to match the narrow space |
| Second camera | Far end, facing back, same height | For long / L-shaped runs — kills the blind spot |
| Lighting | Even, glare-free, end to end | Avoid a single bright bulb by the lens that blows out the near field |
Two India-specific traps to plan around. First, backlight: if the corridor ends in a bright window or an open balcony, a camera facing it fights glare all day and records silhouettes. Aim the camera away from that bright end (mount it at the window end looking inward), or choose a camera with strong wide dynamic range — and if you cannot, expect to add fill light. Second, power cuts: a corridor camera is only as reliable as the recorder it feeds, so plan a UPS for the NVR as part of the wider system, not the camera in isolation.
Doors into frame — and the fire path
Corridors exist to connect doors, and the doors are where the action is — someone entering or leaving a flat, or loitering by one. Angle the camera so that doors open into the frame, not out of it: a person stepping out of their flat should appear in view as the door swings, giving you a clean shot of who it was.
This is also where privacy discipline matters most. When a flat door opens, the camera may glimpse inside the private home — that is unavoidable to a degree, but never position or zoom a camera to deliberately watch into a flat's doorway or interior, and use privacy masking to black out a doorway that sits too prominently in frame. In a society, this is exactly the kind of thing that turns neighbours against a CCTV scheme, so raise it with the RWA up front.
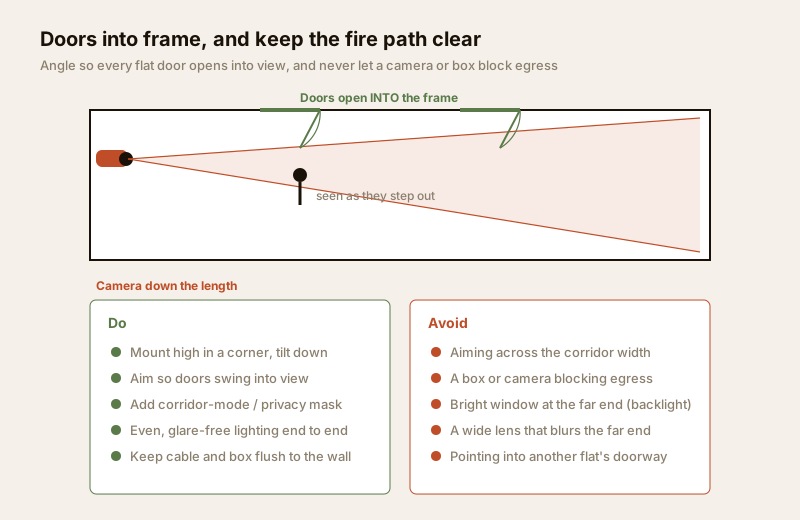
And the non-negotiable: in most apartment blocks and offices the corridor is the fire-escape route. Nothing you mount may reduce the clear escape width, obstruct a fire door, or sit where it could fall into the path. Cameras belong tight in the wall-to-ceiling corner, cabling runs flush in conduit, and any junction box sits flat against the wall — never a bracket jutting into the passage at head height. If in doubt, that is a professional's call.
Do and avoid at a glance
| Do | Avoid |
|---|---|
| Aim one camera down the full length from the end corner | Mounting on a side wall pointing across the corridor |
| Use a narrow lens or corridor mode for the thin space | A wide 2.8mm lens that blurs the far end |
| Add a second camera at the far end of long / L-shaped runs | Trusting one camera to cover a 20 m dog-legged passage |
| Angle so flat doors open into the frame | Zooming deliberately into any flat's interior |
| Keep hardware flush and clear of the escape width | A bracket, box or cable projecting into the fire path |
| Light the run evenly, end to end | A single bright bulb or window blowing out the image |
When to bring in a professional
Decide the positions, the number of cameras and the angles yourself — that is what this guide is for. Then hand the physical work to a licensed installer: mounting at height, pulling cable through the corridor and into the riser, terminations, and commissioning the recorder. Any work at the mains board is a licensed electrician's job — see the electrical hub. Crucially, in a corridor that doubles as a fire-escape route, an installer (and, for a society, the RWA and its fire-safety consultant) should confirm that nothing you add obstructs egress. In a shared block, get written RWA consent before any drilling in common walls.
Key takeaways
- A corridor is long and thin, so aim the camera down its length from the end corner, never across the width.
- Use a narrow lens or corridor mode to match the shape and hold detail to the far end.
- Add a second camera at the far end for long, L-shaped or high-value runs to kill the blind spot behind the first.
- Angle so doors open into frame, use privacy masking near doorways, and get RWA consent in shared blocks.
- The corridor is often a fire-escape route — never let a camera, bracket, box or cable obstruct the clear escape width; route the install to a licensed professional.
- Plan the whole scheme with the CCTV placement planner and cross-check gaps with the coverage-planning and blind-spots guides.
References
- Digital Personal Data Protection Act, 2023 — in a shared corridor, cover only the common circulation with a legitimate purpose, obtain RWA consent, and mask or avoid capturing the interior of any private flat.
- National Building Code of India (SP 7), Bureau of Indian Standards, and local municipal and fire bye-laws for anything touching a means of escape, corridor clear width or fire door; verify the current edition via the BIS catalogue: https://www.services.bis.gov.in/
- Ingress Protection (IP) and impact (IK) ratings — verify a camera's tamper and environmental rating on the manufacturer's specification sheet before ordering for a common area.
This is an educational overview, not legal or fire-safety advice. Mounting at height, cabling and electrical work are qualified professional tasks, and any change near a fire-escape route must be checked by a competent person — engage licensed installers and verify any standard's current status via the BIS catalogue before relying on it.
Export this guide
Related Guides — Deep-dive reading
How to Choose a CCTV Camera (2026): The Homeowner's Decision Guide for India
Cut through the spec-sheet noise and choose the right CCTV camera for each spot around an Indian home. What actually matters — sensor and low-light performance, lens and field of view, form factor, IP and IK ratings, honest smart features — and the marketing claims to ignore.
SecurityCCTV Placement Staircase Guide (India 2026): Watch the Flight Without Blocking the Escape
Where to mount a camera on the staircase so it reads faces going up and down the flight, why it must never obstruct the escape route or handrail, and how to beat the dim, backlit stairwell in an Indian home or society.
SecurityCCTV Camera Placement in India (2026): The Principles Behind Every Good Position
The universal rules that decide whether a camera earns its keep — cover the choke points first, face the flow not a blank wall, keep the sun out of frame, mount out of reach, give each camera one job, overlap so there are no gaps, and respect your neighbours.
SecurityRelated Tools — Try Free
CCTV Camera Type Selector
Answer five questions and get the right camera form factor — dome, vandal dome, bullet, turret or PTZ — with reasons.
Camera SelectorApartment Video Door System Planner
Enter flats, entrances, floors and guard desk for a first-pass building intercom plan — door stations, indoor monitors, guard station, the right architecture and an indicative cost band.
Building PlannerCCTV Blind-Spot Checker
The dead zone under a wall- or pole-mounted camera, from mounting height, downward tilt and vertical field of view.
Blind Spot