
Bathroom Wall Finishes: The Complete Guide for Indian Homes
Wet, splash and dry walls each need a different finish — the bathroom's zones, the best finish for each, why waterproofing comes first, tricks to enlarge a small bath, and three budget combinations.
The bathroom is the most demanding room in the house for a wall finish, because water is relentless and mould is patient. A finish that looks beautiful on day one but was chosen without respect for where the water actually falls will lift, stain or grow black within a year. The trick is to stop thinking of "the bathroom walls" as one thing: a shower wall, a basin surround and a dry wall by the door face completely different amounts of water, and each wants a different finish. Get the zones right — and get the hidden waterproofing right beneath them — and a bathroom stays beautiful and dry for decades.
This is the complete guide to bathroom wall finishes for Indian homes — the room-specific companion to the master wall-finishes guide. We will divide the bathroom into wall zones, match the best finish to each, explain why waterproofing comes before any finish, share tricks to make a small bathroom feel bigger, and lay out three budget combinations. (For the whole room, see bathroom design.)
The bathroom's three wall zones
Every bathroom wall falls into one of three zones by how much water it takes, and that — not looks — is the first thing to settle.

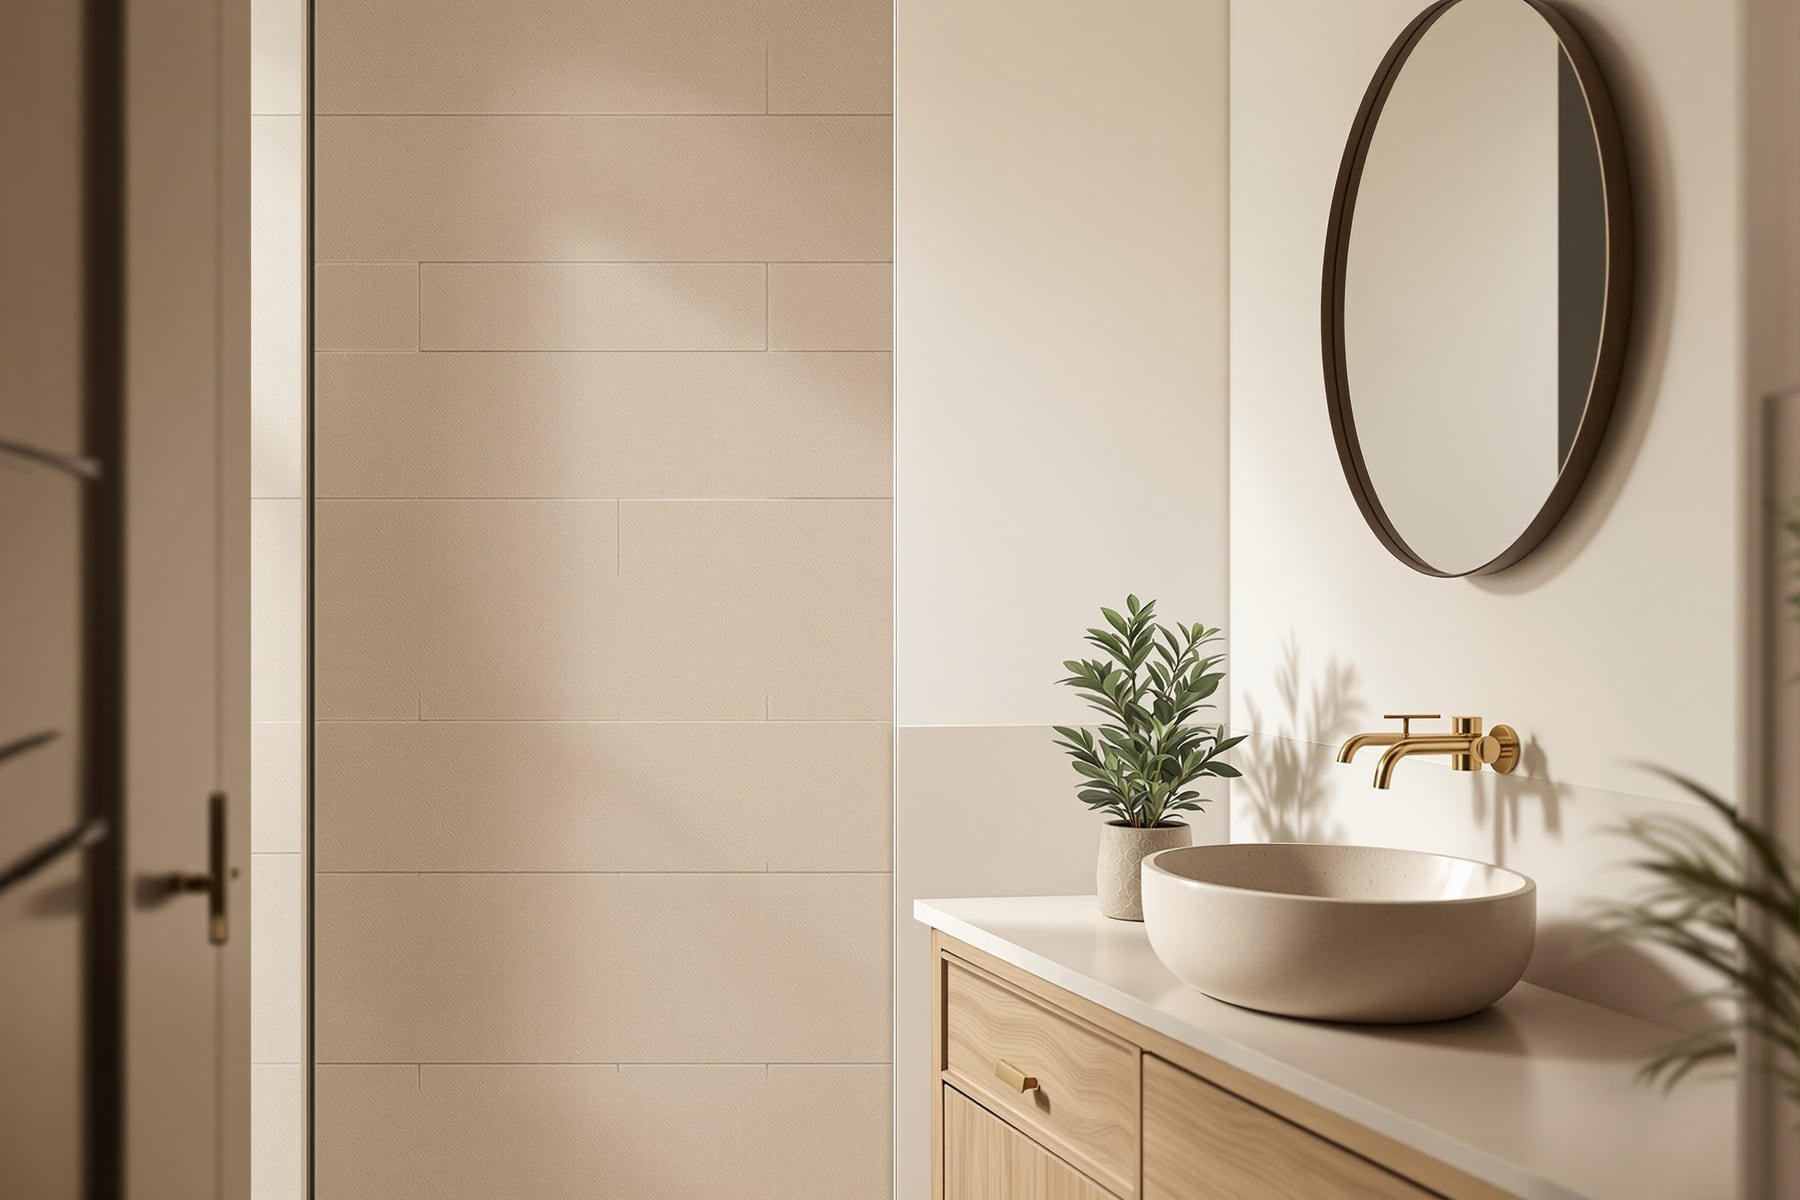
The wet zone (shower and tub) takes constant water and must be waterproof and seamless-jointed — tile, microcement, tadelakt or back-painted glass. The splash zone (basin and WC surrounds) takes frequent splashes and wiping — tile, glass or anti-fungal enamel. The dry zone (the rest of the walls) has humidity but no direct water — anti-fungal washable emulsion, microcement or veneer. Match the finish to how wet each wall gets — and behind every wet wall, waterproofing comes first.
The best finish for each zone
With the zones clear, it is easy to see which finishes survive where — and which quietly fail.

Tile, sealed microcement and tadelakt work brilliantly across all three zones — they are the wet-zone champions. Back-painted glass is excellent in wet and splash zones. Anti-fungal emulsion belongs only on dry (and, with care, splash) walls. Wallpaper is dry-zone-only, and only in a well-ventilated bathroom. Wood or WPC veneer is best kept to dry walls. In short: seamless finishes and tile own the wet zone; save paint, wallpaper and wood for well-ventilated dry walls only.
Waterproofing comes first
This is the single most important paragraph in the guide: in a bathroom, what you cannot see matters more than what you can.

Beneath any wet-wall finish sits a waterproofing membrane, and that is the layer that actually keeps water out of the wall — the finish on top is decoration. Skip or skimp on it and water rots the wall and seeps to the neighbours, whatever tile or plaster sits over it. Two companions complete the rule: anti-fungal everything (humid plus warm equals mould, so use anti-fungal paint, epoxy grout and mould-resistant sealants) and ventilation (an exhaust fan or window that clears steam is half the battle against mould). Our waterproofing guide goes deeper — but the headline is simple: waterproof and ventilate first, decorate second.
Make a small bathroom feel bigger
Most Indian bathrooms are compact, and the wall finish is the biggest lever you have on how large the room feels.

The moves that work: large-format tile or microcement (fewer grout lines read as calmer and more spacious), light colours (pale walls bounce light and expand the space), the same finish floor-to-wall (a continuous surface feels larger), a mirror wall or panel (doubles the visual space and light), vertical layouts (vertical tiles or lines raise a low ceiling), and minimal contrast with recessed niches (built-in niches instead of protruding shelves keep it clean). The summary: big, light, seamless surfaces and a mirror do the heavy lifting — busy small tiles and dark colours shrink a small bathroom.
Three budgets for bathroom walls
Bathroom walls scale smoothly across budgets — as long as one thing never gets cut.

Value: ceramic tile in the wet zone with anti-fungal emulsion on the dry walls — solid, budget and easy to repair. Mid: porcelain or large-format tile (or a feature mosaic) in the wet zone with anti-fungal emulsion or microcement on the dry walls — designed and durable. Premium: microcement or tadelakt (seamless, no grout) or full stone in the wet zone with microcement or Venetian on the dry walls — spa-like and seamless. You can mix — splurge on a seamless shower and save with painted dry walls — but at every budget, waterproofing and ventilation are non-negotiable.
The bathroom rewards clear thinking over expensive taste: divide it into wet, splash and dry zones, put waterproofing and ventilation first, choose seamless finishes and tile where the water falls, and use light, large, continuous surfaces to make it feel bigger than it is. For each finish in depth, follow the deeper guides; for the wider decision, return to the master wall-finishes guide.
Export this guide
Related Guides — Deep-dive reading
Kitchen Wall Finishes: The Complete Guide for Indian Homes
Grease, heat and steam every day — the kitchen's wall zones, the best backsplash options, what to use on the other walls, the five hygiene-and-heat rules, and three budget combinations.
Wall FinishesHow to Make Apartments Feel Bigger
Perceived space is cheaper than real space — the design levers that make a flat read larger
Apartment LivingWall Tiles: The Complete Guide for Indian Homes
The champion of wet and hard-worked walls — the whole tile family, where each belongs, the waterproofing and adhesive that actually matter, how many boxes to buy, and how layout, size and grout change the whole look.
Wall FinishesRelated Tools — Try Free
Cross-Ventilation Analyzer
Estimate airflow and air changes per hour (ACH) from room size, window areas, layout, and local wind — with NBC 2016 Part 8 compliance check.
Ventilation CalculatorMaterial Schedule Generator
Generate a room-wise finish schedule — walls, floors, ceilings, trim, and joinery by location.
Material ScheduleDoor Material Comparison Tool
Compare 2–4 door materials on cost, durability, maintenance, security and moisture resistance.
Comparison Tool