
Laminate Flooring Installation in India: DIY Floating Floor Step-by-Step
A practical, weekend-friendly guide to laying click-lock laminate over concrete — subfloor prep, DPM and underlay, acclimatisation, staggering, expansion gaps and clean transitions.
Laminate is the most forgiving floor a first-timer can attempt: the planks simply float, clicking edge-to-edge over a thin cushion, fixed to nothing. No mortar, no adhesive bed, no curing wait. Yet a perfect-looking laminate floor that peaks, gaps or squeaks within a year almost always traces back to three skipped steps — a flat clean subfloor, a moisture barrier on concrete, and a real expansion gap at every wall. Get those right and a single room is a genuine one-weekend job with hand tools.
This guide walks the floating-floor method from bare slab to fitted skirting, grounded in Indian conditions: humid monsoons, concrete subfloors and the brands you will actually find at the dealer.
What a floating floor is — and why it matters
A laminate floor is not stuck down. The planks lock together into one large "raft" that sits loose on the underlay and is free to expand and contract with humidity as a single sheet. That is why two rules dominate everything below: the floor must be able to slide (so it touches nothing rigid at the edges), and it must be isolated from slab moisture (or it cups and swells).
Because nothing is glued, mistakes are recoverable — you can unclick a wrong plank and re-lay it. This is exactly what makes laminate the best DIY flooring in India. The trade-off: laminate is not refinishable and dislikes standing water, so keep it out of bathrooms and flood-prone ground floors, and seal the perimeter and expansion gaps well.
For choosing the product itself (AC ratings, thickness, plank class), see the companion guide laminate flooring in India. If you are weighing it against rigid vinyl, SPC vs laminate flooring compares the two head to head.
Tools and materials checklist
- Laminate planks (buy 7-10% extra for cutting waste; keep one spare pack from the same batch/dye-lot for future repairs)
- Foam or IXPE underlay, 2-3 mm
- 200-micron polyethylene (PE) sheet as a damp-proof membrane (DPM) — for concrete subfloors
- Spacers (8-12 mm) — buy a pack, or cut hardwood blocks
- Tapping block and pull bar (the click-lock fitting kit)
- Rubber mallet
- Jigsaw or fine-tooth hand saw / laminate cutter; a flush-cut saw for door frames
- Pencil, measuring tape, set square, sharp utility knife
- Skirting / quarter-round beading, threshold (transition) profiles
- PE-compatible cloth tape for joining the DPM sheets
- Cleaning kit: broom, vacuum, slightly damp mop
The 200-micron DPM and underlay — the layer most people skip
On an Indian concrete slab, moisture vapour rises continuously, and it spikes through the monsoon. Without a barrier, that vapour reaches the fibreboard core of the laminate and the planks cup, swell at the joints, or lift. So over concrete you always lay a 200-micron PE damp-proof membrane first, then the cushioning underlay on top. Many premium underlays come with an integrated DPM film — if yours does, you do not need a separate sheet.
Lay the DPM with the sheets overlapping about 200 mm and turned up the wall by 50-75 mm (you will trim it flush before fitting skirting). Tape the overlaps. Then roll out the foam/IXPE underlay edge-to-edge (butted, not overlapped) and tape the seams so planks cannot catch a ridge. The underlay smooths tiny imperfections, cushions footfall and quietens the room. For a deeper treatment of barriers and acoustic underlays, see underlayment and moisture barrier.
Step-by-step installation
| Step | What you do | Why it matters | Time (one room) |
|---|---|---|---|
| 1. Acclimatise | Leave sealed packs flat in the room 48 hours at normal room temperature | Planks reach the home's humidity so they stop moving after laying | 48 h (passive) |
| 2. Prep subfloor | Sweep and vacuum; check flatness — max ~3 mm dip under a 2 m straightedge | Bumps cause clicks to fail and a bouncy, squeaky floor | 1-2 h |
| 3. Correct flatness | Fill dips/level with self-leveling compound where needed; let cure | Floating floors need a flat, sound base | varies |
| 4. Lay DPM | 200-micron PE on concrete, overlap 200 mm, tape, turn up walls | Stops slab vapour reaching the plank core | 30-45 min |
| 5. Lay underlay | Butt-joint foam/IXPE, tape seams | Cushion, sound, minor smoothing | 30 min |
| 6. Plan direction | Run planks parallel to the main light source / longest wall | Hides joints, looks larger and intentional | 15 min |
| 7. Set spacers | 8-12 mm spacers around the entire perimeter | Creates the expansion gap the floating raft needs | with laying |
| 8. Lay rows | Click long edge then short end; stagger joints; tap home | Strength and a random, natural look | 3-5 h |
| 9. Cut around frames | Undercut door architraves; scribe to walls | Clean look; planks slide under, not jammed against | included |
| 10. Final row + edges | Pull-bar the last row; remove spacers | Tight raft, gap preserved | 30 min |
| 11. Trim and beading | Trim DPM flush; fit skirting / quarter-round (fix to wall, not floor) | Hides the gap while letting the floor move | 1-2 h |
| 12. Transitions | Fit threshold profiles at doorways and material changes | Bridges gaps, protects edges | 30 min |
Step 1 — Acclimatise 48 hours
Bring the unopened packs into the actual room and lay them flat for 48 hours. The laminate settles to the room's temperature and humidity so it does not shrink or expand significantly after you have laid it. Skip this in a humid coastal home and you risk peaking joints within weeks.
Step 2-3 — Subfloor flatness and cleaning
The subfloor must be clean, dry and flat. Sweep then vacuum thoroughly — grit trapped under the underlay telegraphs through as bumps and noise. Check flatness with a 2 metre straightedge: aim for no gap greater than about 3 mm beneath it. Grind down high spots and fill low spots. For dips and uneven slabs, a self-leveling compound is the clean fix; for badly out-of-true or cement-screed bases, see subfloor preparation.
Step 6 — Laying direction toward the light
Run the planks parallel to the main incoming daylight (usually toward the largest window) and ideally along the longest wall. Light skimming along the joints, rather than across them, makes the seams almost disappear and the room read larger.
Step 7-8 — Spacers, the expansion gap, and staggering
Place 8-12 mm spacers against every wall and fixed object before you start, and keep them in until the last plank is down. This perimeter gap is non-negotiable: the raft must have room to grow, especially across an Indian monsoon. Too little gap and the floor tents (arches up) in the middle; obstruct one corner and the whole floor buckles.
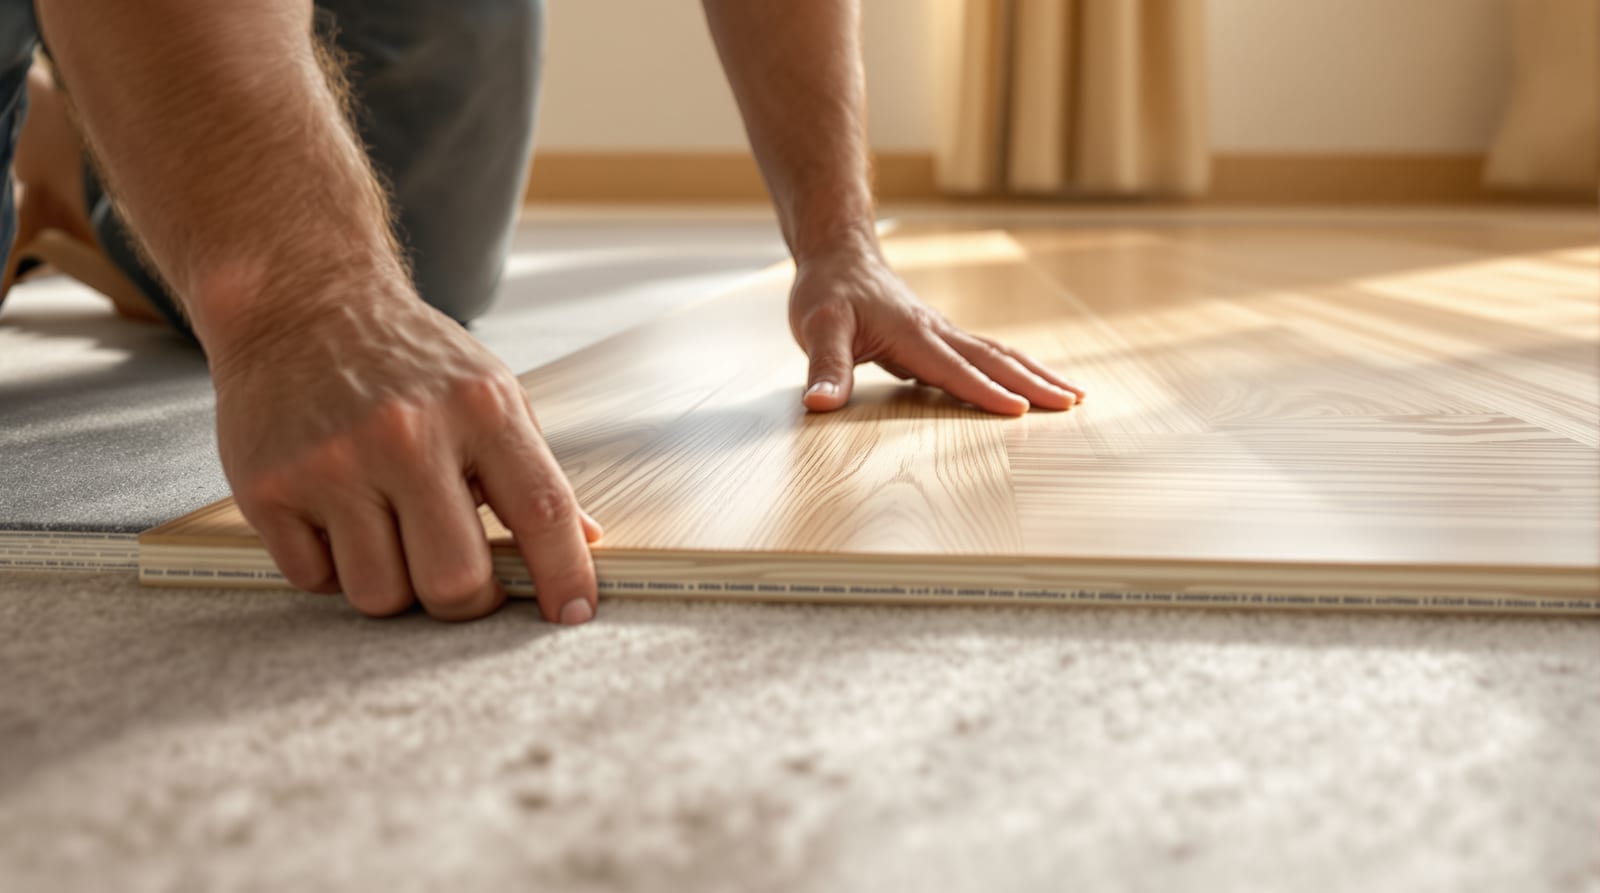
Start in a corner, groove facing the wall, and build left to right. Click the long edge of each new plank into the laid row at a shallow angle and lower it, then close the short end and seat both with the tapping block and mallet. Stagger the end joints between rows by at least 200-300 mm — never let two end-joints line up in adjacent rows. The off-cut from the end of one row usually starts the next, which both staggers the pattern and cuts waste. Aim to start and finish rows with planks at least ~300 mm long, never thin slivers.
Below is the cross-section you are building, from slab to wall edge.
Step 9 — Cutting around door frames and obstacles
Do not cut the plank to fit tightly around a door architrave — it looks rough and traps the floor. Instead, lay a scrap plank face-down beside the frame and use a flush-cut saw resting on it to undercut the architrave by exactly the plank's thickness, then slide the laminate underneath. For pipes, drill a hole a few millimetres larger than the pipe, cut a wedge out to the hole, fit the plank, then glue the wedge back. Always scribe and cut planks so they stop short of walls by the spacer gap, never butt them tight.
Step 10-12 — Final row, skirting and transitions
The last row usually needs ripping to width — measure the gap minus the expansion allowance, cut, and draw it home with the pull bar. Remove all spacers. Trim the DPM turn-up flush. Then fit skirting or quarter-round beading screwed or pinned to the WALL only, never down into the floor, so the raft stays free to move while the gap is hidden.
At doorways and where laminate meets tile, stone or another room, fit a threshold/transition profile (T-bar for equal heights, reducer or end-bar for a step). These bridge the expansion gap, cover the cut edge, and let two floors move independently. Under NBC 2016 and accessibility practice, keep door thresholds low — ideally 12 mm or less — so they are not a trip hazard.
Costs in India (indicative, varies by city and vendor)
Material costs are covered in the laminate flooring guide; here is what the install side adds. All figures are indicative and exclude 18% GST.
| Item | Indicative rate | Notes |
|---|---|---|
| Laminate planks (material) | ₹70-250 / sq ft | AC3 homes to AC4/AC5 heavier use |
| Foam / IXPE underlay | ₹8-25 / sq ft | Integrated-DPM types cost more |
| 200-micron PE DPM sheet | ₹3-8 / sq ft | Skip only if underlay has built-in DPM |
| Professional laying labour | ₹15-35 / sq ft | DIY saves this entirely |
| Skirting / beading | ₹25-70 / running ft | Matching laminate or PVC profiles |
| Threshold / transition strip | ₹150-500 / piece | Aluminium or colour-matched |
Doing it yourself mainly saves the ₹15-35 per sq ft labour line — meaningful on a full home, modest on a single bedroom where buying the fitting kit eats the saving. To size quantities and budget, the flooring cost calculator and underlayment calculator help.
Common mistakes to avoid
- No DPM on concrete — the single biggest cause of cupped, swollen laminate in humid India.
- No expansion gap — the floor tents or buckles; 8-12 mm at every wall and fixed object, plus thresholds at doorways for runs over ~8-10 m.
- Skipping the 48-hour acclimatisation — planks move after laying and joints peak.
- Laying on a dirty or uneven base — grit and dips cause squeaks, bounce and failed clicks.
- Aligned end-joints — looks artificial and weakens the raft; stagger by 200-300 mm.
- Skirting nailed through the planks — pins the raft and defeats the floating principle.
- Laminate in bathrooms or flood-prone ground floors — choose SPC click vinyl for wet zones instead.
For a wider catalogue of avoidable errors across all floor types, see flooring installation mistakes.
Frequently asked questions
Can I lay laminate directly over my existing tile floor?
Yes, if the tiles are sound, well bonded and reasonably flat. Clean thoroughly, fill any deep grout lines or chips so the surface is flat under a 2 m straightedge, then lay underlay (you can usually skip a separate DPM over old tile, but a vapour-barrier underlay is still wise in humid zones) and float the laminate on top. Account for the added height at doors and thresholds.
Do I really need the moisture barrier if my home is on an upper floor?
On any concrete subfloor, yes — slab vapour rises regardless of floor level, and Indian monsoon humidity makes it worse. The only time you can skip a separate 200-micron DPM is when your underlay already has an integrated moisture film, or you are laying over an existing non-porous floor like glazed tile.
How big should the expansion gap be?
Leave 8-12 mm around the entire perimeter and around every fixed object (pillars, door frames, pipes). For long unbroken runs beyond roughly 8-10 metres, or where the floor passes through a doorway into another room, add a transition/expansion profile so each section can move independently.
Is laminate good for an Indian kitchen?
For dry-cooking kitchens with good habits (wipe spills promptly, mats at the sink) it can work, but it is not water-resistant — standing water swells the core and it cannot be refinished. For kitchens, utility areas and bathrooms, rigid SPC click vinyl or vitrified tile is the safer call.
Can one person install a laminate floor?
Yes. Floating laminate is designed for solo DIY — the click-lock joints, tapping block and pull bar are made for one pair of hands. Larger planks and the final pull-bar row are easier with a helper, but a single average room is comfortably a one-person weekend project.
Export this guide
Related Guides — Deep-dive reading
Tile Grouting Guide India: Cement vs Epoxy Grout, Joint Width, Mixing, Curing and Sealing
How to grout tile floors properly in Indian homes: choosing cement versus stain-proof epoxy grout, getting timing and joint width right, floating it in, clearing haze, curing and sealing.
Flooring & SurfacesSubfloor Preparation in India: Get the Base Right Before Any Floor
Why the slab below decides whether your tiles go hollow or your wood cups — assessing, cleaning, repairing, leveling, moisture-testing, priming, screeding and laying over old tiles.
Flooring & SurfacesWooden Floor Installation in India: Nail-Down, Glue-Down & Floating Methods
How solid and engineered wood floors are actually laid in Indian homes — acclimatising planks, moisture barriers, the three fixing methods, expansion gaps and labour rates that decide whether your floor stays flat or cups.
Flooring & SurfacesRelated Tools — Try Free
Cross-Ventilation Analyzer
Estimate airflow and air changes per hour (ACH) from room size, window areas, layout, and local wind — with NBC 2016 Part 8 compliance check.
Ventilation CalculatorFlooring Cost Calculator
Estimate the all-in cost of a floor — material, laying, wastage, skirting and GST — by area and material.
Flooring CalculatorFull-Room BOQ — Living, Bedroom, Kitchen, Bath
Room-wise BOQ across living, bedrooms, kitchen, utility, and bathrooms with line-item pricing.
Full-Room BOQ