
SPC Flooring Installation in India: Rigid-Core Click Vinyl, Step-by-Step
How to install rigid-core click vinyl floors (SPC, WPC and click-LVT) the right way — why subfloor flatness matters most, pre-attached vs separate underlay, the floating click-lock method, expansion gaps and clean transitions.
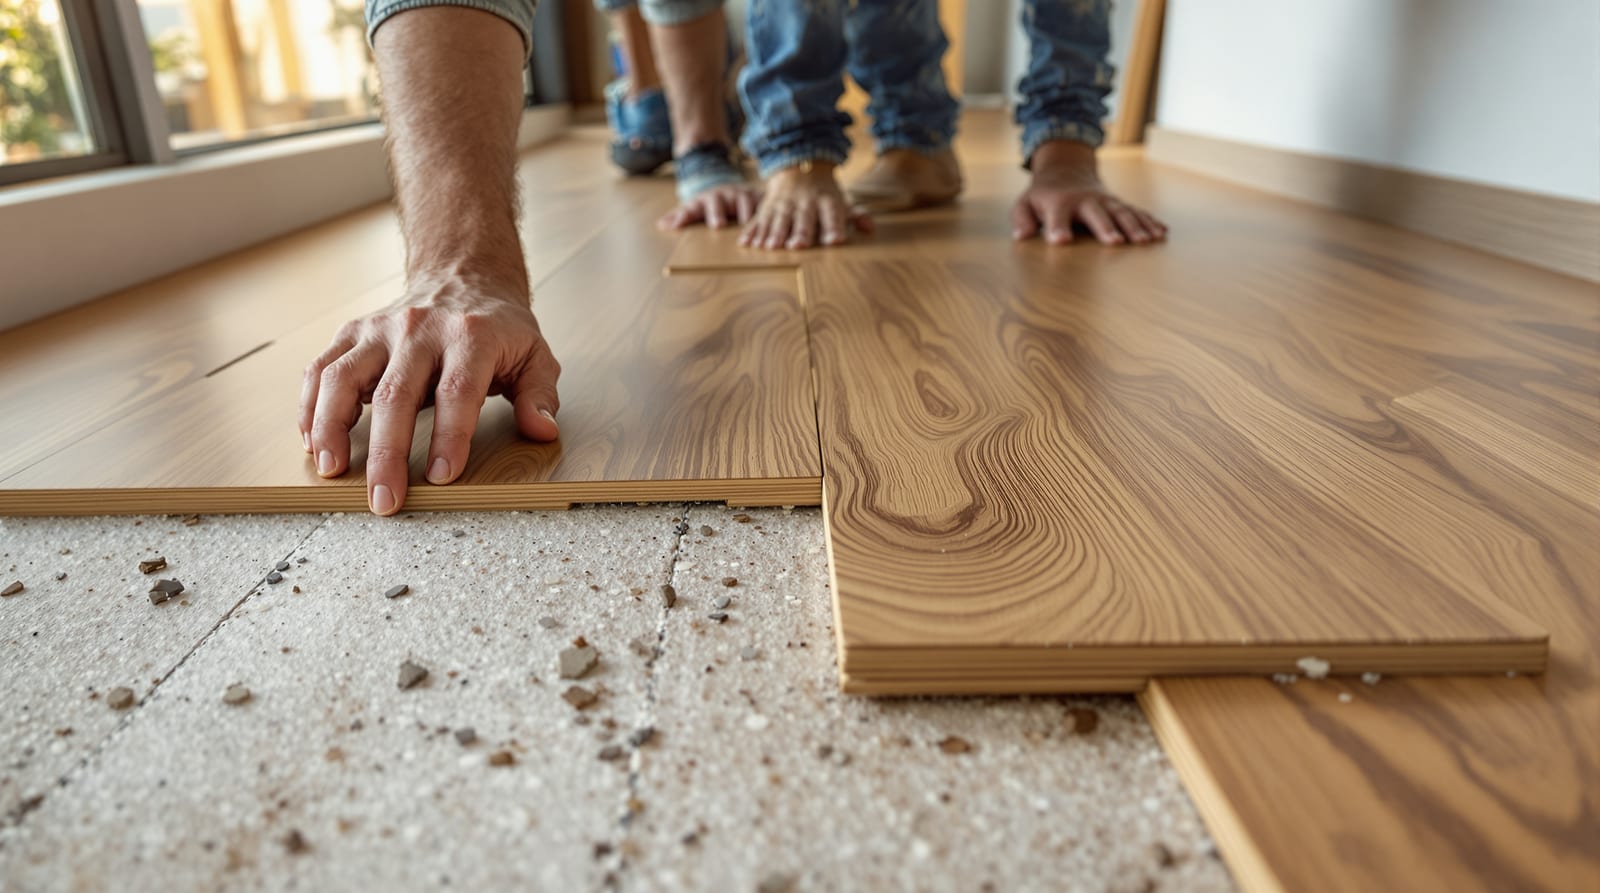
Rigid-core click vinyl is the fastest "real" floor you can lay in an Indian home: no mortar, no curing, no grout, and you can walk on it the same evening. But the speed hides a trap. Unlike heavy ceramic or vitrified tiles bedded in adhesive, a floating SPC or WPC floor only borrows its shape from whatever lies beneath it — so every bump, dip and ridge in the base eventually shows through. Get the subfloor flat and the rest is genuinely a weekend job. Skip that one step and you get clicking, gapping, peaking joints and a floor that feels alive underfoot.
This guide covers installing the whole rigid-core click family — SPC (stone-plastic composite), WPC (wood-plastic composite) and click-LVT (luxury vinyl tile with a locking edge) — the floating way, plus when glue-down LVT is the smarter choice, how to lay over old tiles or a screed, and the transitions and expansion gaps that make or break the result. For what these products actually are and how they compare, read the companion explainers on SPC flooring, WPC flooring and luxury vinyl tile (LVT) first.
Why subfloor flatness matters more than anything
A floating floor is not fixed down. The planks lock to each other, not to the base, and the whole field "floats" as one sheet that can expand and shrink with temperature. Because of that, the rigid core does not adhere to the floor below — it simply rests on it. Where the base has a high spot, the plank bridges over it like a tiny see-saw, and the locking joints flex every time you step there. That flexing is what eventually fatigues and separates a click joint, leaving a hairline gap or a peaked edge. Where the base dips, the plank can deflect slightly underfoot and feel "bouncy" or hollow.
This is called telegraphing — the floor telegraphs the shape of the base through to the surface. SPC's thin, dense stone-polymer core (typically 4-5 mm) is rigid side-to-side but does almost nothing to hide a deformed base; it is far less forgiving than a thick cement-and-sand tile bed. The fix is not a thicker plank. The fix is a flatter base.
The accepted tolerance for floating rigid vinyl is roughly 3 mm of deviation under a 2-metre straightedge (and about 1 mm under a 300 mm straightedge for sharp local ridges). Lay a long aluminium spirit level or a straight 2 m batten across the floor in several directions and look for daylight underneath. Anything more than a 2 rupee coin's thickness gap needs correcting.
How to get the base flat
- Grind down high spots and adhesive ridges with an angle grinder and diamond cup, or chip out blobs of old tile adhesive.
- Fill low spots and large undulations. For corrections under ~10 mm, a self-leveling compound is the cleanest answer — pour, spread, let it find its own level, and it cures hard in a few hours. For bigger dips or a fresh base, a proper cement-sand screed is better; see the floor screed and mortar bed guide.
- Vacuum thoroughly. Grit trapped under the underlay becomes a permanent high spot and squeaks.
- Check moisture. On a ground-floor or basement slab, rigid vinyl is waterproof on top but the locking joints are not a vapour barrier — trapped slab moisture can lift any pre-attached pad and breed mould. New concrete should cure 28+ days; if in doubt, tape a 1 m square of plastic to the slab overnight and check for condensation. Use a 200-micron PE damp-proof membrane (DPM) where moisture is possible. More on this in the underlayment and moisture barrier guide.
Pre-attached underlay vs separate underlay
Most mid-range and premium SPC and WPC planks ship with a pre-attached pad bonded to the underside — usually IXPE (cross-linked PE foam, white) or EVA. This pad cushions footfall, softens sound and absorbs tiny base imperfections. If your plank already has one, do not add a second underlay — stacking two soft layers makes the floor spongy and over-flexes the click joints, which is a classic cause of joint failure.
Use a separate underlay only when the plank has a bare core. Match it to the situation:
| Layer / situation | What to use | Notes |
|---|---|---|
| Plank with pre-attached IXPE/EVA pad | Nothing extra | Lay directly; add DPM only if slab moisture is a risk |
| Bare-core plank on dry upper-floor slab | 1-1.5 mm IXPE underlay rated for rigid vinyl | Thin and firm; never thick foam meant for laminate |
| Bare-core plank on ground/basement slab | 200-micron PE DPM + thin IXPE | DPM seams overlapped 200 mm and taped |
| Noise-sensitive room / flat above neighbour | Acoustic underlay rated for SPC (or cork) | Check the building's impact-sound rules |
The golden rule for rigid vinyl: the underlay must be thin and firm, not thick and soft. Thick laminate foam under SPC voids most warranties because it lets the rigid sheet rock and the joints work loose. The total deflection a click joint can tolerate is tiny.
Can you lay over old tiles or an existing screed?
Yes — and this is one of rigid vinyl's biggest advantages in Indian renovations, because you avoid the dust and debris of demolishing the existing floor. The conditions:
- Over old vitrified or ceramic tiles: fine, provided the tiles are sound (no drummy/hollow tiles — tap-test and re-fix or fill any loose ones) and the surface is flat within tolerance. The one extra worry is grout lines. Wide or deep grout joints (over ~5 mm wide or sunk more than ~1-2 mm) can telegraph through thin SPC over time. Skim-fill deep grout lines with a self-leveling compound or a cement-based filler so the base reads as one flat plane.
- Over a cement screed or IPS floor: fine if cured, dry and flat. Grind off paint flecks and adhesive ridges.
- Over existing wooden or laminate floors: generally avoid floating-on-floating; lift the old floor first, as two floating layers move independently and fight each other.
- Over a heated floor: only if both the heating system and the SPC are rated for it, with a maximum surface temperature (commonly 27-28 deg C). Underfloor heating is rare in India outside hill homes — see the dedicated guidance on it before attempting this.
Because the floor floats, raising the level by 4-7 mm over old tiles is usually trivial — but remember it changes the height at every doorway and below every door leaf. Plan to trim door bottoms and choose transition profiles before you start.
The floating click-lock method, step by step
1. Acclimatise. Stack the unopened boxes flat in the room for 24-48 hours so the planks reach the room's temperature. SPC's stone core moves less than laminate, but it still moves; skipping this in a hot, just-closed flat invites gapping. Keep boxes out of direct sun.
2. Plan the layout. Measure the room and dry-lay a row to check the last row is not a thin sliver (aim for at least a third of a plank width). Lay planks parallel to the longest wall or toward the main light source. Mix planks from several boxes as you go to blend shade and pattern variation.
3. Set expansion spacers. Place 8-10 mm spacers against every wall, pillar and fixed object. This perimeter gap is non-negotiable (more below).
4. First row. Trim the tongue off the boards facing the starting wall so they sit flush against the spacers. Lock planks end-to-end along the row, keeping the cut-tongue edge to the wall.
5. Click the next rows. Most rigid vinyl uses an angle-and-drop or angle-and-tap click. Present the new plank's long edge to the previous row at about 20-30 degrees, push forward to engage the locking profile, then lower it flat. Tap the end joint home gently with a tapping block and a rubber mallet — never hit the plank edge directly.
6. Stagger the joints. Offset end joints between adjacent rows by at least 200-300 mm (a third of a plank length is a safe rule) so seams never line up. Use the offcut from one row to start the next where the offset works out.
7. Scribe around obstacles. Cut SPC with a sharp utility knife: score the wear layer deeply along a straightedge and snap the plank — no power saw or dust needed for straight cuts. For door frames and pipes, jigsaw or coping-saw the curve.
8. Last row. Measure and rip the final row to width, allowing the 8-10 mm gap, and lever it home with a pull bar.
9. Remove spacers, fit skirting and transitions, refit doors. The skirting or quarter-round hides the expansion gap; it must fasten to the wall, never pinch the floor down.
A typical 12 x 10 ft bedroom is a 3-5 hour job for a careful first-timer once the base is ready.
The expansion gap — the rule you cannot break
A floating vinyl floor is one continuous sheet that expands when warm and contracts when cool. India's swing — a 40+ deg C Delhi summer to an air-conditioned 22 deg C — is exactly the kind of change that makes vinyl move. If the field is pinned anywhere (skirting nailed into the plank, a heavy wardrobe trapping an edge, no perimeter gap), the expanding sheet has nowhere to go and it peaks — joints lift into a ridge — or buckles.
- Leave 8-10 mm clear all round the perimeter and around every fixed object (pillars, door frames, pipes, thresholds).
- For large or sun-exposed rooms, follow the manufacturer's maximum continuous run (often around 10-12 m in any direction, or 100-150 sq ft of unbroken field). Beyond that, break the floor with a T-moulding at the doorway or under a divider.
- Never let kitchen units, fixed wardrobes or heavy fixed furniture sit on the floating floor and trap it — install them first and float up to them, or build the floor through and respect the gap.
- Keep direct sun off dark planks where possible; dark colours absorb more heat and expand more.
Glue-down LVT vs click — which method?
Click rigid vinyl is the default for homeowners, but glue-down LVT still earns its place. The choice is about the room, not just preference.
| Factor | Click (floating) SPC / WPC / LVT | Glue-down LVT |
|---|---|---|
| Speed and mess | Fast, dry, DIY-friendly, no cure time | Slower; adhesive spread, open time, cure |
| Subfloor flatness needed | Critical (telegraphing); 3 mm / 2 m | Even more critical (any bump shows instantly) |
| Best for | Bedrooms, living rooms, renovations over old tiles | Large open commercial areas, very high traffic, rooms with heat or strong sun |
| Heat / sun stability | Moves as a sheet; needs gaps and run limits | Fully bonded, so it cannot peak or shift |
| Removability | Lift and reuse / replace easily | Permanent; messy to remove |
| Underlay | Pad cushions and hides minor flaws | None — bonded directly, so prep must be perfect |
| Cost | Plank ₹90-250+/sq ft; DIY labour ~nil | Tile cheaper but adhesive + skilled labour adds up |
In short: click for most homes and renovations; glue-down where the floor will face strong direct sun, very heavy rolling traffic, or wide unbroken spans that exceed click run limits.
SPC vs WPC vs click-LVT — install differences at a glance
All three install by the same floating click logic, but they are not identical underfoot or in their demands on the base.
| Property | SPC (stone-plastic core) | WPC (wood-plastic core) | Click-LVT (flexible vinyl core) |
|---|---|---|---|
| Core | Dense limestone + PVC; very rigid, thin | Foamed wood-flour + PVC; thicker, warmer, softer | Flexible PVC, no rigid mineral core |
| Typical thickness | 4-5 mm | 5-8 mm | 4-5 mm |
| Subfloor flatness demand | Highest — thin rigid core telegraphs most | Slightly more forgiving (thicker, cushioned) | High; flexible core follows the base closely |
| Underfoot feel / sound | Firm, slightly clicky; harder | Warmer, softer, quieter | Soft, quiet, more "give" |
| Stability in heat / sun | Best dimensional stability | Good; foamed core slightly more movement | Lowest; click-LVT moves more, stricter run limits |
| Best Indian use | Living/bedrooms, over old tiles, hot plains | Comfort rooms, mild climates, kids' rooms | Quieter rooms; glue-down version for big/sunny areas |
| Expansion gap | 8-10 mm | 8-10 mm | 8-10 mm (follow tighter run limits) |
The practical takeaway: SPC is the most stable and the most popular choice for Indian conditions, but its thin rigid core is also the least tolerant of an uneven base — which loops right back to the first section of this guide.
Common mistakes that wreck a click vinyl floor
- Skipping flatness prep — the single biggest cause of failed joints and telegraphing.
- Doubling up underlay under planks that already have a pad — spongy floor, failed clicks.
- No expansion gap or trapped edges — peaking and buckling in the first hot season.
- Using thick laminate foam under rigid vinyl — voids warranty, lets joints rock loose.
- Not staggering joints / aligned seams — weak, visually obvious lines.
- Laying over loose or hollow old tiles — re-fix or fill them first.
- Forgetting door clearance — the new floor sits higher; trim leaves and choose thresholds before laying.
- Tapping plank edges directly — crushes the locking profile; always use a tapping block.
For the wider list of laying errors across all floor types, see the flooring installation mistakes guide. If you are weighing this against a laminate floor, the laminate flooring installation guide covers the close cousin that uses the same floating method but a moisture-sensitive HDF core.
Cost and what to expect in India
Rigid click vinyl is sold by the box and priced per square foot (indicative, varies by city, brand and vendor; add 18% GST):
| Item | Indicative range |
|---|---|
| SPC plank (basic to premium) | ₹90-250+/sq ft |
| WPC plank | ₹110-280+/sq ft |
| Click-LVT plank | ₹100-260+/sq ft |
| Professional floating-install labour | ₹15-40/sq ft |
| Self-leveling compound (if base needs it) | ₹40-120/kg, ~1.5-1.7 kg/sq m per mm |
| Spacers, tapping block, pull bar, utility knife | ₹1,000-2,500 (one-time toolkit) |
Because there is no adhesive, no grout and no curing, DIY install saves the whole labour line — the catch is that all the saved effort moves to base preparation, which is the part most people are tempted to rush.
Frequently asked questions
Do I really need to level the floor before SPC if it looks flat?
Almost always, yes — to a degree your eye cannot judge. Use a 2 m straightedge and look for gaps over 3 mm. Even floors that "look fine" usually have ridges of old adhesive or sunken grout lines that will telegraph through thin SPC within a year. Spending an afternoon with a self-leveling compound is far cheaper than relaying a failed floor.
Can SPC go straight over my old vitrified tiles?
Yes, if the tiles are firmly stuck (tap-test for hollow ones), reasonably flat, and you fill any wide or deep grout lines so the base reads as one plane. This is one of the most popular Indian renovation routes because it avoids demolition dust. Just remember the floor height rises a few millimetres, so plan door clearances.
How big an expansion gap do I leave?
8-10 mm clear all around the perimeter and every fixed object, hidden under the skirting or a quarter-round bead. For large or sun-exposed rooms, also respect the manufacturer's maximum unbroken run (often 10-12 m) and break longer spans with a T-moulding at doorways.
Should I choose click or glue-down?
Click for most homes — it is faster, DIY-friendly and reusable. Choose glue-down LVT for areas with strong direct sun, very heavy rolling traffic, or wide unbroken spans that exceed click run limits, because a bonded floor cannot peak or shift. Glue-down demands an even flatter, cleaner base.
Is SPC or WPC easier to install over an imperfect floor?
WPC is marginally more forgiving because its thicker, cushioned core hides small undulations slightly better, while SPC's thin rigid core telegraphs the most. Neither is a substitute for proper leveling — but if your base is borderline and the room is not in extreme heat, WPC can be the kinder choice. Compare the materials in the SPC and WPC explainers.
Export this guide
Related Guides — Deep-dive reading
Cork Flooring in India: Warm, Quiet, Eco Floors for Bedrooms, Study & Kids' Rooms
Why cork is genuinely sustainable (bark is harvested while the tree lives on), the comfort and acoustic benefits, the natural look, ₹200-500/sq ft, click-floating vs glue-down tiles, sealing, and the dent, moisture and sun-fade caveats every Indian homeowner should know.
Flooring & SurfacesLaminate Flooring Installation in India: DIY Floating Floor Step-by-Step
A practical, weekend-friendly guide to laying click-lock laminate over concrete — subfloor prep, DPM and underlay, acclimatisation, staggering, expansion gaps and clean transitions.
Flooring & SurfacesFlooring Underlayment & Moisture Barrier Guide for India (Floating Floors)
Why underlay and a damp-proof membrane make or break laminate, SPC and engineered floors over Indian concrete — types, the 200-micron PE DPM, when you can skip it, and how to lay it.
Flooring & SurfacesRelated Tools — Try Free
Cross-Ventilation Analyzer
Estimate airflow and air changes per hour (ACH) from room size, window areas, layout, and local wind — with NBC 2016 Part 8 compliance check.
Ventilation CalculatorFalse Ceiling Cost Estimator
Live ₹/sqft across 8 ceiling types — POP, gypsum, designer, metal, PVC, wooden — with cove and spot lighting for 20 Indian cities.
Cost CalculatorApartment Furniture Size Chart
Standard furniture dimensions for Indian apartments — sofas, beds, tables, dining, storage.
Reference Chart