
Subfloor Preparation in India: Get the Base Right Before Any Floor
Why the slab below decides whether your tiles go hollow or your wood cups — assessing, cleaning, repairing, leveling, moisture-testing, priming, screeding and laying over old tiles.
Every flooring complaint a mason gets blamed for — drummy tiles that sound hollow, a wooden floor that cups and lifts at the edges, a marble field that develops hairline cracks in a year — usually started one layer below the finish, in a base nobody checked. The subfloor is the part of the job no client ever photographs, and it is exactly the part that decides whether the floor you paid lakhs for stays flat and bonded for twenty years. This guide walks through preparing the base properly for an Indian home: how to assess what you already have, clean and repair it, check flatness and moisture, prime it, decide between a screed and self-leveling compound, lay over an old floor without ripping it out, and protect against rising damp in humid zones.
Why preparation decides everything
A finished floor is only as stable as the surface it sits on. Two failures dominate Indian sites, and both are base failures dressed up as finish failures.
The first is the hollow or "drummy" tile. Tap a vitrified tile with a coin and a healthy one rings solid; a hollow one gives a sharp drumming echo. That sound means the adhesive or mortar never made full contact with the back of the tile, almost always because the base was dusty, uneven, or the tile was bridging a hump. Hollow tiles crack under point loads (a dropped vessel, a chair leg), lift at corners, and the grout lines pop. The fix is to chisel them out and re-fix — disruptive and expensive — when an hour of base prep would have prevented it.
The second is wood cupping and tenting. Solid and engineered wood, laminate and SPC all move with moisture. Lay them over a damp slab with no damp-proof membrane and the planks absorb water vapour rising from below, swell at the edges (cupping), and eventually buckle upward (tenting). No amount of expensive plank or skilled fitting survives a wet base.
Both come back to the same three questions you must answer before any finish goes down: Is the base sound (no loose, cracking, or weak material)? Is it flat enough for the chosen finish? Is it dry enough? Get those right and the finish almost installs itself.
Step 1: Assess the existing base
Indian homes present a few base types, each needing different prep. Walk the room first and identify which you have.
| Base type | What it is | Main prep needed |
|---|---|---|
| New RCC / cement concrete slab | Fresh structural slab or topping | Allow full cure (28 days), remove laitance and curing residue, check flatness, prime |
| Old cement / IPS floor | Existing cast-in-place floor | Remove polish/wax, repair cracks, roughen if too smooth, check soundness |
| Existing tiles (vitrified/ceramic/mosaic) | Old tiled floor you want to keep | Check for hollow tiles, clean, abrade glaze or apply bonding agent, use C2 adhesive |
| Brick-bat / mud or weak base | Old or rural construction | Usually remove; relay a proper screed over a sound sub-base |
| Plywood / timber subfloor (upper floors, wood finish) | Battens + ply deck for wooden floors | Check fixing, flatness, no squeaks, moisture content; DPM below if over concrete |
For a new slab, the single biggest mistake is laying on green (not fully cured) concrete. Cement concrete keeps shrinking and releasing moisture for weeks. As a rule, give a structural slab around 28 days before bonding a rigid finish, and never tile or lay wood while the slab still reads damp on a moisture test (covered below). Skim off the chalky laitance — the weak, powdery cement-rich skin on the surface — by light grinding or acid-free scarifying, because finishes bond to the strong concrete underneath, not to laitance.
For an old floor, the test is soundness. Walk it, tap suspicious areas, look for spalling, deep cracks that move, oil-soaked patches, and any spot that flexes. Anything loose or oily has to go or be cut out and patched — a finish will only ever be as good as the weakest patch under it.
Step 2: Clean and repair
A base must be clean enough to bond and solid enough to carry load.
Strip everything that breaks the bond: dust, loose particles, old adhesive ridges, paint splashes, plaster droppings, curing compound, and especially oil and grease (kitchens, garages, workshops). Oil is the enemy of every cementitious adhesive — degrease with a strong detergent or alkaline cleaner and rinse, because adhesive simply will not stick to a greasy slab.
Then repair:
- Hairline and shrinkage cracks that are stable can be filled with a polymer-modified repair mortar or crack filler. Cracks that are still moving (structural) must be diagnosed before you cover them — a finish laid over a live crack will telegraph it straight up.
- Pot-holes, honeycombing and low patches get filled with a repair mortar (cement-sand with a bonding admixture, or a ready repair mortar from Roff, MYK Laticrete or Pidilite). For deep fills, key the edges and prime first.
- High spots and humps are ground down. It is far easier to grind a hump flat than to build the whole floor up to meet it.
- Re-fix any hollow areas in an old tiled floor before re-tiling over it — leaving a drummy tile under a new layer just buries the fault.
Step 3: Check flatness with a 3 m straightedge
Flatness is measurable, not a matter of eye. The standard tool is a 3 metre aluminium straightedge (a mason's level edge or a dedicated flatness rule). Lay it across the floor in several directions and at the worst-looking spots, and measure the largest gap underneath it with a tape or feeler.
Different finishes tolerate different gaps. As working benchmarks:
| Finish | Typical flatness tolerance | If out of tolerance |
|---|---|---|
| Large-format vitrified / PGVT (600x1200, 800x1600) | gap under 3 m straightedge within ~3 mm | Self-leveling compound or fresh screed; large tiles show every hump as lippage |
| Standard ceramic / vitrified (600x600) | within ~3-4 mm | Minor — adhesive bed can absorb small variation |
| Click vinyl / laminate / SPC | within ~2-3 mm over 2 m | SLC; floating floors bridge dips and flex, causing clicking and gaps |
| Engineered / solid wood (glue or nail) | within ~3 mm over 2-3 m | Level the ply or screed; wood will not hide unevenness |
| Epoxy / microcement | very flat, sound, dry | Grind and SLC; thin finishes copy the base exactly |
The bigger the tile or the thinner and stiffer the finish, the flatter the base must be. A 600x1200 tile cannot drape over a hump the way a small ceramic can — it rocks, lippage appears at the edges, and you get hollow corners. This is why large-format tiles need a leveled base plus full adhesive coverage, never a thick lumpy mortar bed.
Step 4: Check moisture
Moisture is invisible and the most-skipped check on Indian sites, yet it is what cups wood and blisters epoxy. Two simple field methods before any finish that hates damp:
- Plastic sheet test (cheap, do it always): tape a roughly 1x1 m sheet of clear polythene tightly to the slab, sealed on all edges, and leave 16-24 hours. Condensation under the sheet or a darkened slab patch means moisture is still rising — the base is not ready.
- Moisture meter: a concrete moisture meter gives a reading. As a guide, wood and epoxy want a slab around or below ~4% moisture before they go down. Tiles with cement adhesive are far more forgiving of slight damp, but rising damp will still cause efflorescence (white salt bloom) in grout over time.
If the slab is on grade (ground floor, terrace, anywhere over earth) and in a humid or coastal zone, assume rising damp is a risk and plan a barrier (Step 7).
Step 5: Prime the base
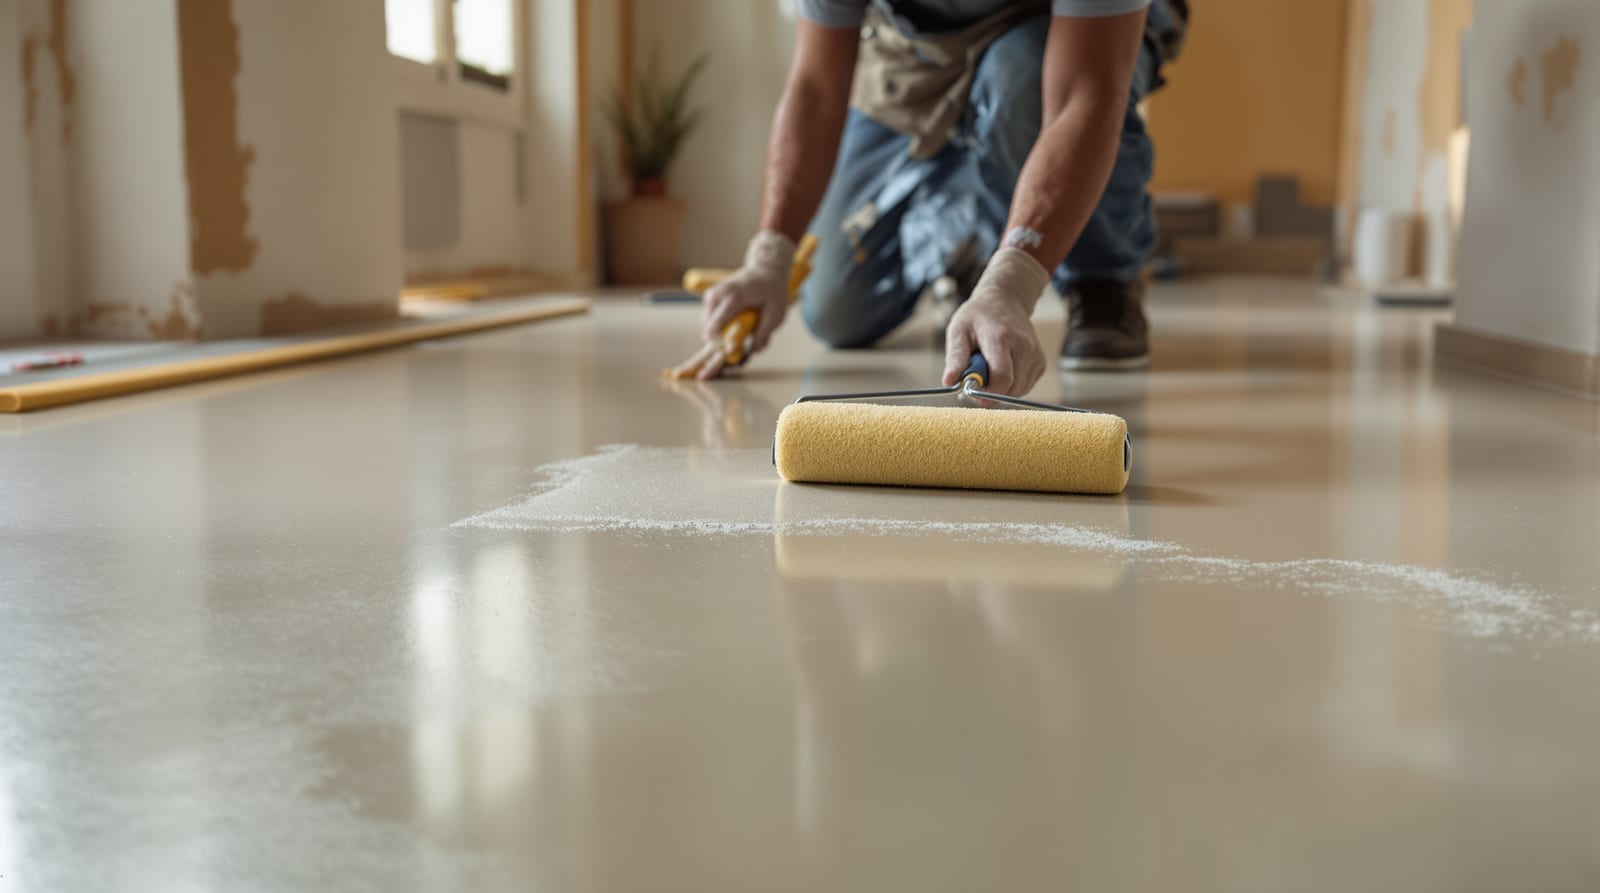
Priming is the cheap step that quietly prevents most bond failures. A primer does two jobs: it seals a dusty or absorbent base so it does not suck the water out of your adhesive or screed too fast (which weakens the bond), and a bonding primer/agent creates a chemical key on smooth or low-absorption surfaces.
- Before a screed or self-leveling compound: prime the slab with the SLC manufacturer's primer (often a diluted acrylic). Skipping this is the classic cause of an SLC layer that delaminates or pinholes.
- On dense, smooth, or old polished surfaces: use a bonding agent / SBR latex (styrene-butadiene rubber) brushed or rolled on, which lets new mortar grip a surface it otherwise could not.
- On highly absorbent old IPS or weak screed: an acrylic sealer-primer stops it drinking the adhesive dry.
Let the primer reach the tack or cure the maker specifies — flooding fresh compound onto wet primer just traps it.
Step 6: Screed or self-level?
Once the base is sound, clean, flat-enough-checked and primed, you correct the level. There are two routes, and choosing right saves money and time.
A cement-sand screed is a leveling layer of cement and sand, typically 25-75 mm thick, laid to dead level (or to a fall in wet areas). Use it when you need to raise the floor more than ~10-15 mm, bring a room up to meet a corridor, build a fall to a drain, or correct a badly out-of-level slab. It is the workhorse for big level corrections. For the mix, ratios, curing and bonded-vs-unbonded detail, see the companion guide on the floor screed and mortar bed.
A self-leveling compound (SLC) is a flowable cement-based liquid that finds its own level, used for thin corrections roughly under 10 mm (some go to 15-20 mm in one pour). It gives a glass-smooth, dead-flat surface fast and is ideal under vinyl, laminate, wood and large-format tiles where flatness is critical. It is more expensive per kg than screed and cannot do big build-ups. Full detail — coverage (~1.5-1.7 kg per square metre per mm of thickness), priming, pour technique and cost — is in the self-leveling compound guide.
The simple rule: big level corrections and falls go to a screed; thin flatness corrections under a critical finish go to SLC. Many jobs use both — a screed to get roughly level, then a thin SLC skim to get perfectly flat under a click floor.
The prepared floor stack
A correctly prepared base under tile builds up in clear layers. Here is the section, bottom to top:
Step 7: Laying over an old floor
You do not always have to demolish. Tiling over a sound old tiled floor saves the cost and mess of breaking, hauling debris, and re-screeding — and it keeps the floor level from creeping up too much. It works only if the old floor passes three checks: it is firmly bonded (no hollow tiles — re-fix or remove any), it is structurally sound (no movement), and the extra height is acceptable at doors and thresholds.
The challenge is that old vitrified and ceramic tiles are glazed and non-absorbent, so ordinary adhesive will not grip. Two ways to solve it:
- Mechanically abrade the glaze (grind or scarify to roughen) so adhesive can key into it, then
- Use a C2-class adhesive (flexible, high-polymer) and/or first coat with an acrylic bonding agent / SBR primer designed for tile-on-tile. C2 adhesives (such as polymer-modified tile-on-tile grades from Roff, MYK Laticrete, Pidilite) are formulated to bond to smooth, low-porosity surfaces and to flex with the slight movement between two tiled layers.
Always clean and degrease the old tiles thoroughly first, fill the old grout lines if deeply recessed, and respect the height gain at every doorway and at the kitchen and bathroom thresholds. For the actual setting-out and fixing once the base is ready, follow the step-by-step on how to lay floor tiles.
Step 8: Damp-proof membrane in humid zones
In coastal and high-humidity India — Mumbai, Goa, the entire Konkan and Malabar coast, Chennai, Kochi, Vizag, Kolkata — and anywhere a floor sits directly on the ground, water vapour rises continuously through the slab. That vapour is what cups wood, blisters epoxy, and blooms white efflorescence in cement grout.
The defence is a damp-proof membrane (DPM). For floating wood, laminate and SPC over a concrete slab, lay a 200-micron polyethylene sheet over the base before the underlay, lapping joints generously and turning it up at the walls (it tucks behind the skirting). For wet areas and on-grade slabs, an integral or applied waterproofing membrane over the screed, laid to the right slope, keeps water where it belongs (IS 2645 covers integral waterproofing admixtures). The underlayment and moisture barrier guide goes deep on membrane types, micron ratings and overlap detail.
A 200-micron sheet costs a rupee or two a square foot. Skipping it under a wooden floor in Mumbai is how a two-lakh floor becomes a warped, lifting mess in one monsoon.
Putting it together: the prep sequence
For a typical ground-floor room in an Indian home getting large-format vitrified tiles, the order runs: confirm the slab is cured and sound, remove laitance and clean off all dust, oil and debris, repair cracks and pot-holes and grind down humps, run the 3 m straightedge to map high and low spots, do the plastic-sheet moisture test, prime, lay a leveling screed (and a DPM first if on-grade in a humid zone), follow with a thin SLC skim if you need dead-flat for big tiles, prime again per the SLC, and only then call the tile-fixer. Every step you skip here re-appears later as a complaint — so this is the cheapest insurance on the whole job.
Frequently asked questions
How long should I wait before tiling a new RCC slab?
Give a structural slab a full cure, around 28 days, before bonding a rigid finish, and confirm it is dry with a plastic-sheet test. Cement concrete keeps shrinking and releasing moisture for weeks; tiling green concrete invites cracked grout, efflorescence, and bond failure. Wood and epoxy are even fussier and want a slab reading around or below 4% moisture.
Can I really lay new tiles over old tiles, or must I break them?
You can, if the old floor is firmly bonded with no hollow tiles, structurally sound, and the height gain is acceptable at your doors. Abrade the old glaze, degrease it, apply a tile-on-tile bonding agent and use a flexible C2 adhesive. If many tiles are loose or the floor flexes, break and re-screed instead.
How flat does my floor need to be for large-format tiles?
Large-format vitrified and PGVT tiles want a base flat to roughly 3 mm under a 3 metre straightedge. They are stiff and cannot bend over humps, so any unevenness shows as lippage and hollow corners. Correct it with a leveling screed for big variation or a self-leveling compound for a thin, dead-flat finish, and always use full adhesive coverage.
Do I need a damp-proof membrane under tiles too?
Tiles with cement adhesive tolerate slight damp far better than wood, so a DPM is not always mandatory under tile. But on a ground-floor or on-grade slab in a coastal or humid zone, rising damp still causes efflorescence and can weaken bonds over years, so a waterproofing membrane or DPM is strongly recommended — and essential under any wooden, laminate or SPC floor.
What is the difference between a screed and self-leveling compound?
A cement-sand screed is a thicker leveling layer (about 25-75 mm) for big level corrections and falls to drains. Self-leveling compound is a thin, flowable layer (roughly under 10 mm) that finds its own level for a dead-flat finish under critical floors like vinyl, laminate, wood and large tiles. Big build-ups use screed; fine flatness uses SLC; many jobs use both.
Export this guide
Related Guides — Deep-dive reading
Wooden Floor Installation in India: Nail-Down, Glue-Down & Floating Methods
How solid and engineered wood floors are actually laid in Indian homes — acclimatising planks, moisture barriers, the three fixing methods, expansion gaps and labour rates that decide whether your floor stays flat or cups.
Flooring & SurfacesFlooring Underlayment & Moisture Barrier Guide for India (Floating Floors)
Why underlay and a damp-proof membrane make or break laminate, SPC and engineered floors over Indian concrete — types, the 200-micron PE DPM, when you can skip it, and how to lay it.
Flooring & SurfacesHow to Lay Floor Tiles in India: Complete Step-by-Step Guide
A practical, mason-grade walkthrough for tiling an Indian home floor — base check, dry layout, adhesive vs mortar bed, leveling, lippage and grouting.
Flooring & SurfacesRelated Tools — Try Free
Monsoon-Readiness Checklist
Pre-rain home audit across 9 categories — terrace, drains, waterproofing, electrical, HVAC, pest, vehicles, documents.
Seasonal AuditMaterial Comparison Sheet
India's interior material cheatsheet — plywood, finishes, hardware, countertops, paints, waterproofing.
Reference GuidePool Tile Calculator
Floor, wall and waterline area and the total number of tiles for your pool, with a wastage allowance.
Pool Calculator