
Window Seal Replacement Guide
The three window seals — perimeter caulk, weatherstrip gasket and the IGU edge seal — and exactly how to replace each (and which one you must not try to reseal)
A "bad seal" can mean three completely different things, and each one has its own fix. Mix them up and you waste an afternoon scraping caulk off a window whose real problem is a draughty gasket — or worse, you try to "reseal" a foggy double-glazed pane that can never be resealed. This guide is the seal-replacement how-to: how to identify which of the three seals has failed, and how to replace each one.
If you are not yet sure your window even has a seal problem — if you only know water or air is getting in somewhere — start with the diagnosis-first sibling, window leak repair, which walks you through finding the source. That guide finds the leak; this guide replaces the seal once you know it is the seal. For the bigger picture of when each seal gets serviced, see the pillar home window maintenance guide.
The three seals — and which you can DIY
Every window in an Indian home relies on up to three distinct seals. They look similar to a non-expert, but they are made differently, fail differently, and are fixed differently.

| Seal | Where it sits | What it does | Failure sign | Fix | DIY or pro |
|---|---|---|---|---|---|
| Perimeter caulk | Joint between frame and wall (outside) | Keeps rain and air out at the masonry junction | Cracked, shrunken, peeling bead; water trickling in at the edge | Remove and re-bead with silicone or PU sealant | DIY |
| Weatherstrip / EPDM gasket | Between the moving sash and the fixed frame | Stops draughts and rattle when the window is shut | Whistling air, dust line, flattened or torn rubber | Measure, source matching profile, fit | DIY |
| IGU edge seal | Inside a double-glazed (DGU/IGU) unit, around the glass spacer | Holds inert gas and keeps moisture out between panes | Fog or condensation between the panes that you cannot wipe off | Replace the whole insulated glass unit (keep the frame) | Pro |
The single most useful thing to learn here: fog between two panes of glass is not a cleaning problem and not a caulk problem. It is a dead IGU, and no sealant on the market reliably brings it back.
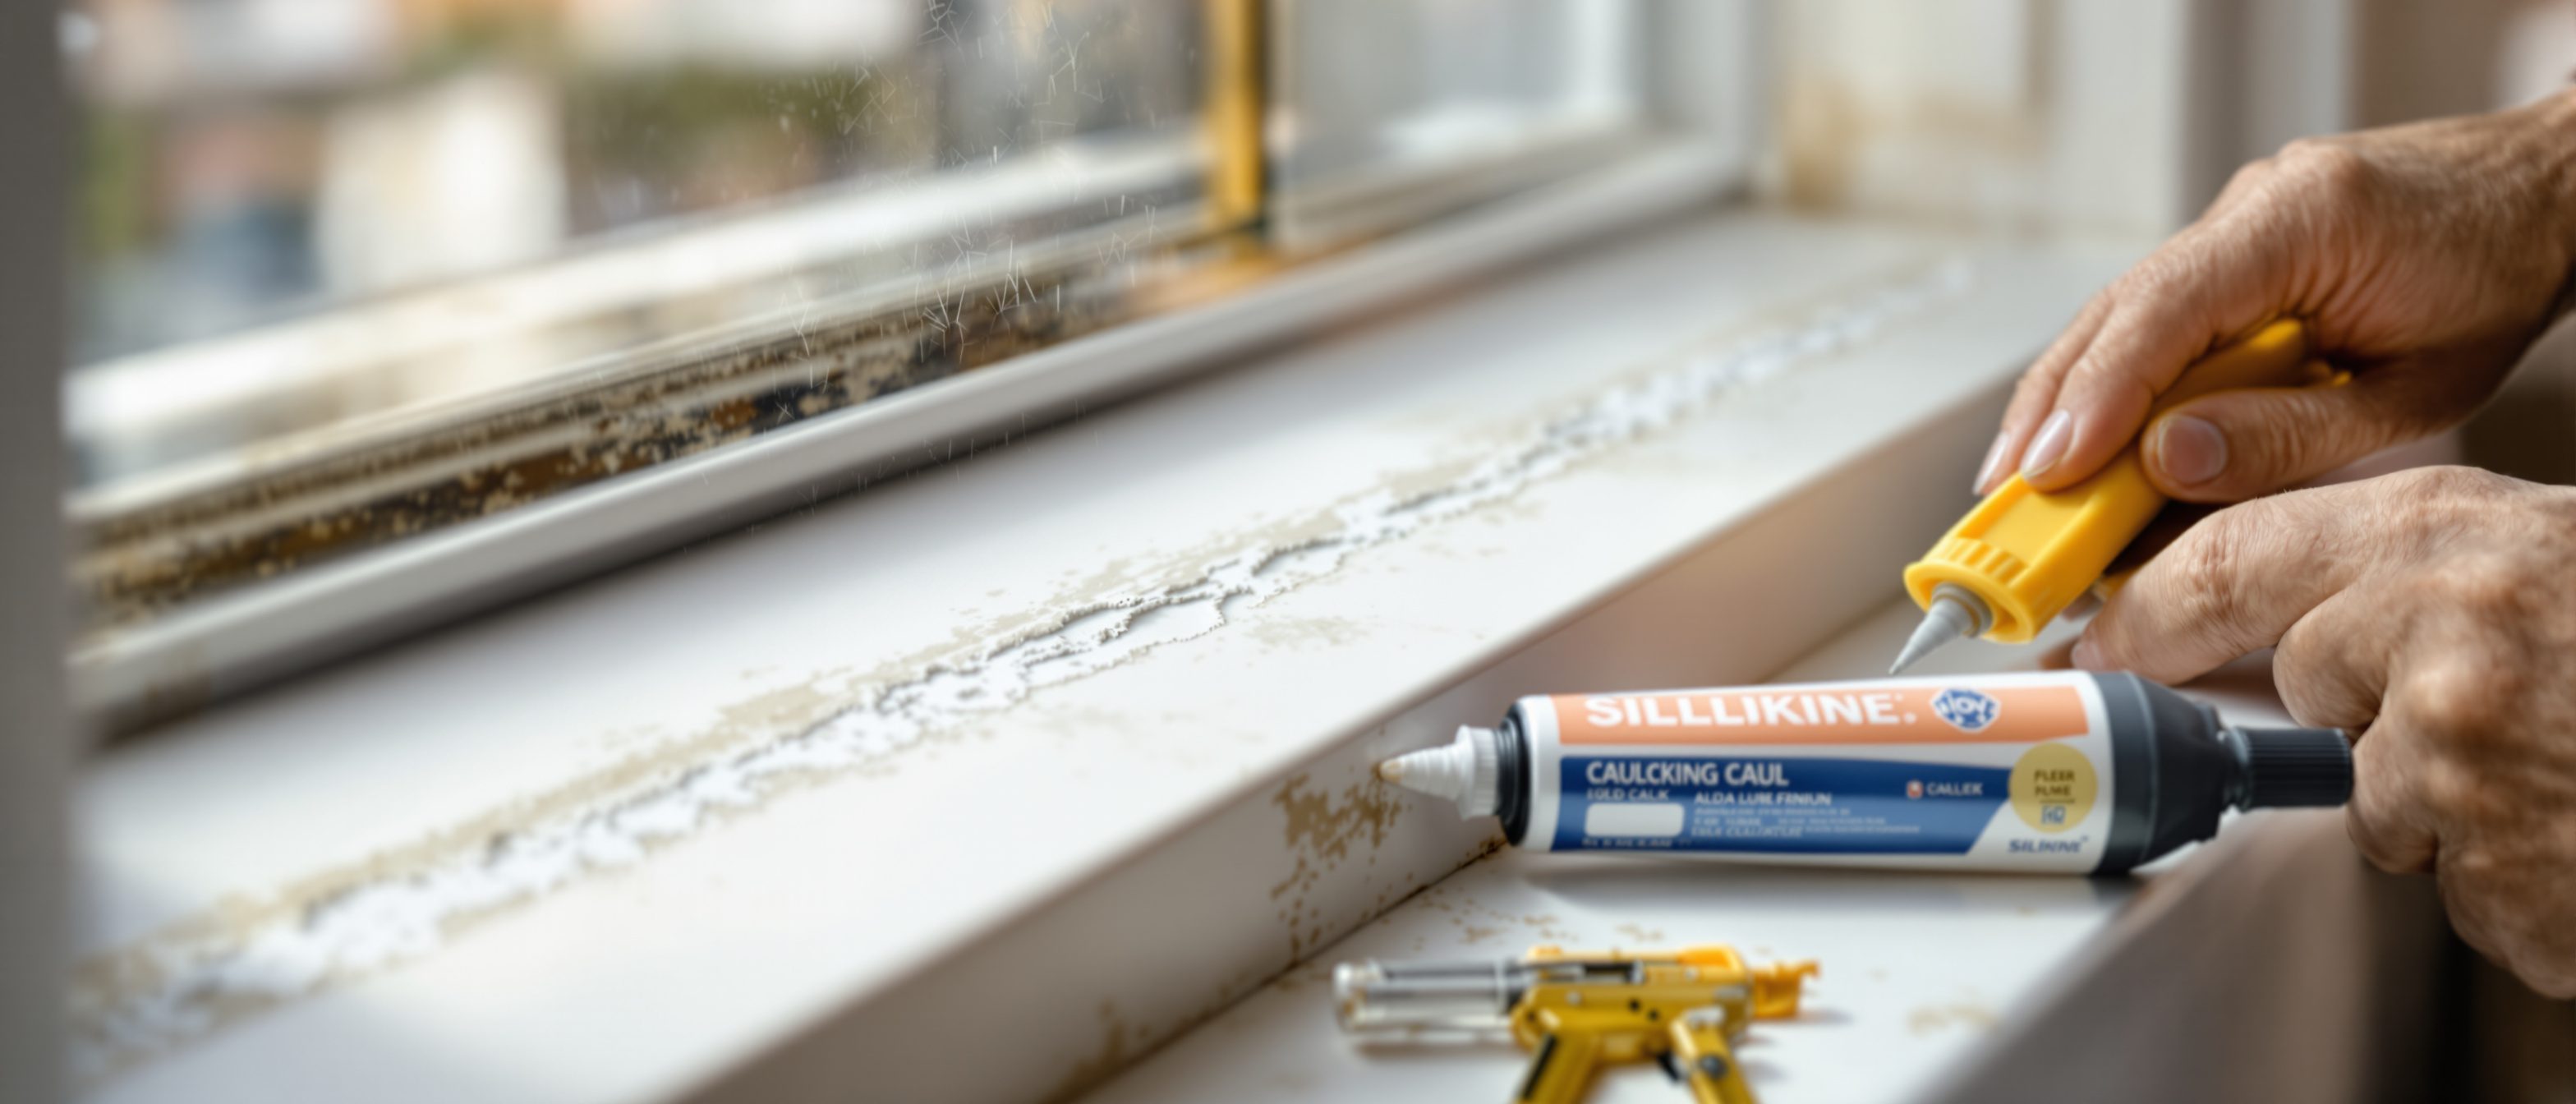
Seal 1 — perimeter silicone / PU caulk (DIY)
This is the bead of sealant where the window frame meets the wall. In Indian conditions it is the first seal to go: UV from harsh sun makes silicone brittle, monsoon cycles flex the joint, and a cheap acrylic "putty" bead can crack within a couple of years.

Tools and materials
- Utility knife or caulk-removal tool
- Stiff brush, mild detergent, clean dry cloth
- Backer rod (foam cord) for gaps wider than about 6 mm
- Neutral-cure silicone or polyurethane sealant plus a caulking gun
- Masking tape for clean edges
Steps
1. Cut out the old bead. Slice along both edges with the knife and peel the old caulk away. Get all of it — new sealant will not bond over crumbling old material.
2. Clean and dry. Brush out grit, wash with mild detergent, wipe, and let the joint dry fully. A damp joint is the most common reason a re-caulk fails. Avoid abrasives that scratch aluminium or dull uPVC.
3. Pack deep gaps. Press backer rod into any gap wider than ~6 mm so the sealant forms a proper hourglass bead instead of slumping into the void.
4. Tape and bead. Run masking tape either side, lay a steady continuous bead, then tool it smooth with a wet finger or spoon. Pull the tape before it skins.
5. Cure. Keep it dry for the cure time on the tube (usually 24 hours) — so plan this for a dry spell, not mid-monsoon.
This overlaps with proactive window waterproofing, which treats the whole keep-water-out system; here we are replacing one specific bead.
Seal 2 — weatherstripping / EPDM gaskets (DIY)
Weatherstrip is the rubber or foam gasket between the moving sash and the fixed frame. When it flattens, tears or hardens, you get draughts, dust ingress and rattle even with the window shut. On uPVC and aluminium systems it is usually a push-in EPDM gasket sitting in a groove; on older wooden windows it may be self-adhesive foam or a brush strip.

Steps
1. Identify the profile. Pull a short length of old gasket out and take it to the dealer — EPDM comes in many bulb and fin profiles, and the wrong one will not seat or will be too tight to close. For system windows, match the brand's profile.
2. Measure the full run. Measure every edge the gasket covers and add ~10 per cent. Buy from one batch so colour and profile match.
3. Remove the old gasket. Pull the push-in type straight out of its groove. For self-adhesive foam, peel it off and clean the residue with mild detergent (no harsh solvents).
4. Fit the new one. Start at a corner, press the bulb into the groove along the run, and cut cleanly at corners. Do not stretch it as you go or it will shrink back and leave gaps. Self-adhesive types go onto a clean dry surface only.
5. Test the close. Shut the window — it should compress the gasket slightly with firm, not forced, action. If it will not latch, the profile is too thick; if it whistles, too thin.
Stiff, sticking operation after a gasket swap often points to hardware, not the seal — see window hardware maintenance for hinges, stays and lubrication.
Seal 3 — the IGU edge seal (call a pro)
A double-glazed unit (IGU/DGU) is two panes bonded to a spacer with a sealed, often gas-filled cavity. The edge seal keeps moisture out and gas in. When it fails, humid air seeps in, condenses on cooling, and you get permanent fog, haze or water droplets between the panes — visible inside the glass, untouchable by any cloth.

Why you cannot reseal it. The damage is the lost gas and the moisture already inside the cavity. Sealant on the outside edge cannot re-pressurise the unit or remove trapped water. "Defogging" services exist but rarely restore insulation or stay clear in humid Indian climates.
The honest fix: replace the insulated glass unit — the glass sandwich only. The frame and sash stay; a glazier measures the unit, orders a matching replacement, and reglazes it. To choose the right replacement spec (Low-E, gas fill, spacer), read types of glass for windows, which covers the IGU and foggy-glazing context in detail.
| Symptom | Likely seal | Action |
|---|---|---|
| Water at the frame-to-wall edge after rain | Perimeter caulk | Re-bead (DIY) |
| Whistling, dust, draught when shut | Weatherstrip gasket | Replace gasket (DIY) |
| Fog or droplets trapped between two panes | IGU edge seal | Replace the glass unit (pro) |
| Streaks or haze you can wipe off | None — just dirty glass | Clean it (glass cleaning) |
Do and avoid
| Do | Avoid |
|---|---|
| Remove all old caulk before re-beading | Caulking over cracked old sealant |
| Let joints dry fully before sealing | Sealing during or just after rain |
| Take a sample gasket to match the profile | Buying a guessed weatherstrip size |
| Replace a foggy IGU as a unit | Trying to "reseal" or scrape fog off inner panes |
| Use neutral-cure silicone or PU | Cheap acrylic putty on exposed exterior joints |
For material-specific quirks — why uPVC gaskets need gentle cleaners, why aluminium tracks suit silicone spray — compare with window frame materials and the right window type in types of home windows.
References
Export this guide
Related Guides — Deep-dive reading
Window Leak Repair Guide
How to find the source of an active window leak and fix it — the top-down spray test, a leak-source map, and the right repair for each zone
Windows & GlazingWindow Waterproofing Guide for Indian Homes
The keep-water-out system for the windows you already have: perimeter sealant, gaskets, sloped sills, weep holes and a pre-monsoon re-caulking routine.
Windows & GlazingTypes of Home Windows in India (2026): Complete Comparison and How to Choose
Every window type compared on ventilation, cost and best use, plus a frame, glazing and climate framework to choose right.
Windows & GlazingRelated Tools — Try Free
Window Material Comparison Tool
Compare uPVC, aluminium, wood, steel and composite windows on cost, life, upkeep and insulation.
CompareWindow Energy Savings Calculator
Compare standard glazing vs Low-E and DGU windows — annual cooling savings, 10-year savings and payback.
Window CalculatorGlass Selection Tool
Single vs double (DGU) vs triple glazing and the right glass type for your climate, priority and sun.
Window Tool