

Understanding Column Layout Drawings
The skeleton drawing — how to read the grid, column marks, sizes and orientation that decide where every wall, beam and room can go.
Imagine someone hands you a sheet of paper covered in a grid of fine lines, with small filled black rectangles sitting neatly at the crossings, each one tagged with a little code like C1 or C2. There are no rooms drawn on it, no furniture, no doors. It looks less like a house and more like a chessboard that has lost its pieces. That sheet is the column layout — and it is, quietly, the single most important drawing in the whole set.
Think of your house as a body. The walls are the skin, the plumbing is the bloodstream, the wiring is the nervous system. The columns are the skeleton. Everything else hangs off them. And just as you cannot move a person's spine after they are grown without serious surgery, you cannot move a column after the concrete is poured without tearing the building apart. So this is the drawing to read slowly, before anything is dug.
A column layout drawing is the structural plan that fixes the exact position, size, identifying mark and orientation of every vertical RCC (reinforced cement concrete) column in your building, located on a reference grid that the entire set of drawings then obeys.
This guide is written first for the homeowner holding this sheet for the first time, and second for the B.Arch or civil-engineering student and the junior site engineer who wants the real conventions, not a cartoon. If you have not yet read the Construction Drawings Masterclass, start there for the big picture. Then this guide pairs naturally with Beam Layout Drawings Explained (beams sit on these columns), Foundation Drawings Explained (footings sit under them) and the Construction Drawing Review Checklist you will use before the pour.
The column layout is the one drawing where a five-minute mistake becomes a five-lakh repair. Read it like the skeleton it is.
1. The grid: the address system of your house
Before there are columns, there is a grid. The grid is a set of thin reference lines running the full width and length of the building — one family of lines lettered A, B, C across one direction, and another family numbered 1, 2, 3 across the other. Where a letter line crosses a number line, you get an address: A-1, B-2, C-3. By long-standing convention the letters usually run in one direction (often the horizontal sequence of lines) and the numbers in the other, so that no two columns share the same address.
At the end of each grid line sits a small circle — called a grid bubble or grid head — with the letter or number inside it. That bubble is how every other drawing in the set refers back to the same point. The plumber's drawing, the electrician's drawing and the beam drawing all carry the same grid, so when the structural engineer says "the column on B-3," everyone on site is standing in exactly the same place.

Centre-to-centre dimensions
Running alongside the grid you will see a dimension string — a chain of numbers between tick marks — that tells you how far apart the grid lines are. These are almost always measured centre-to-centre (written c/c) of the columns, not face-to-face. So "3600 c/c" means the centres of two adjacent columns are 3.6 metres apart. This matters: a homeowner who measures the clear gap between two finished columns will get a smaller number than the drawing, because the column thickness eats into it.
For students & site engineers: the grid is set out on site first, using the centre-lines, before any excavation. Getting the grid square (checking the diagonals are equal) and correctly oriented to the plot is the single most consequential setting-out task on the project. An out-of-square grid propagates into every beam, wall and tile line above it.

2. Reading a column mark: what C1 actually means
Each solid rectangle on the plan is a column shown in section — that is, sliced through horizontally as if you sawed the building off at waist height and looked down. The black fill (the engineer calls it poche) tells you it is solid RCC. Beside each one is its mark: C1, C2, C3 and so on.
A column mark is a label, not a size. C1 is simply the name of a type of column. Every column tagged C1 anywhere on the plan is identical in size and reinforcement to every other C1. This is efficient: instead of writing the full size and steel against fifty columns, the engineer writes a short mark on the plan and lists the details once, in a separate table called the column schedule (Section 4). So your job reading the plan is to note where each mark sits; the schedule tells you what that mark contains.
| You see on the plan | What it means | Where the detail lives |
|---|---|---|
| A solid filled rectangle | A column, shown cut in section | The plan |
| A tag like C1, C2 | The column type/name | The plan |
| 3600 c/c | Spacing centre-to-centre of columns | Dimension string on the plan |
| A-1, B-2 | The grid address of a column | Grid bubbles on the plan |
| The actual size & steel of C1 | 230 x 450, 6-16Ø, etc. | The column schedule |
Different offices use slightly different mark systems — some write C1, some COL1, some use a number per grid intersection. There is no national law on the letters; what matters is that one mark always means one consistent column, and that the mark on the plan exactly matches a row in the schedule.
3. Orientation: why the same column is drawn two ways
Here is the subtlety most homeowners miss. A rectangular column like 230 x 450 is not square — it is longer one way than the other. Which way it is turned is called its orientation, and it is a deliberate engineering decision drawn carefully onto the plan. Turn a column the wrong way and you have changed both how strong it is and whether it disappears into a wall or juts awkwardly into a room.

Two forces decide orientation:
- Structure. A column resists bending best in its long direction. So the engineer turns the longer dimension (the depth) to line up with the beam that carries the most load — usually the longest-spanning beam. Putting the 450 face along that line gives the column more stiffness exactly where it is pushed hardest. (The reason, for the curious, is that the moment of inertia grows with the cube of the depth.)
- Architecture. Wherever possible the column is turned so its width matches the wall thickness and it hides inside the masonry, with no offset poking into the room. A 230-wide column tucks neatly into a 230 brick wall; the 450 length then runs along the wall, invisible.
When these two wishes fight — the structural best direction would push the column out of the wall — somebody has to compromise, and that conversation between your architect and structural engineer is exactly the kind of thing the column layout records. If you see a column drawn turned across a room rather than along a wall, ask why before it is built.
A column in the wrong orientation is not always weaker — but it is often uglier, and once cast it is permanent. Orientation is cheap to fix on paper and impossible to fix in concrete.
4. The column schedule: the table that completes the plan
The plan tells you where; the column schedule tells you what. It is a table, usually on the same sheet or the next one, with one row per column mark. Read across a row and you learn the column's size, its concrete grade, and its reinforcement — and, crucially, how all three change as the column rises through the building.

A simplified schedule reads like this (all values are indicative — read yours from the stamped drawing):
| Mark | Ground to 1st floor | 1st to 2nd floor | 2nd to terrace | Concrete grade |
|---|---|---|---|---|
| C1 | 230 x 600, 8-16Ø | 230 x 450, 6-16Ø | 230 x 300, 4-16Ø | M25 |
| C2 | 230 x 450, 6-16Ø | 230 x 300, 6-12Ø | 230 x 230, 4-12Ø | M25 |
A few things to decode in that table:
- Size is written width x depth in millimetres, so 230 x 450 is a column 230 mm wide and 450 mm deep. The plain x just means "by."
- Reinforcement like 6-16Ø means six longitudinal steel bars of 16 mm diameter (the Ø symbol means diameter). The links or stirrups that wrap them — often written like 8Ø @ 150 c/c — are usually detailed separately; see Reinforcement Drawings Simplified.
- Columns shrink as they rise. The ground-floor column carries the weight of everything above it, so it is biggest. By the terrace it carries only the roof, so it can be smaller with less steel. This stepping-down is normal and economical, not a mistake.

For students & site engineers: the schedule is also where the codes show up. Under IS 456:2000, longitudinal steel in a column must be at least 0.8% and at most 6% of the gross section (and practically not more than about 4% where bars lap), with a minimum of four bars in a rectangular column and no bar smaller than 12 mm. Clear cover to the steel is typically taken as around 40 mm for a column (confirm the value on your drawing and against exposure conditions). In the higher seismic zones — III, IV and V, which cover well over half of India — the link spacing, hooks and confinement at the column ends follow the ductile-detailing rules of IS 13920:2016 (and even in the lower Zone II it is good practice), which is why you will see stirrups bunched closer near the floor and beam junctions.
5. Why a misplaced column is so expensive
Everything stacks downward onto the columns and upward off them. Get a column wrong and the error does not stay put — it ripples through the whole set.
Three classic problems a homeowner can actually catch on the column layout:
- A column in a doorway or the middle of a room. Because the grid is set structurally, a column can land somewhere architecturally awful — blocking a door, splitting a room, eating a parking bay. Cross-check the column layout against your architectural floor plan. Every column should ideally fall inside a wall.
- A beam with no column under it. A beam must span between supports. If your beam layout shows a beam ending where the column layout has no column, that beam is floating. This is a genuine red flag — raise it. (More in Beam Layout Drawings Explained.)
- A column that clashes with parking or a staircase. Count the columns in the stilt or parking level against the car spaces; a single badly placed column can cost you a car park.
The reason all this is so costly to fix later is sequence. Columns are cast early, on top of footings that were sized and cast for them. Move a column after the footing is in and you may have to redo the footing, the plinth beam, the column itself, every beam framing into it and the slab above. A line moved on paper costs nothing; a column chipped out of cured concrete costs lakhs and weeks — and weakens what remains.
Once the rebar is fixed and the shuttering is up, the geometry on this sheet is committed to concrete. That is exactly why the five minutes spent checking the column layout against your floor plan happen before this stage, not after.
6. How to use this drawing
Lay the column layout next to your architectural floor plan and walk the grid line by line. For each column ask: does it fall inside a wall? Does it block anything? Is its mark listed in the schedule? Does a beam land on it? Then keep the same grid in your hand as you move to the beam layout and foundation drawings — they are the same skeleton seen from above and below.
When you are ready to review the whole set methodically, use the Construction Drawing Review Checklist, and to understand how this sheet talks to all the others, read How All Construction Drawings Work Together. If you are still at the planning stage and want a layout that is sound from the start, explore house plans, generate options with DesignAI, or find an architect to stamp and own the structure.
Image credits
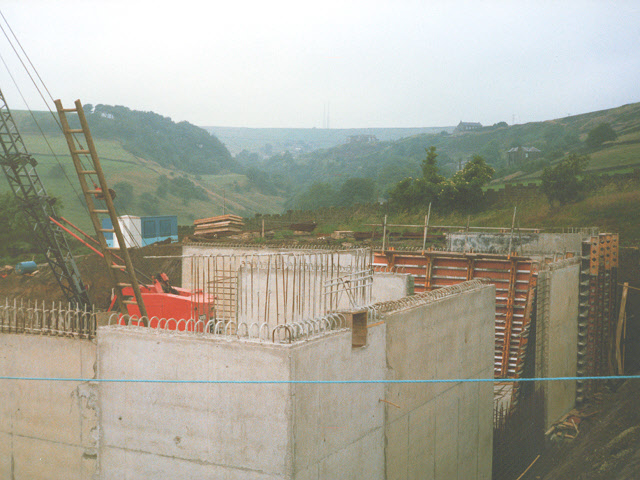
- Photograph (vertical reinforcement starter bars and formwork on a reinforced-concrete structure under construction): Stephen Craven — CC BY-SA 2.0, via Wikimedia Commons. Source: https://commons.wikimedia.org/wiki/File:Windy_End,_new_reservoir_under_construction_-_geograph.org.uk_-_1121314.jpg
References & Further Reading
Indian standards & manuals (confirm the live edition before relying on any clause)
- IS 456:2000 — Plain and Reinforced Concrete, Code of Practice (column reinforcement limits, cover, general RCC detailing).
- IS 13920:2016 — Ductile Design and Detailing of Reinforced Concrete Structures Subjected to Seismic Forces (column confinement and link detailing).
- SP 34 (S&T):1987 / IS 2502 — Handbook and code on concrete reinforcement and detailing, including bar bending.
- IS 962 — Code of practice for architectural and building drawings (drawing conventions, dimensioning, grids).
- NBC 2016 — National Building Code of India, Part 6 (Structural Design) for the framework these drawings sit within.
Books & references
- B. C. Punmia, Ashok Kumar Jain & Arun Kumar Jain — Reinforced Concrete Structures.
- Pillai & Menon — Reinforced Concrete Design (limit-state design, Indian practice).
- Ching, Francis D. K. — Building Construction Illustrated & Architectural Graphics (drawing conventions, the universal grammar of plans).
Companion Studio Matrx guides
- Construction Drawings Masterclass — the pillar overview of the whole set.
- Beam Layout Drawings Explained — what sits on these columns.
- Foundation Drawings Explained — what sits under them.
- Reinforcement Drawings Simplified — decoding 6-16Ø and 8Ø @ 150 c/c.
- Construction Drawing Review Checklist — the pre-pour walkthrough.
Author's Note — Amogh N P. I have watched more than one family stand in a half-built house and discover a column exactly where they wanted a doorway, and the silence in that moment is something I never want you to feel. The column layout is the cheapest, quietest place to catch that mistake — five minutes with this sheet and your floor plan side by side. Please spend them.
Disclaimer. This guide is an educational overview to help you read and question your drawings; it is not a substitute for a licensed structural engineer, MEP consultant or registered architect. All sizes, grades, spacings, cover and reinforcement values here are indicative and typical only — act solely on the stamped, project-specific drawings prepared and signed for your building. When in doubt, ask the engineer who sealed the sheet.
Export this guide
Related Guides — Deep-dive reading
Beam Layout Drawings Explained
How the beams that carry your slabs are drawn — beam marks, sizes, the difference between a beam you can see and one hidden in the slab, and why beams must land on columns.
Construction DrawingsHow Architects Read Drawings Differently Than Homeowners
The same sheet, two different readings — what a trained eye notices first, the questions professionals ask of a drawing, and how to start seeing a plan the way your architect does.
Construction DrawingsBathroom Planning for New Homes in India: Get It Right Before You Build
The bathroom decisions you cannot undo once the slab is cast — location and stacking, sunken vs non-sunken slabs, waterproofing, and the plumbing, electrical and ventilation you must coordinate with the civil work, stage by stage.
BathroomsRelated Tools — Try Free
Cross-Ventilation Analyzer
Estimate airflow and air changes per hour (ACH) from room size, window areas, layout, and local wind — with NBC 2016 Part 8 compliance check.
Ventilation CalculatorInterior Layout Planner — Printable Graph Grid
Printable graph grid to sketch room layouts to scale before committing to furniture placement.
Layout ToolWindow Orientation Planner
Pick the best window type, glass and shading by wall direction — north, east, south and west.
Window Tool