
Gypsum Plaster vs Cement Plaster
The finish under your paint — gypsum's glass-smooth speed versus cement's tough water resistance, where each must and must not be used, and the cost reality.
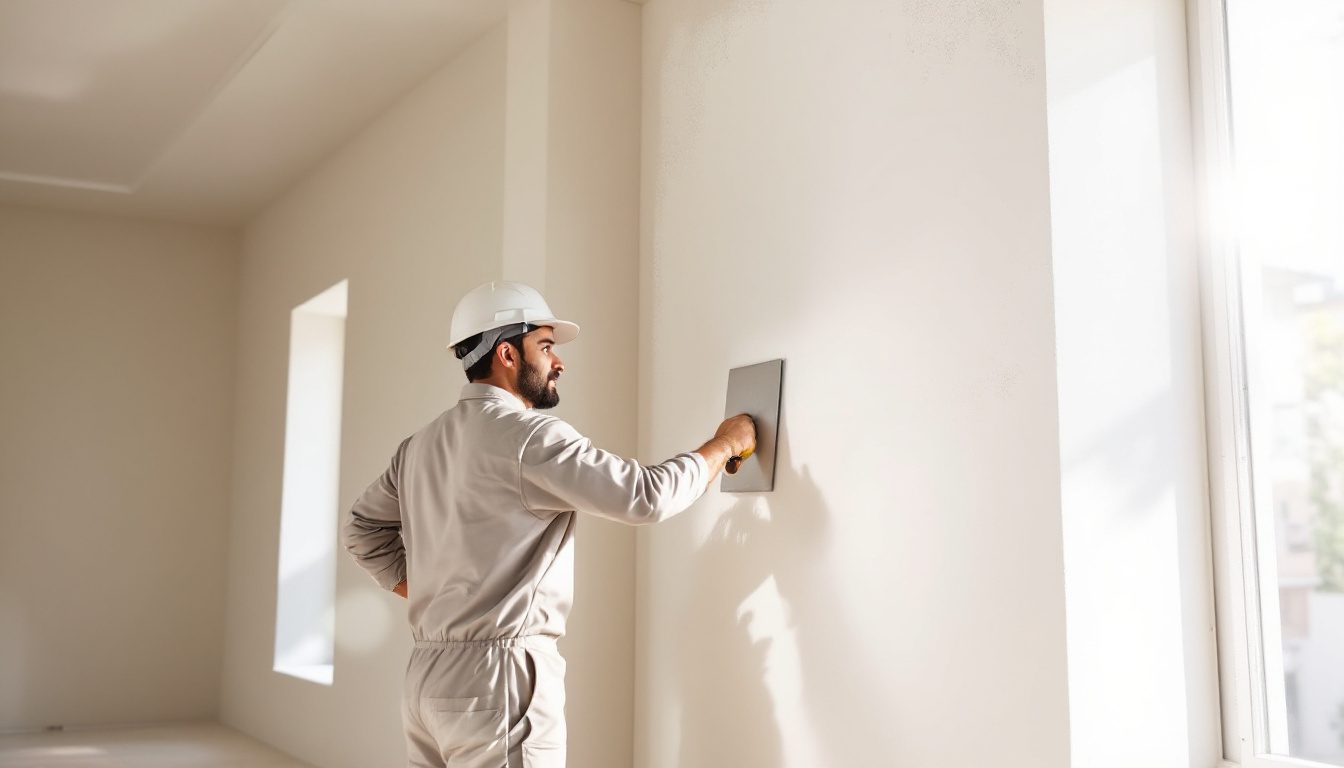
The painter arrived on a Tuesday and ran his fingers along the wall the way a sculptor admires a casting. "Whoever did this gypsum work saved me two days," he said, setting down his putty bucket — the wall was already paint-ready. Across the corridor, the bathroom contractor was doing something entirely different: mixing cement and sand on the floor, laying a rougher grey coat, and telling the homeowner he would come back in three days for curing. Same house, same week, two completely different plastering systems — and both were exactly right for their location.
That split confuses a lot of people. Gypsum plaster is faster, smoother, cleaner, and increasingly popular in Indian cities. Yet every experienced site engineer will say flatly: "Not in the bathroom." The reason for that one hard rule — and for everything else about these two materials — comes down to water. This guide lays out the full head-to-head so you can walk into any plastering conversation, or any hardware shop, and know exactly what to ask for.
Gypsum plaster is a factory-made, fast-setting interior finish that gives a glass-smooth wall surface ready for paint without any putty; cement-sand plaster is a site-mixed, slower-setting coat that is tougher, water-resistant, and mandatory wherever moisture or the outdoors can reach a wall.
1. What Each Material Actually Is
Understanding what you are buying matters, because the two products are made of entirely different chemistry.
Cement plaster is a mix you prepare on site: ordinary Portland cement (or Portland pozzolana cement), clean river or M-sand, and water. The ratio is typically 1:3 to 1:6 (cement:sand by volume) depending on the application — a tighter mix for external walls, a slightly leaner one for internal rendering. It is governed by IS 1661 (Code of Practice for Application of Cement and Cement-Lime Plaster Finishes) and IS 2402 (Code of Practice for External Rendered Finishes). When cement hydrates, it forms calcium silicate hydrate — the same crystalline glue that makes concrete strong. That reaction needs water to complete, which is why cement plaster must be cured: kept continuously wet for at least seven days.
Gypsum plaster is a factory-manufactured product. Calcium sulfate dihydrate (natural gypsum rock) is heated (calcined) at around 150–180 °C to drive out most of its crystal water, producing hemi-hydrate calcium sulfate — also called Plaster of Paris or POP in the trade. Manufacturers grind it fine, add retarders (so it does not set too fast on a wall) and sometimes a lightweight filler, then bag it. On site, you add only clean water and stir; the product self-levels beautifully. It is governed in India by IS 2547 (Gypsum Plaster) and IS 12860 (Ready Mixed Dry Plasters — specification). Unlike cement, gypsum's setting reaction is a re-hydration: the hemi-hydrate simply absorbs water back and re-forms interlocked crystals of dihydrate. No prolonged water curing is needed or wanted.
"Gypsum is one of the oldest building binders — the Egyptians used calcined gypsum in the Great Pyramid. Its weakness has always been water. Its strength has always been smoothness." — S.K. Duggal, Building Materials, 5th ed.
Both materials produce a bonded wall coat, both go under paint, and both look similar from a distance. But they are chemically, mechanically, and zonally different in every way that matters.
2. The Head-to-Head: Eight Properties That Decide Everything
The table below is the quickest summary; the subsections below it give the detail you need to actually apply it.
| Property | Gypsum Plaster | Cement-Sand Plaster |
|---|---|---|
| Governing IS code | IS 2547, IS 12860 | IS 1661 (internal), IS 2402 (external) |
| Base chemistry | Calcined calcium sulfate (hemi-hydrate) | Portland cement + sand + water |
| Factory vs site-mixed | Factory product — just add water | Site-mixed: cement + sand + water |
| Finish smoothness | Class A, glass-smooth | Class C–D; rough, needs putty coat |
| Coats required | Single coat (6–12 mm) | Two coats: scratch coat + finish coat (18–25 mm) |
| Curing requirement | None | Minimum 7 days of wet curing |
| Water resistance | Very poor — dissolves/softens with moisture | Good — essential for wet zones |
| Shrinkage cracking | Very low (gypsum expands slightly on setting) | Moderate — common if curing is skipped |
| Typical dry density | 1,000–1,200 kg/m³ | 1,700–2,000 kg/m³ |
| Dead load (20 mm slab) | ~20–24 kg/m² | ~34–40 kg/m² |
| Hardness (Mohs scale) | ~2 (easily scratched) | ~5–6 (harder) |
| Thermal conductivity | ~0.16–0.30 W/m·K (slightly insulating) | ~0.6–1.0 W/m·K |
2.1 Finish and Smoothness
Gypsum plaster's self-levelling chemistry produces a surface so smooth that in most residential work you can skip wall putty entirely and go straight to primer and paint. This is not marketing — it is why painters in Delhi, Pune, and Bengaluru prefer it for internal walls. Cement plaster, even when floated well, has a granular texture from the sand particles. A skim coat of wall putty is almost always needed before painting on cement-plastered surfaces, adding cost and time.
2.2 Application Speed and Labour
A skilled plasterer can apply gypsum plaster to a room's four walls and ceiling in a single day, because only one coat is needed and no curing downtime follows. With cement plaster you apply a scratch coat, wait for it to stiffen, then apply the finish coat, then cure for at least seven days before any painting work starts. In a project where walls, paint, and fit-out run in a tight sequence, gypsum plaster can cut two to three weeks off the schedule — a serious saving in a city apartment.
2.3 Curing: Where Gypsum Saves and Where It Misleads
Cement plaster's curing requirement is genuine: skip it, and the surface layer carbonates before the cement hydrates fully, producing a chalky, friable finish that cracks and dusts. Gypsum needs no curing — its setting reaction is complete within 24–48 hours. But "no curing needed" does NOT mean "no water sensitivity." The opposite: gypsum has absorbed its process water to set, but it will re-absorb ambient water from leaks, moisture-laden walls, or damp monsoon air, and when it does, it softens, blisters, and eventually falls off. This is the central fact of the gypsum vs cement decision.
"Never use gypsum plaster below the damp-proof course level or in any area subject to dampness — its susceptibility to moisture is a fundamental limitation." — IS 2547 (Part 1): 2004, Clause 4.1.
2.4 Water Resistance — The Decisive Caveat
This deserves its own heading because it is non-negotiable.
Gypsum is calcium sulfate. Water rehydrates it. A wet or humid environment will, over time, reverse the setting reaction. The consequence on a bathroom wall is blistering, crumbling, and eventually chunks of plaster falling off, taking the tile adhesive with them. The consequences on an external wall are just as bad: the first monsoon weakens the surface; by year three the wall looks leprous. No coating or sealer will reliably protect gypsum plaster in a permanently wet zone.
Cement plaster, if mixed and applied correctly, is water-tolerant. It is the standard for external walls, bathrooms, kitchen splash zones, areas below the damp-proof course (DPC), and any surface that may see standing or flowing water. For a deeper look at why moisture infiltration is so destructive, see why buildings leak and the full guide to waterproofing chemicals.
The rule: if water can ever reach the wall, use cement plaster. Full stop.
2.5 Cracking and Shrinkage
Cement plaster shrinks as it dries — slightly, but enough to cause hairline cracks if the mix is too rich (high cement:sand ratio), if curing is skipped, or if the underlying wall has differential movement. Gypsum plaster expands very slightly on setting (the re-hydration crystallisation increases volume by roughly 1%), so shrinkage cracking is rare. For a comprehensive look at why plastered and concrete surfaces crack, see what makes buildings crack.
2.6 Thickness and Dead Load
Cement plaster on an internal wall is typically applied in two coats totalling 18–25 mm. Gypsum is applied in a single coat of 6–12 mm. In a concrete-frame apartment building where slabs are already at their structural design load, using gypsum on all internal walls and ceilings reduces the dead load by roughly 15–20 kg per square metre of wall area — a meaningful quantity across hundreds of flats. This is part of why high-rise developers and large residential projects shifted to gypsum plaster in the 2010s.
2.7 Hardness and Abuse Resistance
Gypsum is a soft mineral (Mohs 2). A sharp corner, a doorknob, a child's toy — any of these can dent or gouge a gypsum-plastered wall. Cement plaster is significantly harder and more abrasion-resistant. For utility corridors, ground-floor walls of a house with children and pets, or industrial spaces, cement plaster's toughness is an advantage.
2.8 Thermal Feel
Gypsum's lower thermal conductivity means walls feel slightly less cold in winter and slightly more comfortable in summer than cement-plastered walls — a small but perceptible difference in bare-walled, uninsulated Indian construction. It also absorbs and releases small amounts of moisture (hygroscopic buffering), which can modestly regulate indoor humidity.
3. Zone-by-Zone Decision Map
This is the practical decision table most homeowners and site engineers actually need.
| Zone / Surface | Gypsum Plaster | Cement Plaster | Notes |
|---|---|---|---|
| Internal dry walls (living, dining, bedroom) | Preferred | Acceptable | Gypsum saves time + putty |
| Internal ceilings (dry areas) | Preferred | Acceptable | Gypsum lighter, smoother |
| Bathroom walls (wet area) | Never | Mandatory | Gypsum fails with moisture |
| Kitchen walls (near sink, splash zone) | Never | Mandatory | Treat as wet area |
| External walls (facade, compound) | Never | Mandatory | Rain, UV, humidity |
| Terrace parapet walls | Never | Mandatory | Exposed to weather |
| Below DPC / plinth area | Never | Mandatory | Rising damp |
| Staircase (public, high-traffic) | Avoid | Preferred | Harder, abuse-resistant |
| Service areas / utility corridors | Avoid | Preferred | Possible water exposure |
| False ceiling board (POP/gypsum board) | Specialist product | Not used | Different from wall plaster |

Gypsum is the right choice for most internal dry surfaces; cement is the only choice wherever moisture can reach.
4. Substrates: What Each Plaster Bonds To
Gypsum plaster bonds well to:
- AAC (autoclaved aerated concrete) blocks — AAC's porous surface grips gypsum excellently, and because AAC is also used for internal partition walls in modern Indian construction, the two are a natural pair. See the detailed comparison at AAC vs red brick.
- Dense concrete (RCC columns, beams, slabs) — a bonding agent or key coat (slurry of cement + bonding compound) is needed on very smooth poured concrete, because gypsum cannot key into a glossy surface.
- Brick masonry (internal walls) — works well; rake the joints 10–12 mm before applying.
- Concrete block masonry (internal) — similar to brick; joint raking or bonding agent on smooth-faced blocks.
Gypsum plaster should NOT be applied over:
- Existing cement or lime plaster that is damp, friable, or unsound — always hack off and allow to dry.
- Any surface where moisture may travel through the wall from outside.
- Surfaces in contact with iron or steel without corrosion protection — gypsum is mildly sulfate-aggressive and will accelerate rust.
Cement plaster bonds to virtually all masonry substrates. On very smooth concrete, a bonding slurry helps adhesion, same as gypsum. For a broader look at how different modern wall materials interact with finishes, see modern construction materials.
5. POP vs Gypsum Plaster — The Confusion Indian Homeowners Face
Many homeowners conflate three different gypsum-family products. The differences are important.
| Product | What it is | Typical use | Setting time | Strength |
|---|---|---|---|---|
| Plaster of Paris (POP) | Pure calcined gypsum, no retarder | False ceiling ornaments, cornices, repair patching | 5–20 minutes (very fast) | Low — brittle |
| POP skim / POP finish coat | POP trowelled thin over cement-plastered wall | Old-school wall finish before paint | 10–30 minutes | Low — cracks over time |
| Ready-mix gypsum wall plaster (IS 12860) | Calcined gypsum + retarder + fillers, factory bag | Wall + ceiling plaster (single coat) | 45–90 minutes (controlled) | Moderate — better than POP skim |
| Gypsum board (dry lining) | Factory sheet — gypsum core between paper | Partition walls, false ceiling with metal frame | N/A | Fire-rated, impact rated |
The modern product referred to when contractors say "gypsum plaster" is the ready-mix IS 12860 bag product — not loose POP. POP skim on a cement-plastered wall is an older technique that produces a surface prone to cracking and delamination over time. The bag-product gypsum plaster applied as the sole finish coat is a superior system in all dry areas.
"POP finish over cement plaster is two different binders in layers — the shrinkage mismatch at the interface is a classic cause of map cracking in older apartments." — Field observation, structural finishing consultants.
6. Application: Step by Step
Cement plaster (internal wall, two-coat)
1. Clean the substrate; rake mortar joints to 10 mm depth; wet the wall.
2. Apply scratch coat (1:4 or 1:3 mix), 10–12 mm thick; key the surface with a comb scratcher.
3. Allow 24 hours for the scratch coat to stiffen (not dry out — keep moist).
4. Apply finish coat (1:4 or 1:6 mix), 8–12 mm thick; float and trowel to the required texture.
5. Cure: wet the plastered surface twice daily for a minimum 7 days. Cover with gunny bags or curing compound in hot weather. This step is the one most contractors skip — do not let them.
6. After curing, allow to dry (typically 14–21 days in Indian summer conditions, longer in monsoon). Then apply wall putty, prime, paint.
Gypsum plaster (internal wall, single coat)
1. Clean substrate; ensure it is dry; apply a bonding agent if the surface is smooth concrete.
2. Mix the bag product with clean water (typically 0.6–0.8 litres per kg of powder) to a lump-free slurry; use a paddle mixer.
3. Apply 6–12 mm in one pass; rule off with an aluminium straight edge; final trowel pass for glass finish.
4. Allow to set fully (24–48 hours); lightly sand any trowel marks.
5. Prime and paint — no putty needed in most residential applications.

Gypsum's shorter sequence is the main reason contractors price it similarly to cement despite higher material cost.
7. Cost Comparison: What You Actually Pay
Pricing for 2026 in Indian metros — use as a guide, not a tender document.
| Cost Element | Cement Plaster (per sq ft) | Gypsum Plaster (per sq ft) |
|---|---|---|
| Cement + sand material | ₹12–18 | — |
| Gypsum bag product material | — | ₹22–30 |
| Bonding agent (if needed) | ₹2–4 | ₹2–4 |
| Labour (plastering) | ₹18–28 | ₹14–20 |
| Wall putty (needed on cement) | ₹8–14 | ₹0–4 (often skip) |
| Curing water + labour | ₹2–5 | ₹0 |
| Total indicative range | ₹42–69 | ₹38–58 |
| Timeline (plaster to paint-ready) | 14–21 days | 3–4 days |
These are indicative 2026 ranges; actual rates vary by city, floor area, quality of contractor, and market conditions. The headline observation: gypsum material is more expensive per square foot, but when you remove wall putty costs and account for the drastically shorter timeline (cash flow, rentals, contractor mobilisation), the all-in cost is often comparable or slightly lower for gypsum in dry areas.
The picture shifts in a labour-rich, material-cost-sensitive smaller town or tier-3 city, where cement-sand ratios are cheaper to mix on site and daily labour rates are lower. In those contexts, cement plaster may remain less expensive even all-in. Get itemised quotes for both systems and compare line by line.
"The best material is not always the cheapest per bag — it is the one whose total life-cycle cost, including rework, is lowest." — M.L. Gambhir, Concrete Technology, 4th ed.

Gypsum's higher bag price is partially offset by eliminating putty, curing labour, and lost project time.
8. Visual: What Each System Looks Like

The cement system is thicker, heavier, and needs an extra putty layer; gypsum is thinner and paint-ready.
The physical difference shows up in two places. First, thickness: a cement-plastered wall eats 18–25 mm of floor area on each face; gypsum eats 6–12 mm. In a 10 × 12 ft bedroom, this is small but real. Second, the paint job: on cement-plastered walls without thorough putty work, you can see micro-texture in raking light. On gypsum-plastered walls, the painter's job is genuinely easier — two coats of emulsion and done.
9. The Water Caveat — Visualised

The single biggest installation mistake: gypsum in a wet area. When the plaster comes off the bathroom wall, it takes the tiles with it.
The practical consequences of using gypsum in a bathroom are ugly and expensive. You do not see the failure for six to eighteen months — it starts behind the tiles as a slow softening of the plaster. Then grout lines start weeping. Then tiles begin to sound hollow. Then they crack off, often in sections, revealing a soft, crumbly, whitish mush behind them. Rectifying this means hacking all the tiles, removing all the plaster, drying the wall for weeks, applying correct cement plaster, curing, re-tiling. The cost is many times what using the right material upfront would have been. For more on moisture-driven failures, see waterproofing failures explained.
10. Common Mistakes and Consequences
| Mistake | System | Consequence |
|---|---|---|
| Gypsum plaster in bathroom, kitchen, or wet area | Gypsum | Plaster softens, tiles fall, expensive rework |
| Gypsum on external wall or below DPC | Gypsum | First monsoon blisters and crumbles the surface |
| Applying gypsum over damp substrate | Gypsum | Adhesion failure, delamination within months |
| No bonding agent on smooth RCC surface | Gypsum | Hollow-sounding patches, sections drop off |
| Over-thick gypsum coat (more than 15 mm single layer) | Gypsum | Cracking and sagging as it sets |
| Skipping cement plaster curing | Cement | Shrinkage cracking, chalky surface, weak finish |
| Too-rich cement mix (1:2 or tighter) | Cement | Excessive shrinkage cracking |
| Painting cement plaster without putty | Cement | Paint peels in patches, poor coverage |
| Using POP skim over cement plaster (old method) | POP over cement | Map cracking over 2–3 years — binder mismatch |
| Expecting gypsum plaster to perform like cement for durability | Gypsum | Gouges, dents, not suitable for high-traffic walls |
11. Putty and Paint Readiness
The relationship between plaster type and wall putty matters because it affects your painting budget and timeline.
Cement plaster and putty: Almost all cement-plastered walls in Indian residential work get a coat of white cement-based wall putty (brands like Birla White, JK Wall Putty, Asian Putty — treat as categories) before priming and painting. Putty fills micro-pores and the sand texture, giving the paint a smooth base. Skipping it produces a chalky, uneven painted surface. This adds ₹8–14 per sq ft and typically 2–3 more days of work.
Gypsum plaster and putty: In good gypsum work, no putty is needed. The surface is already smooth enough. Some painters apply a thin skim of putty at trowel marks or joints, but a skilled gypsum plasterer minimises these. This is the efficiency gain — not having to putty 1,500 sq ft of wall in a standard apartment is a meaningful saving.
Whichever system you use, do not skip primer. A quality alkali-resistant primer seals the surface and dramatically improves paint adhesion and coverage — on gypsum especially, because new gypsum is highly alkaline and will otherwise degrade water-based paints.
12. Verdict: What Should You Specify?
The answer is not one or the other — it is both, in the right zones. Here is the decision rule:
Use gypsum plaster for:
- All internal dry walls: living room, dining, bedrooms, corridors, study
- Internal ceilings (dry areas)
- Any space where speed-to-handover matters
- High-rise apartments where dead load reduction is a structural priority
- Projects with tight schedules where you cannot wait 3 weeks for cement curing
Use cement plaster for:
- All bathrooms and toilets — no exception
- Kitchen walls, particularly near the sink and cooking range
- All external walls and facades
- Any wall below the DPC or near the plinth
- Compound walls, parapets, terrace areas
- High-traffic areas where abrasion and impact are concerns
For a full new home build in a typical Indian city flat: gypsum plaster is right for roughly 70–75% of the wall and ceiling area (all internal dry zones); cement plaster is right for 25–30% (wet areas and external). Using one system everywhere is always a mistake — cheap contractors who plaster the entire house in gypsum to save time are setting you up for a bathroom failure. Cheap contractors who use cement everywhere are wasting your schedule and giving you a wall that needs heavy putty work.
"The division of labour between gypsum and cement plaster is not a preference — it is a functional requirement dictated by water chemistry." — Structural finishing consultant, site observation, Mumbai 2024.
The interplay between plaster and the wall material beneath it — brick, block, AAC, concrete — is explored in detail in material lifespan comparison. For the full picture of how all these shell materials work together, start with the cluster pillar at modern construction materials.
If you are still unsure which system your contractor is proposing — or whether they are specifying the right product for each zone — the Studio Matrx DesignAI assistant can help you frame the right questions before your next site meeting.
Author's Note
My father built our house in the early 1990s with full cement plaster everywhere — walls, ceilings, bathroom, bedroom, the lot. The painter spent weeks on putty. Thirty years later that house is still standing. But in the fifteen years since, I have watched dozens of apartment projects where a contractor, cutting corners or simply not knowing better, plastered a bathroom with gypsum — and three years later the tiles were off and the wall was paste. The fix cost more than the original bathroom fit-out.
This guide exists because the right material is not always obvious, and a contractor who says "gypsum everywhere — faster and cheaper" is not always your friend. Learn the water rule, stick to it, and your walls will last a generation.
— Amogh N P
Disclaimer
This guide is for educational purposes. Material prices and brand availability change; the figures here are indicative 2026 ranges. IS code clause numbers and requirements should be verified against the latest BIS publications. For structural decisions, waterproofing specifications, and construction quality control on your specific project, always consult a qualified structural engineer or architect.
References
1. Bureau of Indian Standards. IS 2547 (Part 1): 2004 — Gypsum Plaster: Ordinary Plaster. BIS, New Delhi.
2. Bureau of Indian Standards. IS 12860: 1990 — Ready-Mixed Dry Plasters — Specification. BIS, New Delhi.
3. Bureau of Indian Standards. IS 1661: 1972 — Code of Practice for Application of Cement and Cement-Lime Plaster Finishes. BIS, New Delhi.
4. Bureau of Indian Standards. IS 2402: 1963 — Code of Practice for External Rendered Finishes. BIS, New Delhi.
5. Bureau of Indian Standards. IS 269: 2015 — Ordinary Portland Cement — Specification. BIS, New Delhi.
6. Bureau of Indian Standards. IS 1489 (Part 1): 1991 — Portland Pozzolana Cement — Fly Ash Based — Specification. BIS, New Delhi.
7. Duggal, S.K. Building Materials. 5th ed. New Age International, New Delhi, 2017. Chapter 7: Gypsum Products.
8. Gambhir, M.L. Concrete Technology: Theory and Practice. 4th ed. Tata McGraw-Hill, New Delhi, 2004.
9. Shetty, M.S. Concrete Technology — Theory and Practice. S. Chand, New Delhi, 2005.
10. Neville, A.M. Properties of Concrete. 5th ed. Pearson, Harlow, 2011. Chapter 1: Portland Cement.
11. Mehta, P.K. and Monteiro, P.J.M. Concrete: Microstructure, Properties and Materials. 4th ed. McGraw-Hill, New York, 2014.
12. National Building Code of India 2016 (NBC 2016), Part 5: Building Materials, Section 5.5: Gypsum Products and Plasters. BIS, New Delhi.
13. Chudley, R. and Greeno, R. Building Construction Handbook. 10th ed. Routledge, Abingdon, 2014. Chapter 16: Plastering.
14. Central Public Works Department (CPWD). CPWD Specifications 2019, Vol. 1: Civil Works. Ministry of Housing and Urban Affairs, Government of India. Section: Plaster Works.
15. Bureau of Indian Standards. IS 2645: 2003 — Integral Cement Waterproofing Compounds — Specification. BIS, New Delhi.
Word count: approximately 3,350 words.
Export this guide
Related Guides — Deep-dive reading
Plaster, Render and Texture-Paint Facades in India: The Honest Guide to the Country's Default Wall Finish
A building-physics guide to cement and lime render, exterior emulsion and weatherproof paints, and textured coatings — how these everyday facades are built, why they crack, streak and grow algae, and what actually keeps them looking good in the Indian monsoon.
Building FacadesPorcelain, Ceramic & Sintered-Stone Facade Cladding in India: A Practical Guide
Thin large-format porcelain and sintered-stone slabs can clad a building with the look of marble, concrete or weathered steel at a fraction of stone's weight — but on a facade, the fixing system is a life-safety decision, not a finish choice.
Building FacadesAcrylic vs Cast Iron Bathtub: Which Is Better? (India, 2026)
A fair, India-first head-to-head between an acrylic bathtub and an enamelled cast-iron one — weighed on the factors that actually decide it here: slab load and handling, heat retention, durability, warmth to touch, repairability, price and installation — with a clear verdict by home type and budget.
BathroomsRelated Tools — Try Free
Cross-Ventilation Analyzer
Estimate airflow and air changes per hour (ACH) from room size, window areas, layout, and local wind — with NBC 2016 Part 8 compliance check.
Ventilation CalculatorFalse Ceiling Cost Estimator
Live ₹/sqft across 8 ceiling types — POP, gypsum, designer, metal, PVC, wooden — with cove and spot lighting for 20 Indian cities.
Cost CalculatorHome Building & Interior Cost Calculator — 20 Cities
Construction + interior costs for 20 Indian cities across kitchen, wardrobes, flooring, painting, ceiling.
Cost Calculator