
Dry Bathroom Design India: Wet-and-Dry Layout, Glass Partition & Benefits
How to design a dry bathroom for an Indian home — separating a dry WC and vanity zone from a tanked wet shower with a glass partition — with sizes in mm, rupee costs, and the drainage and ventilation detail that keeps the dry side genuinely dry.
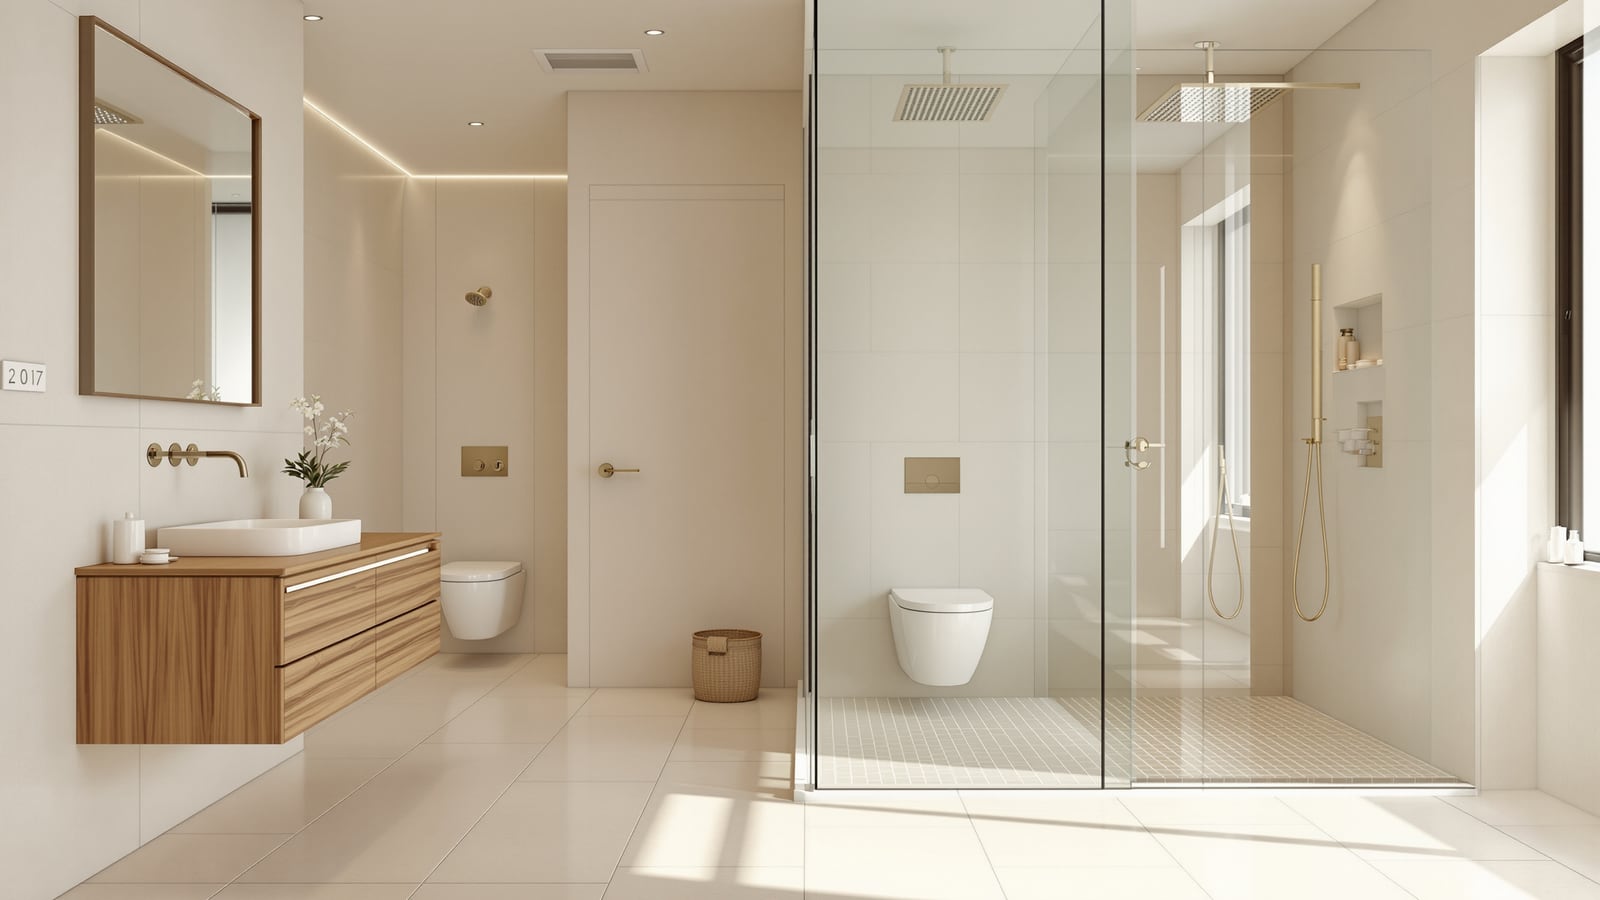
Most Indian bathrooms are built entirely wet. One floor drain, a gentle slope across the whole room, and a health-faucet or shower that sprays water everywhere — so you learn to hop between wet tiles in slippers, and the WC seat, the vanity and the floor stay damp for hours. A dry bathroom, or more accurately a wet-and-dry bathroom, fixes this by dividing the room into two: a tanked, gradient-drained wet zone for the shower, and a dry zone where the WC, basin, mirror and storage stay dry all day. A glass partition or a simple half-height wall holds the split.
This is the dry-bathroom guide in the Studio Matrx bathroom hub. Read it alongside the complete bathroom design guide for India for the codes and fundamentals, and the bathroom layout and planning guide for how the split fits into the wider plan. If you are going the opposite way — a fully open, no-enclosure shower room — see the wet room design guide.
A dry bathroom is not about spending more. It is about drawing one line — the shower partition — and putting drainage, ventilation and the dry fixtures on the correct side of it.
Dry vs wet: what actually changes
In the traditional all-wet Indian bathroom, the entire floor is a shower tray. In a wet-and-dry layout, only a defined enclosure is treated as wet; everything outside it is planned to stay dry.
| Feature | Traditional all-wet | Wet-and-dry (dry bathroom) |
|---|---|---|
| Water spread | Whole floor gets wet | Confined to the shower enclosure |
| Floor slope | Single slope to one drain | Steeper slope only inside the wet zone |
| WC & vanity | Sit in the splash zone | Kept in the permanently dry zone |
| Slip risk | High — wet tiles everywhere | Low — dry side stays dry |
| Cleaning | Constant squeegee, damp corners | Wet zone contained; dry side wipes clean |
| Footwear | Slippers stay wet | Dry-side slippers stay dry |
| Cost | Lowest | Slightly higher (partition + second drain) |
The benefits are practical, not cosmetic. A dry WC seat and dry floor mean far fewer slips — a real concern for children and elderly users, covered in the elderly-friendly bathroom guide. Storage lasts longer because cabinets are not sitting in humidity. And the room dries and smells better, because water no longer pools under fixtures.
The core layout
The single most important decision is which side of the door the wet zone sits on. Put the shower at the far end, away from the entry, so you never walk through the wet zone to reach the WC or basin. Everything the diagram below shows follows from that one rule.
Sensible dimensions for an Indian home:
| Element | Recommended size (mm) | Note |
|---|---|---|
| Wet shower zone | 900 x 900 min; 900 x 1200 comfortable | Fully tanked, its own drain |
| Glass partition height | 1800–2000 | 8–10 mm toughened glass |
| Partition-to-fixture gap | 750–900 circulation | Keep the dry side walkable |
| Dry-zone floor slope | 1:100 to a small drain | For occasional washdown only |
| Wet-zone floor slope | 1:50 to the shower drain | Steeper, so water clears fast |
| Threshold / kerb | 0–12 mm upstand or flush trap | Low kerb or a linear channel at the glass line |
Keeping the dry side dry: the four details that matter
A dry bathroom fails when water crosses the line. Four things stop it.
- A real partition. A fixed 8–10 mm toughened glass panel with a pivot or sliding door is the reliable option. A half-height dwarf wall (900–1000 mm) topped with glass is cheaper and still works well. Even a shower curtain on a good track beats nothing, though it is the weakest choice.
- Two independent drains and slopes. The wet zone gets a steep 1:50 fall to its own trap; the dry zone gets a gentle 1:100 fall to a small drain so you can still swab the floor. Never rely on a single drain to serve both.
- A drainage break at the glass line. A small linear channel or a low kerb where the partition meets the floor stops the shower's runoff from sheeting across into the dry zone. This is the detail most jobs skip.
- Ventilation that actually moves air. A dry bathroom only stays dry if humidity leaves. Size an exhaust fan at roughly 6–8 air changes per hour and vent it outside, not into a false ceiling. Openable louvred windows help in the monsoon. See the humidity notes in the complete bathroom design guide.
Materials and slip safety
Because the dry side is meant to stay dry, you can relax slightly on the dry zone and be strict on the wet zone.
- Wet-zone floor: small-format matt or textured tiles with anti-slip rating R11 or higher; smaller tiles mean more grout lines and more grip. Conform to IS 15622 for ceramic and vitrified tiles.
- Dry-zone floor: you can use larger-format or slightly smoother tiles for a cleaner look, but keep it at least R10 — a stray splash near the basin still happens.
- Partition glass: 8–10 mm toughened (safety) glass; add a nano / anti-spot coating in hard-water areas so you are not scrubbing scale off the panel every week.
- Sanitaryware: wall-hung or floor-mounted WC and basin to IS 2556; wall-hung frees the dry floor for easy cleaning.
Costs in an Indian home
Converting to, or building, a wet-and-dry bathroom costs a little more than an all-wet room — the partition and the second drain are the extras. Indicative ranges (labour + materials, excluding sanitaryware brand premiums):
| Item | Indicative cost (₹) |
|---|---|
| Fixed toughened glass partition + door | 18,000–45,000 |
| Half-height dwarf wall + glass topper | 12,000–28,000 |
| Extra wet-zone waterproofing + slope | 8,000–20,000 |
| Second floor drain + linear channel | 4,000–12,000 |
| Exhaust fan (rated, ducted out) | 2,500–8,000 |
For a small flat bathroom, a dwarf-wall-plus-glass split can keep the whole upgrade under ₹40,000. This is a common move in the apartment bathroom guide, where shafts are fixed and the wet-and-dry split is the cheapest way to make a compact room feel bigger and stay cleaner.
Where a dry bathroom suits — and where it does not
It suits family and common bathrooms with real daily use, homes with children or elderly members, and anyone tired of a permanently damp floor. Think twice in a very tight bathroom under about 1.2 x 1.5 m, where a fixed partition eats circulation — there, a well-tracked shower curtain or a compact corner enclosure may be the honest answer. And if you want a spa-like open feel with no glass at all, the fully tanked wet room is the alternative philosophy.
References
- NBC 2016 (National Building Code of India), Part 9 — plumbing services, drainage slopes and bathroom ventilation.
- IS 2556 — sanitary appliances (vitreous china WCs and wash basins) specifications.
- IS 15622 — pressed ceramic and vitrified tiles; use for wet-zone anti-slip selection.
- IS 1172 — basic requirements for water supply, drainage and sanitation.
- CPHEEO Manual on Water Supply and Sanitation — drainage and trap guidance for domestic bathrooms.
Export this guide
Related Guides — Deep-dive reading
Wet and Dry Bathroom Layout India: Zoning, Glass Partition & Drainage Plan
How to zone an Indian bathroom into a wet shower area and a dry WC-and-vanity area — where to place the glass partition, how to slope and drain each zone, and the clearances in mm that make the split the modern Indian standard.
BathroomsResidential Bathroom Design India: Types, Plumbing & Finishes
A complete, systems-first reference for bathrooms in Indian homes — the room types, the plumbing and drainage, ventilation, waterproofing, lighting, storage and smart features, with NBC and IS codes and real ₹ ranges.
BathroomsSmall Bathroom Layout India: 3x5, 4x6 & 5x7 ft Plans That Actually Work
How to plan a tiny Indian bathroom so it feels bigger and works harder — the best fixture arrangements for 3x5, 4x6 and 5x7 ft rooms, corner basins, sliding doors, wall-hung sanitaryware, clearances in mm and rupee-smart tricks.
BathroomsRelated Tools — Try Free
Cross-Ventilation Analyzer
Estimate airflow and air changes per hour (ACH) from room size, window areas, layout, and local wind — with NBC 2016 Part 8 compliance check.
Ventilation CalculatorWindow Size Calculator
Get the right window size, glazing area and openable area for any room using NBC daylight rules.
Window ToolBathroom Drainage Pipe Calculator
Recommended drain and waste pipe sizes, slopes and stack size for a bathroom's fixtures — indicative IS 1172 / NBC plumbing practice.
Bathroom Calculator