
Bathroom Waterproofing India: The Complete Guide to Membranes, Detailing, Testing & Cost
Why and where bathrooms leak, the full waterproofing system layer by layer, how the membrane types compare, the critical junction detailing, the flood test, warranties, and honest ₹ per sq ft costs for an Indian home.
Nothing in a home fails as expensively, or as invisibly, as bathroom waterproofing. A leak does not announce itself at the tap; it seeps for months through a hairline gap in a buried membrane, tracks along the slab, and surfaces two rooms away as a damp patch, a blistering paint line, or a stain on the neighbour's ceiling below. By then the water has been in the concrete for a season and the repair means breaking finished tiles. Waterproofing is the one bathroom layer you can never see once the tiles go down, and the one you most regret getting wrong.
This is the waterproofing pillar in the Studio Matrx bathroom hub — the overview that explains the whole system and points to the deeper sibling guides. Read it alongside the bathroom planning guide for new homes, which sequences waterproofing into the build, and the site-wide waterproofing guide for terraces, basements and the building envelope beyond the bathroom.
Waterproofing is not a product you buy — it is a continuous system: a sound substrate, the right membrane, watertight detailing at every junction, and a flood test that proves it before a single tile is laid.
Why and where bathrooms leak
Water always finds the weakest joint. In an Indian bathroom — with its health-faucet jet spray, wet-and-dry zones, hard-water scaling and long monsoon humidity — the water load is relentless, and it concentrates at a handful of predictable points. A membrane over the flat middle of the floor almost never fails; the failures are at the edges, holes and corners.
- The sunken slab. Most Indian bathrooms sit in a sunk portion of the floor slab (typically 250–450 mm deep) that is later filled to carry the plumbing and set the finished level. If the sunken slab and its fill are not waterproofed, they become a hidden tank that soaks the concrete and leaks into the room or flat below.
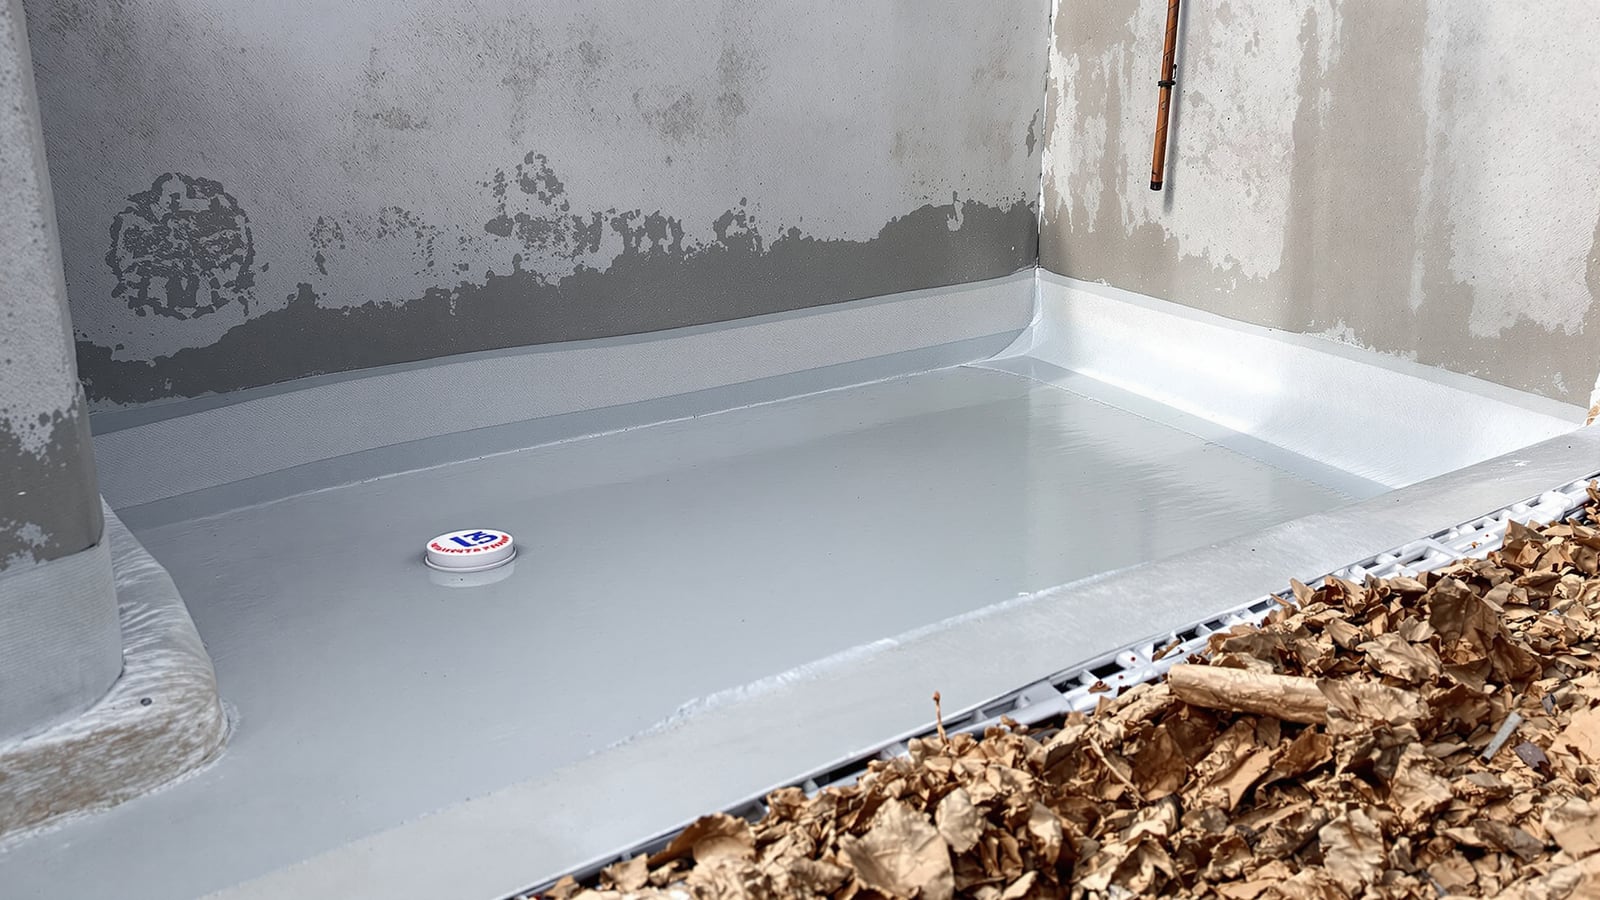
- Wall-floor junctions. The right-angle where the floor meets the wall is where a flat membrane must bend 90°. A membrane taken up as a hard corner cracks there; it must be coved (a rounded fillet) and turned up the wall at least 300 mm, higher in the shower.
- Pipe penetrations. Every point where a supply pipe, waste, or the floor trap pierces the membrane is a designed hole. Water wicks along the pipe unless the penetration is sealed with a collar or fillet and the membrane is dressed tight to it.
- Floor traps and drains. The floor trap is the lowest point — all the water heads there. If the membrane is not clamped or dressed into the drain body, water runs under it instead of into it.
- Threshold and door line. Water escapes the wet room at the door if there is no upstand or a raised threshold to hold it back.
| Leak location | Why it fails | The fix in the system |
|---|---|---|
| Sunken slab & fill | Untreated concrete acts as a tank | Waterproof the sunk slab base + walls before filling |
| Wall-floor junction | Membrane cracks at hard 90° corner | Coved fillet + 300 mm min upstand |
| Pipe penetrations | Water wicks along the pipe | Collar/fillet seal, membrane dressed to pipe |
| Floor trap / drain | Water runs under an unclamped membrane | Membrane dressed and clamped into drain body |
| Door threshold | No upstand to hold water in | Raised threshold or kerb + upstand |
| Shower wall | Splash above the upstand | Membrane to 1,800 mm on shower walls |
For a deeper, location-by-location treatment, see bathroom leak prevention and the post-mortem of common waterproofing failures.
The waterproofing system, layer by layer
Think of waterproofing as a build-up, not a coat of paint. Each layer has a job, and skipping one is where systems fail. From the structural slab upward, a sound wet-area build-up reads like this:
- Substrate. Clean, sound, crack-free concrete or plaster. Loose material, honeycombing and oil defeat any membrane. Fill and repair first.
- Primer. Locks down dust and controls the porosity so the membrane bonds evenly.
- Membrane. The waterproof layer itself — two or more coats, applied wet-on-dry, reinforced with fibre mesh or fillet tape at every junction. This is the layer everything else protects.
- Protection / screed to falls. A bonded screed protects the membrane from the tile-layer's trowel and sets the fall to the trap (roughly 1:80 to 1:100, or about 10–12 mm per metre).
- Tile, adhesive and grout. Tiles are decorative and water-resistant, not waterproof — the joints and grout let water through. Use a cement-based adhesive (IS 15477 Type) and, in wet zones, epoxy grout, which does not soak or stain like sanded cement grout.
The order of operations matters as much as the products: waterproofing is done before filling the sunk slab and again before tiling, with a test in between. Sequence it into the build using the new-home bathroom planning guide.
The membrane types compared
There is no single "best" membrane — each chemistry has a place. The choice comes down to substrate movement, exposure, ease of application and budget. Here is the overview; each has its own sibling deep-dive.
| Membrane type | How it works | Best for | Watch-outs | ₹/sq ft (material) |
|---|---|---|---|---|
| Cementitious (2-component) | Cement + acrylic polymer, brush/roller | Sunken slabs, general wet areas — the India default | Rigid; needs mesh at joints; low crack-bridging | 30–70 |
| Liquid / acrylic (single-component) | Elastomeric coat cures to a film | Walls, easy DIY-grade jobs | Thin build; UV/standing-water limits | 40–90 |
| Polyurethane (PU) | High-elongation liquid, seamless | High movement, terraces over baths, ponding zones | Skilled application; moisture-sensitive cure | 90–180 |
| Sheet / APP membrane | Pre-formed bitumen/HDPE rolls, torched or self-adhesive | Large slabs, podiums | Overlap joints are the weak point in small bathrooms | 60–130 |
| Crystalline | Chemicals grow crystals inside concrete pores | Sunk slab base, water tanks, integral protection | Only works in dense concrete; not a surface film | 40–100 |
For most Indian residential bathrooms, the workhorse is a two-component cementitious membrane on the sunk slab and walls, often with a crystalline treatment integral to the concrete, and a more flexible acrylic or PU coat where movement or ponding is expected. Compare them in full in the membrane types guide, then go deep on cementitious, liquid/acrylic and polyurethane systems.
A flexible membrane bridges a hairline crack; a rigid one telegraphs it. Match the membrane's crack-bridging to how much the substrate is likely to move.
Critical detailing — where the system is won or lost
A perfect product installed with lazy detailing still leaks. These are the details a good applicator will never skip.
- Coved junctions with reinforcement. Every wall-floor and wall-wall internal corner gets a rounded fillet and a strip of fibre mesh or a preformed fillet tape embedded in the membrane. No hard right angles.
- Upstands to the right height. Membrane up the wall 300 mm minimum in dry zones, up to 1,800 mm on shower walls, and full-height behind long-run showers.
- Pipe and drain penetrations. Seal each with a bonded collar or fillet; dress the membrane tight to the pipe. The floor trap membrane is clamped or dressed into the drain body so water enters the drain, not the slab.
- Double protection at the sunk slab. Waterproof the base of the sunk slab, then again the filled, screeded surface — two independent lines of defence.
- Compatible layers. Primer, membrane, adhesive and grout should be one manufacturer's compatible system where possible; mixing incompatible chemistries breaks bonds.
The flood (ponding) test — proof before tiles
The one step that separates a warrantied job from a hopeful one is the flood test, and it is cheap: plug the floor trap, fill the waterproofed floor with 25–50 mm of standing water, mark the level, and leave it 24 to 48 hours. If the level drops beyond evaporation, or a damp patch shows on the slab soffit below, the membrane has failed — and you find out now, while the fix is a re-coat, not a demolition.
- Do it after the membrane cures and before tiling (and ideally again on the sunk-slab base before filling).
- Check the ceiling of the room below for any seepage during and after the test.
- Insist the test is witnessed and photographed — it is your evidence for the warranty and, in an apartment society, your protection against a neighbour's damp-ceiling claim.
The inspection routine — what to watch at each stage and the questions to ask your applicator — is set out in the waterproofing inspection guide.
Warranty and cost
A serious waterproofing job comes with a written warranty — commonly 5 to 10 years from applicators, and manufacturer-backed 10-year (or longer) system warranties when a certified applicator uses a full compatible system. Get it in writing, tied to the flood-test photographs, and clear on what voids it (later core-drilling for a new fixture is the classic voider).
| Scope | Typical ₹/sq ft (applied) | Notes |
|---|---|---|
| Basic cementitious, floor + skirting | 45–90 | Minimum for a dry-zone bathroom |
| Full system: sunk slab + walls to 1,800 mm | 90–160 | Recommended for wet/shower bathrooms |
| PU / high-performance over movement zones | 160–300 | Terraces over baths, ponding balconies |
| Crystalline admix (integral) | 8–15 per sq ft of slab | Added to concrete, not a surface cost |
For a typical 35–45 sq ft Indian bathroom, a proper full system lands around ₹4,000–₹8,000 in waterproofing — a rounding error against the ₹20,000–₹60,000 it costs to break tiles and re-do a leaking bathroom two years later. It is the highest-return spend in the whole build.
Waterproofing is the cheapest insurance in your home. Never let it be the line item that gets "value-engineered" out.
References
- NBC 2016 (National Building Code of India), Part 3 & Part 9 — building services, damp-proofing and plumbing provisions for wet areas.
- IS 2645 — specification for integral cement waterproofing compounds.
- IS 3067 — code of practice for general design details and preparatory work for damp-proofing and waterproofing of buildings.
- IS 13182 — waterproofing and damp-proofing of wet areas in buildings: recommendations.
- IS 15477 — code of practice for laying of ceramic tiles using adhesives (wet-area tiling and grout).
- CPWD Specifications & CPHEEO Manual — workmanship and sunken-slab waterproofing guidance for public and domestic buildings.
Export this guide
Related Guides — Deep-dive reading
Bathroom Leak Prevention India: Detailing the Junctions That Stop Water Reaching the Flat Below
Bathroom leaks almost never come from a broken pipe — they come from a badly detailed junction. Here is how to get the wall-floor corner, pipe penetrations, floor trap, nahani trap and door threshold right, plus the flood test that catches a leak before you tile.
BathroomsBathroom Waterproofing Failure in India: Causes, Diagnosis & Fixes (2026)
Why bathroom waterproofing fails in Indian homes — poor surface prep, thin coats, missed junctions, no membrane turn-up, damage during tiling — how to read the symptoms, and whether a surface fix or a full redo is the right remedy.
BathroomsCementitious Waterproofing India: Coatings, Coats & Cost (2026)
How cement-based waterproofing coatings work in Indian bathrooms — one- vs two-component, polymer-modified slurries, surface prep, number of coats, curing, where they suit sunken slabs and wet areas, and where their low flexibility lets you down, with rupee costs.
BathroomsRelated Tools — Try Free
Monsoon-Readiness Checklist
Pre-rain home audit across 9 categories — terrace, drains, waterproofing, electrical, HVAC, pest, vehicles, documents.
Seasonal AuditApartment Video Door System Planner
Enter flats, entrances, floors and guard desk for a first-pass building intercom plan — door stations, indoor monitors, guard station, the right architecture and an indicative cost band.
Building PlannerBathroom Waterproofing Calculator
Work out waterproofing material (kg/L) and cost for a bathroom by area, wall band, system type and coats — cementitious, acrylic, PU or SBR.
Bathroom Calculator