
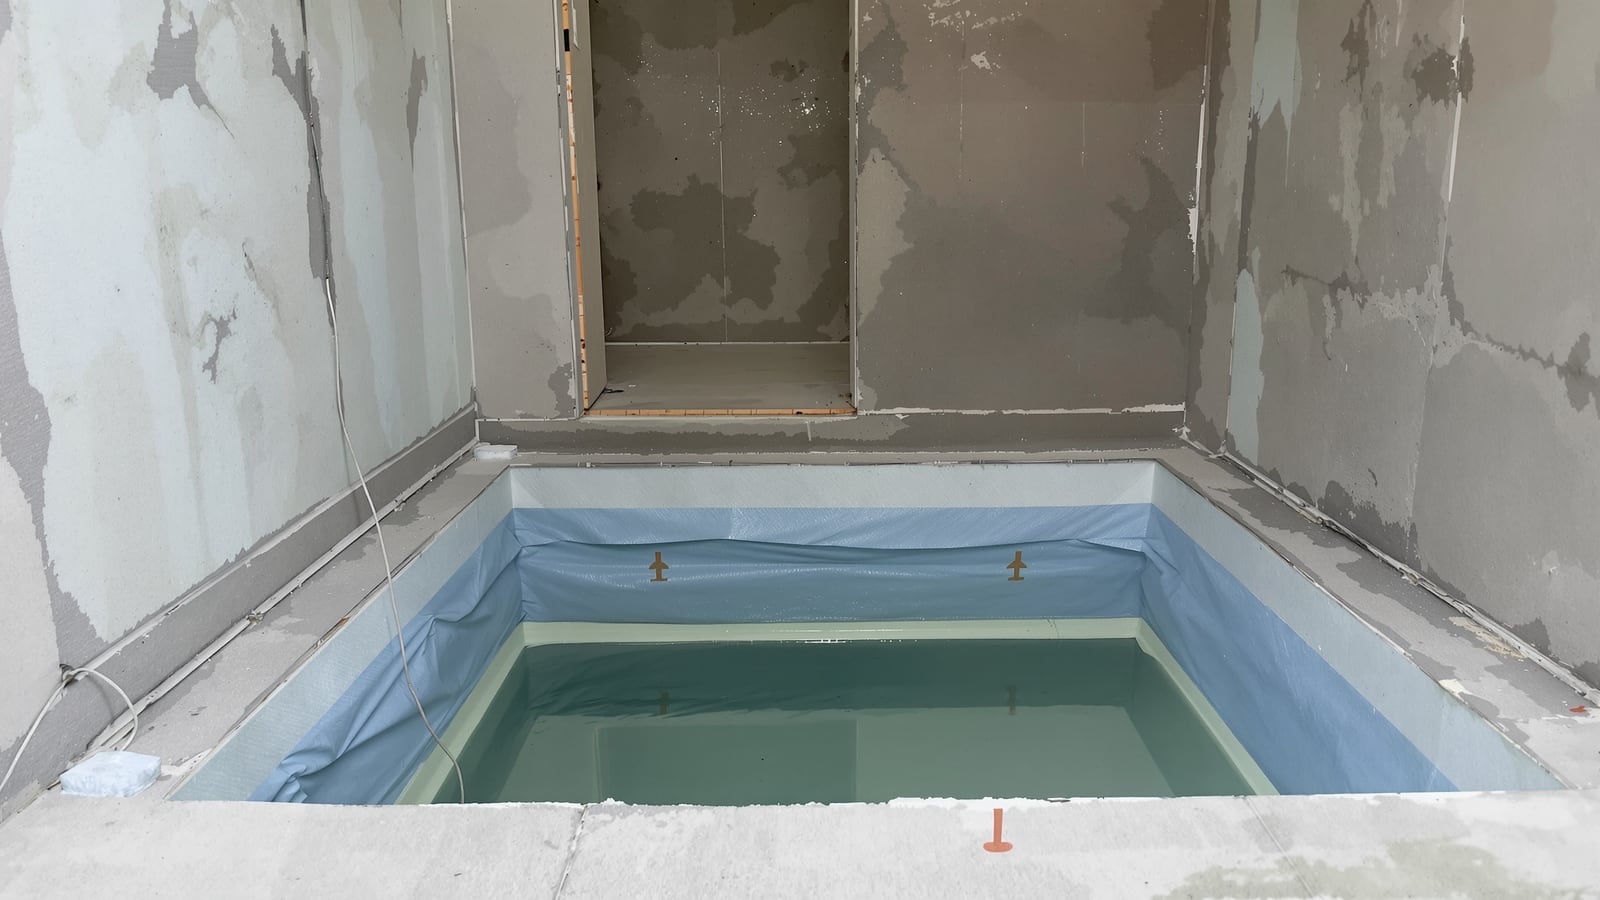
Bathroom Waterproofing Inspection India: Stage-Wise QC Checklist & Flood Test
How a homeowner or site engineer inspects and signs off bathroom waterproofing in India — the stage-wise QC checklist for surface prep, coats and dry-film thickness, junction reinforcement and membrane turn-up height, plus the 24-48 hour ponding test procedure, acceptance criteria and warranty paperwork to demand before a single tile is laid.
Waterproofing is the one bathroom layer you cannot fix after the fact. Once tiles go down over a bad membrane, the only cure for the leak that follows is to break everything open and start again — a job that costs ten times what a proper inspection would have cost, plus the ceiling of the flat below. So the single most valuable hour you will spend on a bathroom is the one where you stand over the finished waterproofing, before any tiling, and decide with evidence whether it passes or fails.
This is the inspection and sign-off guide in the Studio Matrx bathroom hub. It assumes the membrane is already chosen and applied — for the how and what of systems, coats and products, read the complete bathroom waterproofing guide for India first. Here we cover only the QC: what to check at each stage, how to run the flood test, and what paperwork to demand.
Never let tiling start on a bathroom that has not passed a witnessed flood test. A signed test report and a dated photo are worth more than any verbal assurance a contractor can give you.
Why the inspection has to happen before tiling
The waterproofing membrane is buried. Once the screed, adhesive and tiles cover it, you can never see it again — you only find out it failed when a damp patch blooms on the wall of the adjacent room or the ceiling below, months later. At that point the membrane is inaccessible and every remedy is destructive.
The inspection therefore has to catch defects while the membrane is still open to view and still testable with water. Miss this window and you are gambling the whole bathroom on faith. Catching a pinhole now costs a dab of coating; catching it in year two costs a demolition.
The four inspection stages
Waterproofing is not a single event — it is a sequence, and each stage hides the one before it. Inspect at each handover point, not just at the end.
| Stage | What to inspect | Sign-off gate |
|---|---|---|
| 1. Substrate prep | Cured screed, slope to drain, clean dry surface, sealed penetrations | Before first coat |
| 2. Detailing | Fillets at junctions, reinforcing tape/fabric at corners and drains | Before flood coat |
| 3. Membrane build | Number of coats, colour change between coats, dry-film thickness, turn-up height | Before flood test |
| 4. Flood test | 24-48 hr ponding, water level, leak checks below | Before tiling |
Each gate is a stop-work point: the next trade should not begin until you have looked, measured and, ideally, photographed. If your contractor resists these holds, that resistance is itself information.
Stage 1 — Substrate preparation
Everything rides on the surface under the membrane. Before the first coat goes on, confirm:
- The screed is cured and dry. Fresh cement screed holds water; coating over it traps moisture and blisters the membrane. Allow the screed to cure (typically 21-28 days for a full sand-cement bed, less for polymer-modified screeds) and check with a moisture meter — under 5% for cementitious systems, drier still for PU.
- Slope to the drain is correct. Pour a mug of water anywhere on the floor; it must run to the trap, not pool. A dead-flat or reverse-sloped floor will pond under the tiles forever. Target roughly 1 in 80 to 1 in 100 fall.
- The surface is sound and clean. No loose sand, no laitance, no oil, no honeycombing. Cracks and construction joints are raked out and filled. Corners are rounded, not sharp.
- Penetrations are sealed and fixed. Drain bodies, waste pipes and the WC outlet are set, immobile and sealed to the slab. A pipe that still wobbles will crack the membrane at the collar within a year.
Stage 2 — Detailing and reinforcement
Membranes almost never fail in the open field — they fail at the edges, corners and pipe penetrations, where the surface changes direction and the coating is thinnest and most stressed. This detailing stage is where good waterproofing is won or lost.
- Fillets (cove/haunch) at every floor-to-wall junction. A small mortar or sealant fillet, roughly 20-40 mm, turns a sharp 90-degree internal corner into a gentle curve the membrane can bridge without cracking.
- Reinforcing fabric or tape at all junctions. Corners, wall-floor lines, drain flanges and pipe collars get a strip of polyester/glass-fibre mesh embedded in the coating, or a preformed corner piece. This is non-negotiable — an unreinforced corner is a crack waiting to happen.
- Extra coat around drains and pipes. These points get a local reinforcing layer before the general coats. This is exactly where the leaks in the waterproofing failures guide originate.
Stage 3 — Membrane build: coats, thickness and turn-up
Now inspect the membrane itself. Three numbers decide whether it will keep water out:
- Number of coats. Cementitious and acrylic systems are applied in at least two coats, laid at right angles to each other so misses in one are covered by the next. A single thick coat is a red flag. Insist the second coat is a contrasting shade (many brands ship the two coats in different colours) so full coverage is visible.
- Dry-film thickness (DFT). The coating must reach the system's specified thickness — commonly around 1.0-1.5 mm dry for coating membranes. Check the consumption: divide litres/kg used by floor area and compare to the product datasheet's coverage rate. A wet-film comb gauge on the last coat is the site-friendly proof.
- Turn-up height at walls. The membrane must climb the wall, not stop at the floor. General wet areas need at least 150 mm; the shower wall and any wall that gets direct spray from a health faucet or overhead shower should be tanked to 1,800 mm or full height. At the door threshold the membrane turns up and out over the sill so water cannot creep into the adjoining room.
| Check | Instrument / method | Passing value |
|---|---|---|
| Screed moisture | Moisture meter | < 5% (cementitious) |
| Floor slope | Water pour to drain | 1:80 to 1:100, no ponding |
| Coats applied | Visual, colour contrast | ≥ 2, right-angle passes |
| Dry-film thickness | Consumption calc + wet-comb | Per datasheet, ~1.0-1.5 mm |
| Turn-up (general wall) | Tape measure | ≥ 150 mm |
| Turn-up (shower wall) | Tape measure | 1,800 mm or full height |
| Curing before flood test | Time / touch dry | Per datasheet (often 24-72 hr) |
The flood (ponding) test — the real acceptance gate
Every check above is a proxy. The flood test is the truth: it puts the membrane under exactly the load it will face for the next twenty years and lets you watch for failure.
Procedure:
1. Cure first. Let the final coat cure fully per the datasheet (commonly 24-72 hours) before flooding. Testing a green membrane can damage it and gives a false fail.
2. Plug the drain. Cap the floor trap and any waste outlets with an inflatable plug or a bung sealed with clay/mortar so the water cannot escape down the pipe.
3. Fill to depth. Flood the floor to roughly 25-50 mm of standing water — deep enough to cover the whole floor and reach a little way up the turn-up. Mark the starting water level on the wall with a pencil or tape.
4. Hold for 24-48 hours. Longer is better; 48 hours is the confident standard. Note the time and take a dated photo.
5. Inspect below and around. During and after the hold, check the ceiling of the room or flat below, the outside faces of the bathroom walls, and any adjacent dry areas for damp patches, drips or efflorescence.
6. Read the level. After the hold, compare the water level to your mark.
Acceptance criteria — it passes only if all are true:
- The water level has not dropped beyond what evaporation alone explains (allow a few mm in dry heat; a clear, steady fall means a leak).
- No damp patch, drip, stain or efflorescence anywhere on the ceiling or wall of the room below, or on the outer faces of the bathroom's own walls.
- No dampness creeping into adjoining dry areas at the threshold.
Any leak means fail. Do not let anyone talk you into "it will seal once the tiles go on" — tiles and grout are not waterproof, the membrane is. Trace the leak, dry the area, patch with reinforcement, re-cure and flood test again. A repaired bathroom earns a fresh full-duration test, not a token top-up.
Documentation, warranty and sign-off
A test only protects you if it is recorded. Before you release payment for the waterproofing stage, collect:
- A signed flood-test report — date, start time, duration, water depth, result, and the names of who witnessed it (you or your engineer, and the applicator).
- Dated photographs — the ponded floor, the marked level at start and end, the ceiling below during the test, and the turn-up heights with a tape in frame.
- The system warranty — waterproofing warranties in India commonly run 5 to 10 years, sometimes longer for applicator-certified PU systems. Get it in writing, tied to this bathroom, naming the product and the applicator, with the datasheet and batch details attached.
- Product datasheets and consumption record — proof the specified coats and thickness were actually used.
File all of it. If a leak ever appears, this pack is the difference between a free warranty repair and a fight.
The pre-tiling checklist, in one line each
- Screed cured, dry, sloped to drain — no ponding.
- Penetrations fixed, sealed, immobile.
- Fillets at every internal corner.
- Reinforcing fabric at all junctions, drains and pipes.
- Two coats minimum, contrasting colours, full coverage.
- DFT meets the datasheet; consumption checks out.
- Turn-up ≥ 150 mm generally, 1,800 mm / full height on shower walls, over the threshold at the door.
- 24-48 hr flood test passed and witnessed.
- Report, photos and warranty in hand.
Only when every line is ticked does tiling begin. For how to keep the finished bathroom leak-free through its life, read the bathroom leak prevention guide; for where all this fits into a new build, see the bathroom planning guide for new homes.
References
- National Building Code of India (NBC) 2016, Part 9 (Plumbing Services) — wet-area drainage, slopes and sanitary detailing.
- IS 3067 — Code of practice for general design details and preparatory work for damp-proofing and waterproofing of buildings.
- IS 2645 — Integral cement waterproofing compounds, specification.
- IS 1172 — Code of basic requirements for water supply, drainage and sanitation.
- CPWD General Specifications for Waterproofing Works — Central Public Works Department guidance on membrane systems, application and testing.
- Manufacturer system datasheets (Dr. Fixit, Fosroc, Pidilite, Asian Paints and similar) for coverage, coats, curing and flood-test timing — always follow the specific product's numbers.
Export this guide
Related Guides — Deep-dive reading
Bathroom Leak Prevention India: Detailing the Junctions That Stop Water Reaching the Flat Below
Bathroom leaks almost never come from a broken pipe — they come from a badly detailed junction. Here is how to get the wall-floor corner, pipe penetrations, floor trap, nahani trap and door threshold right, plus the flood test that catches a leak before you tile.
BathroomsBathroom Waterproofing Failure in India: Causes, Diagnosis & Fixes (2026)
Why bathroom waterproofing fails in Indian homes — poor surface prep, thin coats, missed junctions, no membrane turn-up, damage during tiling — how to read the symptoms, and whether a surface fix or a full redo is the right remedy.
BathroomsBathroom Planning for New Homes in India: Get It Right Before You Build
The bathroom decisions you cannot undo once the slab is cast — location and stacking, sunken vs non-sunken slabs, waterproofing, and the plumbing, electrical and ventilation you must coordinate with the civil work, stage by stage.
BathroomsRelated Tools — Try Free
Plumbing Pressure-Test & Leak Checklist
Pre-closure pressure and leak test — 9 categories, 60+ checkpoints across water supply, drainage, fixtures, waterproofing, hot water, tanks.
Pre-Closure TestBathroom Drainage Pipe Calculator
Recommended drain and waste pipe sizes, slopes and stack size for a bathroom's fixtures — indicative IS 1172 / NBC plumbing practice.
Bathroom CalculatorBathroom Waterproofing Calculator
Work out waterproofing material (kg/L) and cost for a bathroom by area, wall band, system type and coats — cementitious, acrylic, PU or SBR.
Bathroom Calculator