
Bathroom Leak Prevention India: Detailing the Junctions That Stop Water Reaching the Flat Below
Bathroom leaks almost never come from a broken pipe — they come from a badly detailed junction. Here is how to get the wall-floor corner, pipe penetrations, floor trap, nahani trap and door threshold right, plus the flood test that catches a leak before you tile.
When a bathroom leaks into the room or flat below, the owner's first instinct is to blame a pipe. Yet on the overwhelming majority of Indian jobs the pipe is fine. The water is escaping at a junction — the corner where the wall meets the floor, the collar around a drain, the gap the plumber left when he cut the slab for a waste pipe. Waterproofing chemistry rarely fails on its own; detailing fails. A membrane is only as good as the weakest 100 mm of edge, penetration and upstand around it, and those weak points are all predictable.
This is the leak-prevention guide in the Studio Matrx bathroom hub, and it is deliberately narrow: it is about getting the critical junctions right so a well-chosen membrane actually performs. Read it alongside the bathroom waterproofing guide for India for the full system and product choices, the waterproofing inspection guide for how to check each stage on site, the waterproofing failures guide for the failure modes that follow bad detailing, and the site-wide waterproofing guide for the fundamentals.
A leak is almost never a hole in the field of the floor. It is a gap at a junction. Detail the five junctions correctly, prove it with a flood test, and the room below stays dry for decades.
The five junctions that leak
Nine leaks in ten trace back to one of five details. Learn to recognise each one and you know exactly where to look — both when you build and when you diagnose seepage after the fact.
| Junction | Why it leaks | The fix in one line |
|---|---|---|
| Wall-floor corner | Membrane cracks at a sharp 90° angle | Cove/fillet + reinforcing tape, turn membrane up the wall |
| Pipe penetrations | Gap between pipe and slab is never truly sealed | Grout collar, then wrap membrane onto the pipe |
| Floor trap / nahani trap | Loose drain body flexes; water runs behind it | Sealed, screwed drain; membrane clamped into the body |
| WC & mixer connections | Water tracks along the supply/waste through the wall | Sleeve and seal every wall/floor pass-through |
| Door threshold | Wet-zone water crosses the doorway into the passage | Raised waterproofed sill / kerb, membrane returned up |
The rest of this guide takes them in the order you build them.
Slope first: water that pools will always find the gap
Before any junction detail matters, the floor has to move water to the drain. A flat or reverse-sloped bathroom floor holds a film of standing water over every joint, and standing water is what eventually works through a hairline gap. Ponding is both a leak risk and, under NBC 2016 and IS 1172 drainage practice, simply bad plumbing.
Slope rules that prevent the pooling that leads to leaks:
- Fall the whole floor to the trap. Aim for 1:80 to 1:50 (roughly 12–20 mm per metre) toward the floor trap; the wet-shower zone can be steeper at 1:50. The trap must sit at the lowest point — check with a spirit level and a mug of water, not by eye.
- No dead corners. Every corner of the floor should drain toward the trap. A common failure is a flat patch behind the WC or under the vanity that never dries.
- Set fixtures after you know the slope. The finished floor level around the WC and door is dictated by the fall — plan it before the screed goes down, not after.
Coving the wall-floor corner and turning the membrane up
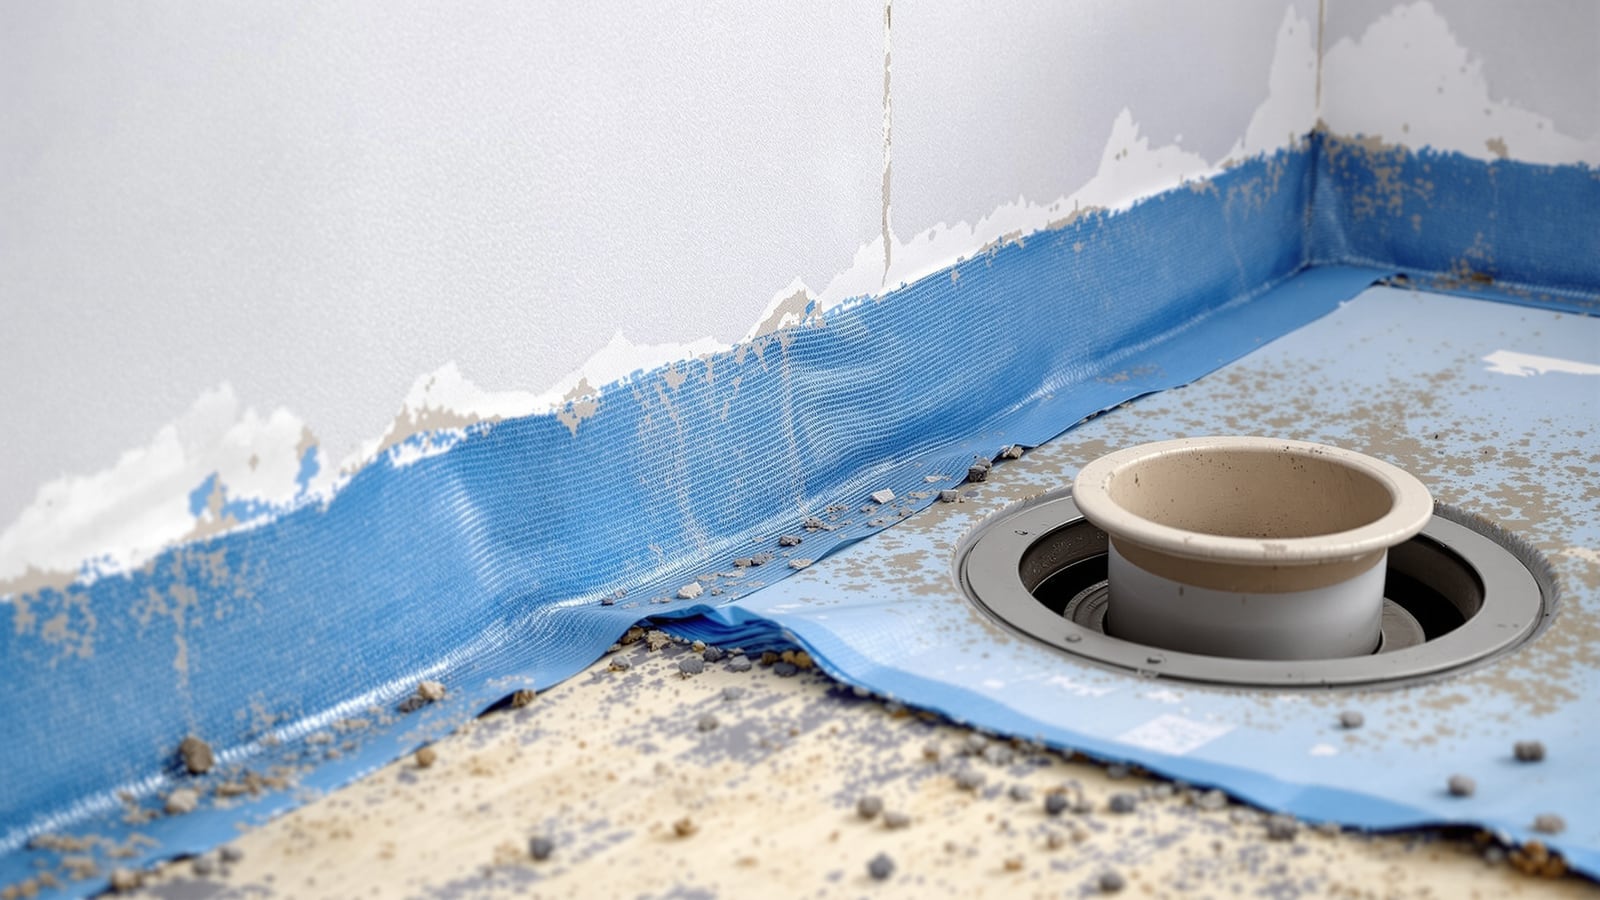
The sharp internal angle where the wall meets the floor is the number-one leak point. A liquid or sheet membrane bridged across a hard 90° corner is stretched thin and cracks with the smallest movement. The fix is two-part: soften the angle, then reinforce it.
- Form a cove/fillet. Run a 20–25 mm mortar or polymer fillet along every wall-floor and wall-wall internal corner so the membrane bends around a radius, not an edge.
- Bed reinforcing tape or fabric. Lay the manufacturer's reinforcing tape into the first coat of membrane along all corners and over every crack — this is the single cheapest detail that prevents the most leaks.
- Turn the membrane up the wall. Carry it a minimum of 150–300 mm up all walls, and to 1800 mm on any wall inside the shower/wet zone, so splash never gets behind the tile adhesive. The turn-up must be continuous with the floor membrane, not a separate strip.
Pipe penetrations, the floor trap and the nahani trap
Every hole cut through the slab is a planned leak unless it is deliberately re-sealed. The plumber's job is to make the pipe work; sealing the annulus — the gap between pipe and concrete — is the waterproofer's job, and it is routinely skipped.
- Grout the annulus first. Fill the gap around every pipe through the slab with a non-shrink grout or polymer mortar, packed solid. A foam-filled or debris-filled gap is a direct path to the ceiling below.
- Wrap the membrane onto the pipe. Take the waterproofing coat 20–30 mm up the outside of each pipe and dress reinforcing tape around the base. The membrane must bond to the pipe, not merely butt against it.
- Use a trap with a clamping collar. A proper floor trap or nahani trap with a puddle flange / clamp ring lets you lock the membrane into the drain body so water entering the floor build-up is caught by the drain, not routed around it. Screw the trap down so it cannot flex; a loose trap opens a gap on every footstep.
- Two-part (weep-hole) drains earn their keep. In a tiled floor, water that gets into the bed needs a lower outlet — a trap with weep holes at membrane level drains the bed itself, so nothing sits on top of the membrane.
Sealing around the WC, mixer and other fixtures
Fixtures are penetrations too. Water tracks along a supply line or a WC waste where it passes through wall or floor, and it emerges as a stain far from the source.
- Sleeve and seal wall pass-throughs. Where the mixer inlets, health-faucet tee or concealed cistern pipes cross the waterproofed wall, seal around each one; do not rely on tile grout to keep water out of the wall build-up.
- Bed the WC on a sealed connector, then silicone the base. Use a proper pan connector to the soil pipe and run a neat silicone bead around the WC base — but only after the floor membrane is proven, so the WC is not hiding a leak.
- Silicone, not grout, at movement joints. The wall-floor tile joint, and joints around the tub, tray and vanity, should be a flexible neutral-cure silicone. Grout there cracks and wicks water. Reserve grout for tile-to-tile joints.
- Keep the concealed cistern niche waterproof. A wall-hung WC frame sits in a wet wall; tank that recess like any other wet surface.
The flood / ponding test — prove it before you tile
This is the step that separates a dry bathroom from a gamble. Once the membrane has fully cured, plug the floor trap, flood the floor to 25–50 mm depth, mark the level, and hold it for 24–48 hours while someone checks the ceiling of the room below. If the level drops or a damp patch appears downstairs, you have found the leak while it is still a free fix — before a single tile, and before the flat below is finished.
| Test / check | When | What to look for | Pass criteria |
|---|---|---|---|
| Ponding (flood) test | After membrane cures, before tiling | Water level drop; damp on slab soffit below | No measurable drop over 24–48 h; dry ceiling below |
| Trap & penetration check | Same test | Seepage around trap collar or pipes | No wetness at any junction |
| Slope / no-pooling check | Before screed sets | Water pools away from trap | All water runs to the trap; no standing film |
| Post-tiling spray test | After tiling & grout cure | Water behind skirting or at threshold | Passage/adjacent room stays dry |
Skip this test and every later stage — screed, tiling, fixtures, the ceiling below — is built on an unproven membrane. Redoing it after the flat below is occupied costs many times more, as the waterproofing failures guide sets out.
The door threshold: stopping water leaving the room
The last junction is the one people forget because it is not underground. In a wet or partly-wet bathroom, water reaches the doorway and, without a barrier, runs out into the passage or bedroom and under the adjacent flooring.
- Raise a waterproofed sill. A small kerb or a stone/granite threshold, with the membrane returned up its face, stops sheet water crossing the door line. Even 10–15 mm helps in a dry-zone doorway; a wet room needs a defined kerb or a step-down.
- Return the membrane at the door. The floor membrane must turn up and lap over the threshold, not stop short of it — the doorway is a corner like any other.
- Slope away from the door. The fall near the entry should run toward the trap, never toward the passage.
For where these details sit in the wider build, the bathroom waterproofing guide covers membrane selection and the full system, the waterproofing inspection guide gives you the stage-by-stage checklist to hold the contractor to, and the site-wide waterproofing guide puts bathrooms in the context of the whole building envelope.
References
- NBC 2016 (National Building Code of India), Part 9 — plumbing services, drainage slopes, floor traps and sanitation practice.
- NBC 2016, Part 3 — general building requirements including damp-proofing and sanitation.
- IS 1172 — basic requirements for water supply, drainage and sanitation in buildings, including floor gradients.
- IS 2645 — integral cement waterproofing compounds; guidance for cementitious bathroom waterproofing.
- IS 3067 — code of practice for general design details and preparatory work for damp-proofing and waterproofing of buildings.
- CPHEEO Manual on Water Supply and Sanitation — trap, drainage and floor-fall guidance for domestic bathrooms.
Export this guide
Related Guides — Deep-dive reading
Bathroom Waterproofing Failure in India: Causes, Diagnosis & Fixes (2026)
Why bathroom waterproofing fails in Indian homes — poor surface prep, thin coats, missed junctions, no membrane turn-up, damage during tiling — how to read the symptoms, and whether a surface fix or a full redo is the right remedy.
BathroomsShower Niche India: Building a Recessed Wall Shelf That Holds Shampoo Without Ever Leaking
A shower niche is a shelf you carve into the wall instead of screwing onto it. Done right it is invisible and dry for decades; done wrong it is the single most common source of seepage into the room behind. Here is how to size it, which wall you may cut, and how to waterproof, slope and tile the recess so it never leaks.
BathroomsBathroom Planning for New Homes in India: Get It Right Before You Build
The bathroom decisions you cannot undo once the slab is cast — location and stacking, sunken vs non-sunken slabs, waterproofing, and the plumbing, electrical and ventilation you must coordinate with the civil work, stage by stage.
BathroomsRelated Tools — Try Free
Bathroom Drainage Pipe Calculator
Recommended drain and waste pipe sizes, slopes and stack size for a bathroom's fixtures — indicative IS 1172 / NBC plumbing practice.
Bathroom CalculatorPlumbing Pressure-Test & Leak Checklist
Pre-closure pressure and leak test — 9 categories, 60+ checkpoints across water supply, drainage, fixtures, waterproofing, hot water, tanks.
Pre-Closure TestGrout Quantity Calculator
Estimate grout in kg and cost by tile size, joint width and thickness — cement or epoxy grout.
Flooring Calculator