
Measuring for a Door: Opening Sizes & Checks (India 2026)
How to measure a door opening in India — three width and height points, diagonals, plumb and level — so the carpenter cuts it right the first time.
Getting the numbers right before anyone buys a leaf or cuts timber saves money, time and a lifetime of a door that rubs or self-swings. Measuring for a door is not a single tape-pull across the opening — Indian masonry walls are rarely truly square, plumb or level, so a competent measure means taking several readings, comparing them, and working to the smallest dimension. This guide shows exactly where to put the tape, how to test the opening for square and plumb, how a replacement measure differs from a brand-new opening, and the short list of figures you hand your carpenter. It is door-specific; if you want whole-room dimensions for furniture planning, that is a different exercise.
Why measuring for a door needs more than one reading
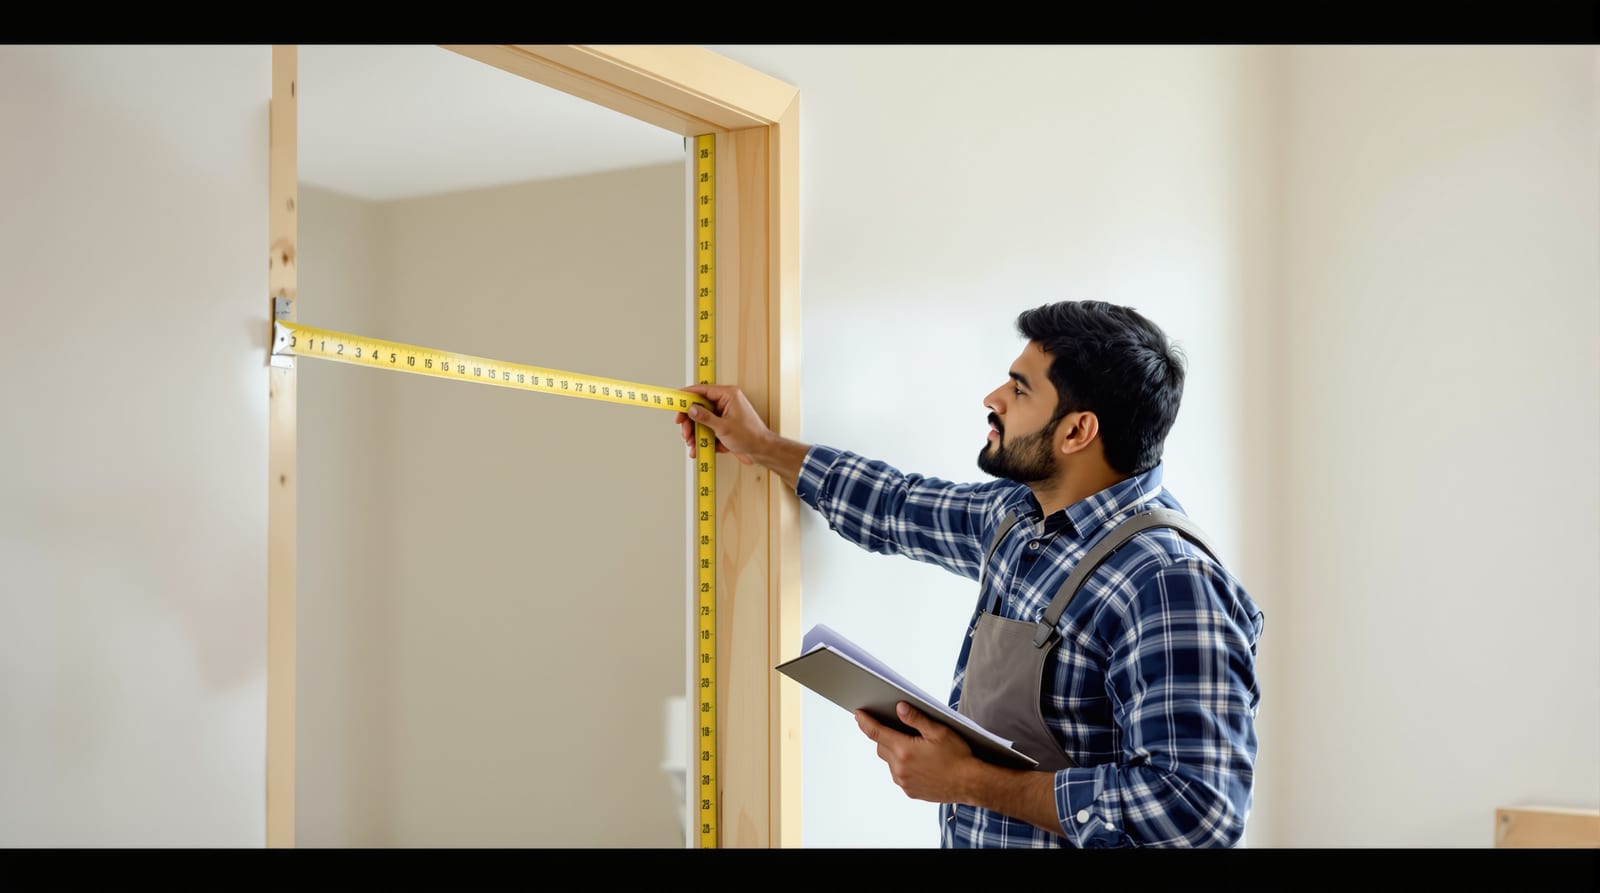
A brick or block opening plastered on site can taper, lean or bow by several millimetres over a 2.1m height. If you measure once at the top and order to that, the leaf may foul a narrower point lower down — or leave an ugly tapering gap. The professional habit is to measure for a door at three points across the width and three down the height, then work to the smallest reading, leaving the fitting clearances as adjustment. A 2-3mm error is invisible; a 10mm error means a re-plane, a re-order, or a door that never latches.
You need: a steel tape (read in mm), a 1.2m or longer spirit level, a pencil and paper, and ideally a second person to hold the tape. Always measure the structural/masonry opening for a new frame, and the frame's internal rebate (or the old leaf) when replacing a leaf into an existing frame — they are different jobs.
Width: top, middle, bottom
Measure the clear horizontal distance across the opening at three heights:
- Top — about 150mm down from the head/lintel.
- Middle — at roughly handle height (~1000mm).
- Bottom — about 150mm up from the finished floor.
Measure to the same reference each time: face of brick/plaster for a new frame, or the inside faces of the existing jamb rebate for a replacement leaf. The three figures will rarely match. Record all three and use the smallest as your working width.
Height: both jambs and the centre
Floors slope and lintels sag, so take the vertical height in three places too:
- Left jamb — floor to underside of head.
- Centre — floor to head at the mid-point of the opening.
- Right jamb — floor to underside of head.
Again, use the smallest. Crucially, measure to the finished floor level. If tile, marble or wood flooring is still to be laid, subtract its build-up (tile + bed often 30-50mm) from your raw figure, because the leaf must clear that finished surface plus its undercut.
| Reading | Where to place the tape | What it controls |
|---|---|---|
| Width top | ~150mm below head | Head-to-stile fit |
| Width middle | Handle height ~1000mm | Lock-edge fit |
| Width bottom | ~150mm above floor | Frame foot fit |
| Height left jamb | Floor to head, left | Leaf height at hinge side |
| Height centre | Floor to head, mid | Head gap |
| Height right jamb | Floor to head, right | Leaf height at lock side |
| Diagonals (×2) | Corner to opposite corner | Square / wracking |
Checking the opening is square, plumb and level
Dimensions alone do not tell you whether the opening is true. Three quick checks reveal whether the carpenter needs to pack, scribe or rebuild before fitting.
Diagonals — is it square?
Measure corner-to-corner both ways (top-left to bottom-right, then top-right to bottom-left). If the two diagonals are equal, the opening is square. A difference up to ~3-4mm is normal and packs out; more than ~6mm means the opening is racked and the frame will need careful shimming — or the masonry made good — so the reveal looks even.
Plumb — are the jambs vertical?
Hold the spirit level against each jamb top to bottom. Indian plastered jambs often lean inward at the top. A frame should finish plumb within about 1-2mm over its height; if a jamb is well out, the carpenter packs the frame plumb and fills behind it, which also tells you the opening must be a touch wider than the bare frame.
Level — is the floor flat?
Lay the level across the sill line. A floor falling to one side means one jamb of the frame must be packed up so the head sits level and the leaf doesn't swing open or shut on its own. Note which side is low and by how much.
Frame, leaf and the rough opening
Three sizes are involved and people confuse them constantly:
| Term | What it is | Typical relationship |
|---|---|---|
| Leaf (shutter) size | The door panel itself | e.g. 825 × 2050mm |
| Frame (chowkhat) size | Outer timber/steel frame | Leaf + 2× rebate + frame sections |
| Rough/structural opening | The hole in the wall | Frame outer + ~10-12mm packing each side |
For a new opening, you are sizing the masonry hole. Work back from the leaf you want: add the frame sections and rebate, then add the packing/grout gap of about 10-12mm per side and over the head so the frame can be wedged plumb and grouted. Confirm a lintel or RCC header spans the opening with at least 150-200mm bearing each side. The standards behind this are IS 4021 (timber frames), IS 4351 (steel frames) and NBC 2016 for minimum widths and free egress.
For a replacement leaf into a sound existing frame, ignore the masonry — measure the clear rebate opening (inside face to inside face of the rebate, and rebate floor line to head). Subtract your fitting margins and confirm the existing frame is itself plumb and square first; a leaf cut to a true rectangle will never fit a racked frame.
Fitting clearances to deduct
The leaf is always smaller than the opening it shuts into, so it can swing without binding. Tell the carpenter the gaps you expect, or let them work to standard margins:
| Edge | Typical gap | Notes |
|---|---|---|
| Head (top) | 3mm | 2-4mm acceptable |
| Hinge stile | 2-3mm | Even reveal |
| Lock stile | 2-3mm | Slight bevel helps |
| Bottom undercut | 6-12mm | Over finished floor; 10-12mm for carpet/return air; less with a threshold or seal |
Fire doors are tighter — gaps ≤3mm with intumescent and smoke seals. Bathrooms often want a larger undercut for ventilation. Always relate the undercut to the finished floor and any threshold or saddle, not bare slab. For a quick sanity check on the masonry hole, the door rough opening calculator and the door clearance checker turn these rules into numbers.
The measuring diagram
What to record for the carpenter
Hand over a single, unambiguous sheet. Vague instructions are where doors go wrong. Note:
- Smallest width and smallest height (in mm), with the finished-floor allowance already deducted.
- All three width and height readings, so the carpenter sees the taper.
- Diagonal difference and which corner is high — flags racking.
- Plumb result per jamb and floor level (which side is low, by how much).
- Wall thickness (frame depth must match) and whether the opening is for a new frame or a leaf into an existing frame.
- Handing and swing — view from the security/outside; hinges on the left = left-hand (LH); state in-swing or out-swing, since it drives lock, closer and seal choice.
- Desired clearances if you have a preference (undercut especially), and any threshold/saddle to be fitted.
- Lintel present? and DPC/anti-termite notes for the frame foot in damp or ground-floor positions.
A careful measure is the cheapest insurance in the whole door job. When the opening is badly out of true, an experienced carpenter or site engineer should make the call on whether to scribe the frame, pack it, or rebuild the reveal — don't force a square frame into a racked hole. For the next steps, see the door opening prep guide, the door rough opening sizing rules, door clearances & tolerances, and how to confirm door frame plumb & level. Settle the door handing & swing before you order. The full picture sits in the complete door guide and the door frames pillar.
Frequently asked questions
Why do I measure in three places instead of once?
Because Indian masonry openings are rarely perfectly square or plumb. Taking width at top, middle and bottom and height at both jambs and the centre exposes any taper or sag. You order to the smallest reading so the leaf fits everywhere, then absorb the difference in the fitting gaps.
Should I measure the wall opening or the existing frame?
It depends on the job. For a new frame you measure the structural masonry opening (and add packing). For a replacement leaf going into a sound existing frame, you measure the clear rebate of that frame — inside face to inside face — and confirm the frame itself is plumb and square before cutting anything.
How do I allow for flooring that isn't laid yet?
Measure floor-to-head as normal, then subtract the build-up of the finished floor — tile plus bed is often 30-50mm. Your working height is to the finished level. The leaf is then cut to clear that surface plus the undercut (typically 6-12mm), not the bare slab.
What does the diagonal check actually tell me?
It tells you whether the opening is square. Measure both corner-to-corner diagonals: equal means square. A difference under ~3-4mm packs out easily; more than ~6mm means the opening is racked and the frame needs careful shimming or the masonry made good, or the reveal will look uneven.
How much undercut should I leave at the bottom?
As a rule of thumb, 6-12mm over the finished floor — nearer 10-12mm where you need return air, carpet clearance or bathroom ventilation, and less where a threshold, saddle or door seal is fitted. Always relate it to the finished floor and any threshold, never the bare slab.
Is this the same as measuring a room?
No. This is door-opening specific — clear width, height, square, plumb and level of one opening. Measuring a whole room for furniture or space planning is a separate exercise with its own method; use a room-measuring guide for that.
Export this guide
Related Guides — Deep-dive reading
How to Measure a Door India: Opening, Leaf, Frame and Hand the Right Way
A homeowner's measuring guide for India — measure the structural opening, work out leaf versus frame size, find the door hand and swing, allow for floor finish, and order without the classic too-tight or wrong-hand mistakes.
Home Doors & EntrancesDoor Frame Plumb, Level & Square: Setting It True (India 2026)
How to set a door frame plumb, level, square and out-of-wind on Indian sites — spirit level, plumb bob, diagonals, shimming and the 1-2mm tolerance that decides whether the leaf latches.
Home Doors & EntrancesDoor Opening Preparation Before Fitting (India 2026)
How to prep a door opening before the chowkhat goes in — checking size, plumb and square, confirming the lintel, laying DPC and marking holdfasts.
Home Doors & EntrancesRelated Tools — Try Free
Accessible Door Checker
Check a door against wheelchair-accessibility guidance — clear width, threshold, handle and closer force per RPwD 2021.
Compliance ToolApartment Furniture Size Chart
Standard furniture dimensions for Indian apartments — sofas, beds, tables, dining, storage.
Reference ChartFire Door Rating Checker
See the likely fire-door rating (30/60/90/120 min) and components a location needs per IS 3614 / NBC — guidance, confirm with your architect.
Compliance Tool