
Kitchen Lighting Mistakes
Why you chop in your own shadow — the seven common errors and the three-layer fix
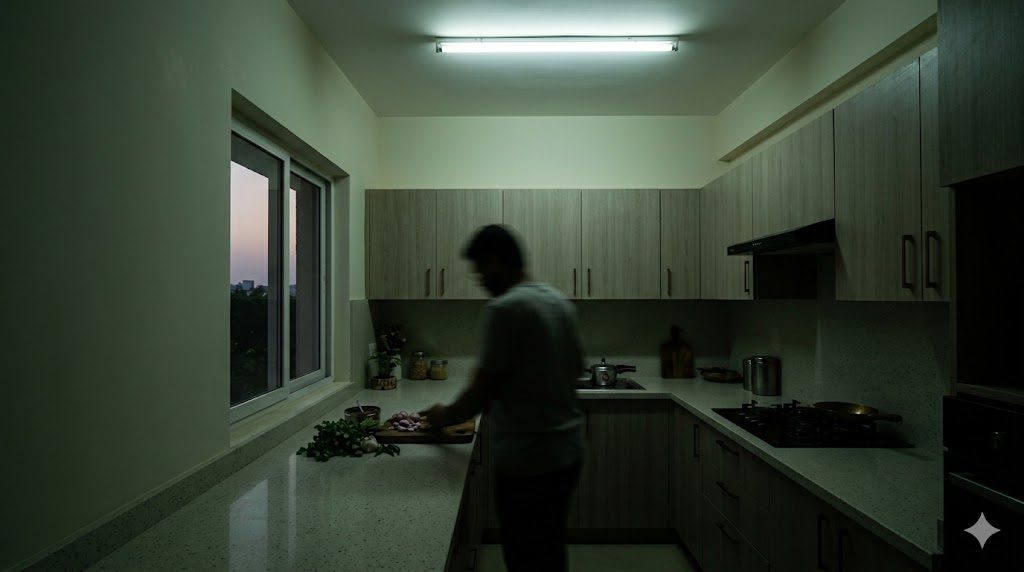
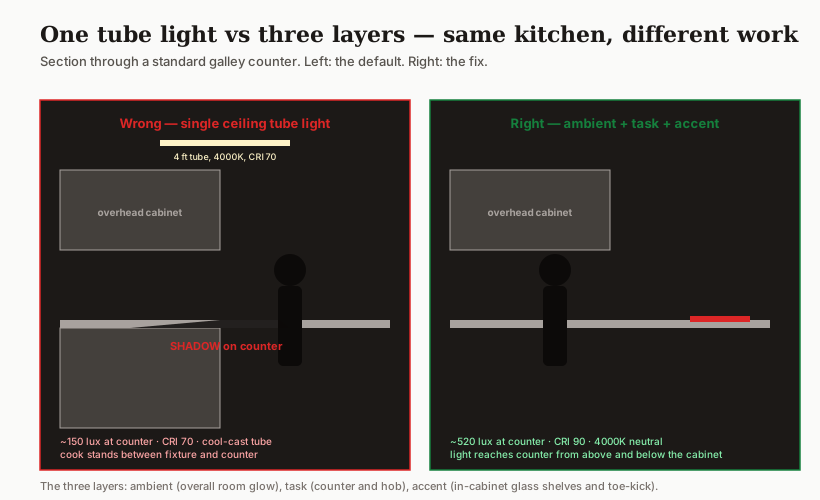
Stand at your kitchen counter in the early evening. The ceiling light is on. Look at the chopping board. If your hand is throwing a shadow across the onions you are cutting, you are not bad at chopping — you have a badly lit kitchen. And almost every Indian kitchen is. The default scheme in this country is one ceiling fixture in the centre of the room, switched at the door, and that is all. The cook is permanently between the light source and the work surface.
The frustrating part is that fixing it is not expensive. Under-cabinet LED is the single cheapest upgrade in the kitchen — a fraction of a per cent of the kitchen budget — and it transforms how the room works. But it has to be planned before the wiring is buried in the wall. After that, the cost multiplies. This guide names the seven mistakes you can stop making, sets out the three-layer fix, and gives you the lux, CRI and colour-temperature targets your kitchen actually needs. It is a deep-dive companion to our best modular kitchen layout for Indian cooking.
The seven mistakes
These are the lighting failures you will find in nine out of ten Indian flat kitchens, in roughly descending order of how much they hurt cooking.
| # | Mistake | What it does to cooking |
|---|---|---|
| 1 | One tube light per kitchen | Cook stands in own shadow at every counter |
| 2 | No task light under the cabinets | Counter sits in shadow under overhead boxes |
| 3 | Wrong colour temperature (2700K or 6500K) | Warm dulls colour; cool is harsh and clinical |
| 4 | Switch at the wrong point | Walk into a dark kitchen, juggle utensils to flip it |
| 5 | No separate hob light | Sauce colour is unreadable, food burns |
| 6 | No light inside the pantry | Reach into a dark pull-out, guess at jars |
| 7 | Low-CRI ambient light | Skin, meat, vegetables read the wrong colour |
Each of the seven traces back to one root cause: lighting is treated as a fixture purchase, not a designed system.
The three-layer fix
A working kitchen needs three layers of light, each on its own switch.
Ambient is the overall glow of the room. Plan it as evenly distributed downlights at 3500–4000K, never a single tube. Aim for around 200 lux on the floor. This is the layer that lets you walk into the kitchen at 11 pm for a glass of water without turning the room into a stadium.
Task is the bright, accurate, glare-free light on every work surface. Under-cabinet LED on the counter, a dedicated hood light on the hob, a downlight directly over the sink. The cook is never between the source and the surface, because the source is below the cabinets or directly above the work. Aim for around 500 lux on the counter at CRI 90 and 4000K.
Accent is the in-cabinet glass-shelf wash, the toe-kick glow, and the over-cabinet up-light if you have one. It carries no functional load — switch it independently of ambient.
Lux, CRI and colour temperature — the numbers that matter
The three numbers that decide whether a kitchen is comfortable to cook in are illuminance (lux), colour-rendering index (CRI), and correlated colour temperature (CCT). All three are printed on every LED package sold in India; almost no one reads them.
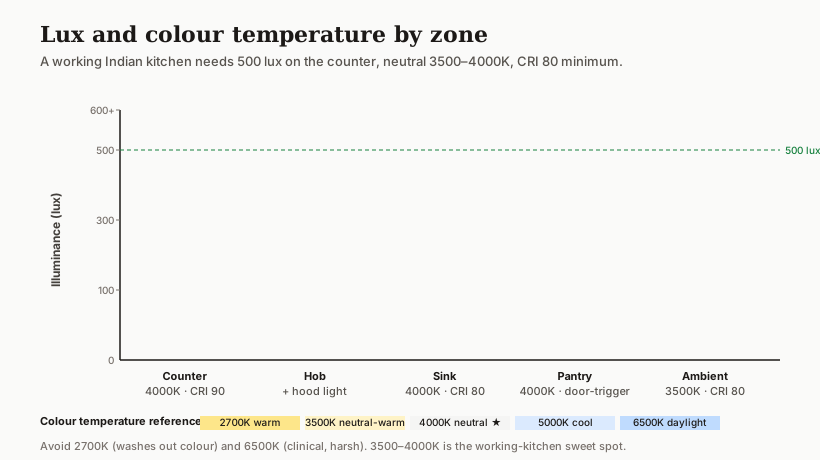
Illuminance (lux) measures how much light is actually falling on the work surface. The Bureau of Indian Standards (IS 6665) and the Illuminating Engineering Society both put the working kitchen counter at 500 lux. Your average ceiling tube light delivers 150 lux at counter level after the cook stands in front of it. The deficit is the reason every Indian kitchen tale ends with "I cut myself".
Colour rendering index (CRI) measures how faithfully a light source reproduces colour against a reference. A perfect score is 100; a budget LED tube is 70 to 75. The difference is the colour of curry — at CRI 70 you cannot tell if the masala has caramelised correctly, and your palak looks grey. Aim for CRI 80 minimum and CRI 90 for any surface you cook on.
Correlated colour temperature (CCT) measures whether the light is warm (yellow), neutral, or cool (blue). 2700K is the warm of a living-room lamp; it washes out cooking colour. 6500K is daylight white; it reads as harsh and clinical in a domestic kitchen. The working sweet spot is 3500K for ambient and 4000K for task — neutral, slightly cool of warm-white, with accurate colour rendition.
| Zone | Target lux | Target CCT | Min CRI | Why |
|---|---|---|---|---|
| Counter (prep) | 500 | 4000K | 90 | See ingredient colour true |
| Hob | 300 + dedicated hood light | 4000K | 80 | Read sauce reduction state |
| Sink | 350 | 4000K | 80 | Spot stains and food residue |
| Pantry | 200 (door-triggered) | 4000K | 80 | Read labels in pull-outs |
| Ambient (room) | 200 | 3500K | 80 | Comfortable evening glow |
The combination "500 lux, 4000K, CRI 90" is the single biggest experience upgrade you can give an Indian kitchen, and most LED strips sold under ₹300 per metre meet it on the spec sheet — buy from a brand that publishes lumens-per-metre and CRI, not just wattage.
Under-cabinet LED — get the placement right
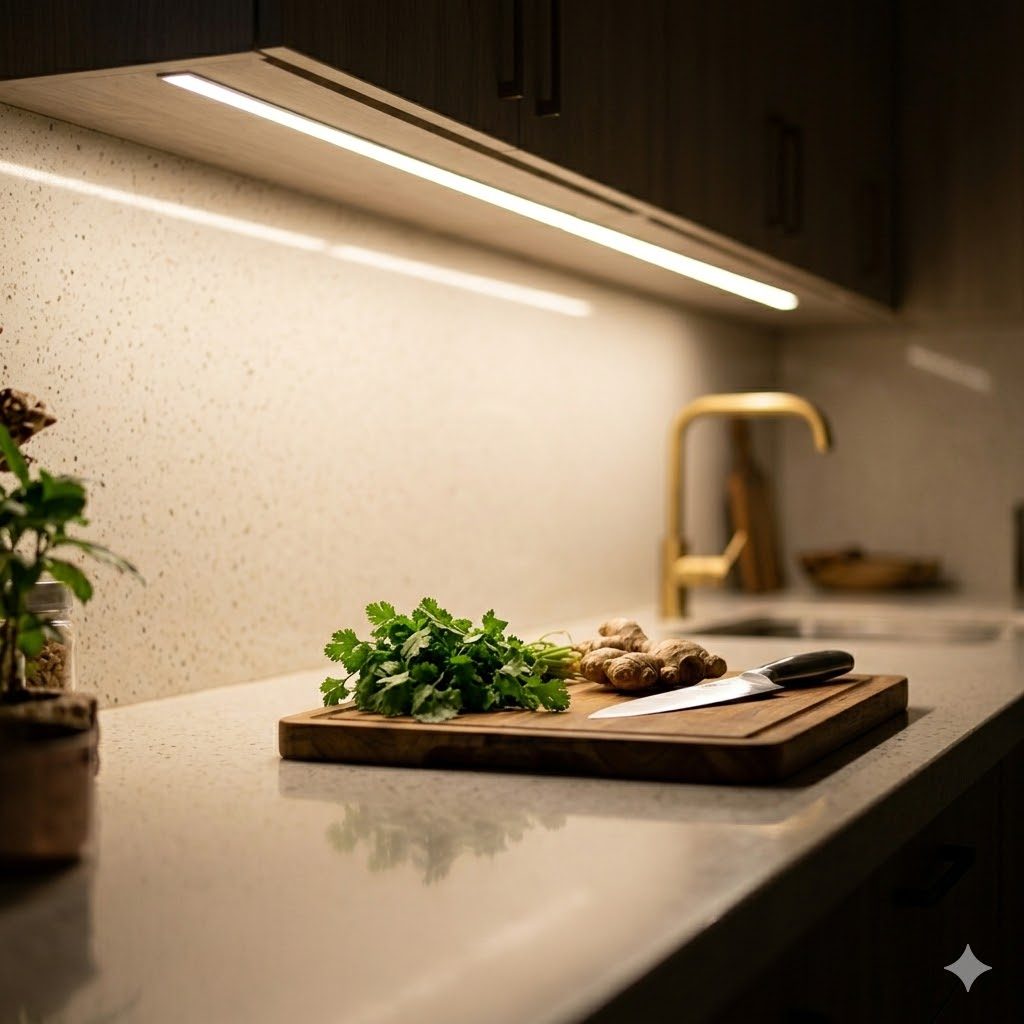
Under-cabinet LED is the most-installed and most-misplaced kitchen fixture in India. The two failures are: mounting the strip at the back of the cabinet underside (so the light hits the dado and bounces uselessly) and using an undiffused strip (so you see the diode dots in every reflective surface). Both are avoidable in the same five minutes of planning.
Mount the strip toward the front of the cabinet underside — within the front 40 mm of the carcase — so light throws across the full counter depth and not at the back wall. Use a strip in an aluminium channel with a frosted polycarbonate diffuser; you will pay 80 to 120 rupees per metre extra and you will not see a single diode. Choose a strip rated CRI 90 minimum at 4000K. If the cabinets have a 50 mm valance below them, the strip lives behind that valance and is fully invisible from any standing angle in the room.
Plan the circuits before the wiring is poured
Every layer needs its own switch. Switch them all at one bank, at the entry point of the kitchen, where you reach as you walk in. Never put the primary kitchen switch behind the fridge or behind a cabinet pull-out.
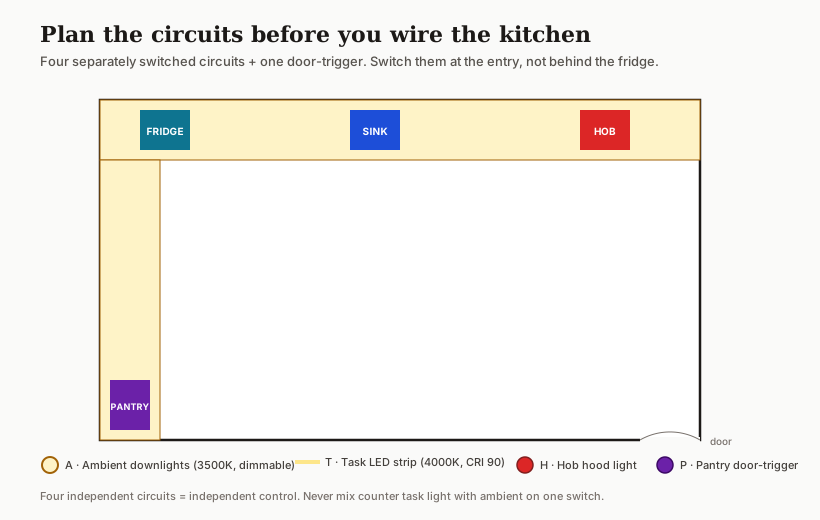
The minimum sensible circuit plan for a 2 BHK kitchen is four circuits plus one door-trigger:
| Circuit | What it controls | Notes |
|---|---|---|
| A — Ambient | All ceiling downlights | Dimmable 0–100 per cent |
| T — Task | All under-cabinet LED runs | Single 24 V driver, 2-way switch at the hob end |
| H — Hob hood | Hood-integrated light | Switched on the hood, no wall switch |
| P — Pantry | Door-trigger micro-switch | Lights when shutter opens, off when closed |
The 2-way switch for the task circuit is the small detail that separates a kitchen designed by a thinker from one designed by a defaulter. When the cook is at the hob end of a long galley, they should not have to walk back to the door to dim the under-cabinet strip.
Lighting is the cheapest, highest-impact upgrade in the kitchen — and the one that is hardest to add after the wiring is buried. Plan it before the BOQ is signed, not after.
The fix, in order
1. Three layers, three switches — ambient, task, accent. Never on one circuit.
2. 500 lux, 4000K, CRI 90 on every counter. Under-cabinet LED gets you there.
3. Strip toward the front of the cabinet underside, in a diffused aluminium channel.
4. Hob hood light is a separate circuit, switched on the hood itself.
5. Pantry door-trigger — never reach into a dark pull-out.
6. Switch bank at the entry, not behind a cabinet, and a 2-way for task at the hob end.
7. Ambient dimmable, so 11 pm water-glass runs do not need stadium light.
Prevent it / Plan it: Run a fixture-by-fixture pass with the lighting planner, and read the broader companion guides on why your home feels dark, the apartment lighting planning guide, common kitchen planning errors, and the pillar best modular kitchen layout for Indian cooking.
References
- Bureau of Indian Standards (1972, reaffirmed 2018) IS 6665: Code of Practice for Industrial Lighting. New Delhi: BIS. (Domestic kitchen counter values consistent with industrial food-prep recommendations of 500 lux.)
- Illuminating Engineering Society (2020) IES Lighting Handbook (11th edition). New York: IES.
- CIBSE (2018) Lighting Guide LG9: Lighting for Communal Residential Buildings. London: Chartered Institution of Building Services Engineers.
- Bureau of Indian Standards (2016) National Building Code of India 2016, Part 8: Building Services, Section 1 — Lighting and Ventilation. New Delhi: BIS.
- Boyce, P. R. (2014) Human Factors in Lighting (3rd edition). Boca Raton, FL: CRC Press.
Part of the Studio Matrx Kitchen Design series.
Export this guide
Related Guides — Deep-dive reading
Kitchen Lighting Design for Indian Homes: Task-First & Shadow-Free (2026)
The design guide to lighting an Indian kitchen where task and safety matter most: the one rule that ends counter shadows, the ambient-task-accent layers, the right lux, neutral colour and high CRI so food looks true, and where wiring near water hands off to a licensed electrician.
LightingColour Temperature & CRI: Choosing the Right White for Every Room
The two numbers that decide how light feels and how true colours look — colour temperature in kelvin (warm to cool) and the colour rendering index (CRI). What warm, neutral and cool light suit, why CRI matters for skin, food and fabric, and the room-by-room choices for an Indian home.
Electrical & WiringApartment Lighting Planning Guide
How to light a deep, dark apartment floor plate in layers — before the wiring is chased into the walls
Apartment LivingRelated Tools — Try Free
Apartment Video Door System Planner
Enter flats, entrances, floors and guard desk for a first-pass building intercom plan — door stations, indoor monitors, guard station, the right architecture and an indicative cost band.
Building PlannerHome Lighting Planner
Enter room dimensions and fixture type — required lumens and fixture count calculate instantly.
Live CalculatorCircadian Light Meter
Patient-centric circadian lighting visualizer for Indian healthcare design — time-of-day × intensity → CCT, melanopic lux (EML / mEDI), melatonin suppression, and an alertness curve. Calibrated against WELL v2 L03 Circadian Lighting Design, CIE S 026:2018, Brainard 2001, and Lucas et al. 2014.
Circadian Tool