
How to Install Home CCTV: Step-by-Step (India)
Plan camera positions, choose wired PoE NVR or Wi-Fi, run cable or go wireless, mount and power cameras, set up recording and motion zones, respect DPDP privacy, and know when to call a pro.
Buying a CCTV kit is the easy part. Installing it well — cameras aimed at the right places, footage you can actually read at 2 AM, storage that keeps enough days, and a setup that does not point into your neighbour's bedroom — is where most home installations go wrong. This guide walks the whole job end to end, for both wired PoE and Wi-Fi paths, in Indian conditions and with Indian prices.
It assumes you have already picked your cameras. If you have not, start with how to choose CCTV for your home, and see how cameras fit the bigger picture in the smart home security systems guide and the smart homes pillar guide. To size storage before you buy the hard disk, use the CCTV storage calculator.
The single most common installation mistake in India is mounting a camera high on a wall pointing down at the top of people's heads. You get a great view of scalps and no faces. Mount for faces, not roofs.
Step 1 — Plan camera positions and angles on paper first
Walk your property and mark every point an intruder must pass: the main gate, the front door, the compound wall, the parking, the back service door, the staircase to upper floors. These choke points matter more than open areas. One camera covering the only path to your door beats three cameras spread thinly across a lawn.
For each position decide the purpose, because purpose sets the angle and lens:
| Purpose | Mount height | Aim | Field of view |
|---|---|---|---|
| Face capture (entry, gate) | 2.2–2.5 m | Slightly down, at head height 3–4 m away | Narrow, 2.8 mm lens |
| Overview (parking, yard) | 3–3.5 m | Wide, angled down 15–20° | Wide, 2.8–4 mm |
| Perimeter (long wall) | 3 m | Along the wall, not across it | Bullet, longer range |
| Doorbell zone | 1.4–1.6 m | Straight at the visitor | Video door phone often better |
Two rules save most installs. First, keep the sun behind the camera, not in front — a camera facing the morning or evening sun will silhouette everyone into black shapes. Second, mount at a height where an average adult's face falls in the frame at the distance they will actually be. For a gate that is usually 3 metres of standoff and a 2.3 m mount.
Step 2 — Choose your install path: wired PoE NVR or Wi-Fi
This decision shapes every step that follows. A wired Power-over-Ethernet (PoE) system runs a single Cat6 cable from each camera to a Network Video Recorder (NVR) that both powers the camera and records it. A Wi-Fi system puts battery or plug-powered cameras on your home Wi-Fi and records to a memory card, a hub, or the cloud.
| Factor | Wired PoE NVR | Wi-Fi cameras |
|---|---|---|
| Best for | New homes, renovations, 4+ cameras | Rentals, quick installs, 1–3 cameras |
| Reliability | Very high, no Wi-Fi dropouts | Depends on signal and router |
| Install effort | High — cable runs, drilling | Low — mount and pair |
| Continuous recording | Yes, to NVR hard disk | Usually motion clips only |
| Power at camera | From PoE switch/NVR | Adapter or battery |
| Typical 4-cam cost | ₹18,000–₹40,000 | ₹8,000–₹22,000 |
| Ongoing cost | None (local storage) | Often cloud subscription |
If you are wiring during construction or a renovation, run PoE — the reliability and continuous recording are worth it and there is no cable to hide later. If you rent, or you want two cameras up this weekend without drilling long runs, Wi-Fi is the honest choice. The wider trade-off is covered in CCTV vs video door phone and the smart home installation guide.
Step 3 — Gather tools and materials
For a wired PoE install you will want: an impact drill with masonry bits, PVC conduit or casing, Cat6 outdoor-grade cable, RJ45 connectors and a crimping tool (or buy pre-crimped cables), wall plugs and screws, a spirit level, a fish tape for pulling cable, and a network cable tester. For Wi-Fi you mostly need a drill, plugs and screws, and a ladder. In both cases keep a smartphone handy for aiming — nearly every camera app shows a live preview while you mount.
Step 4 — Run cable (wired) or place cameras (wireless)
For wired systems, plan the shortest safe cable route from each camera back to the NVR, ideally through the ceiling void, along beams, or in surface conduit. Keep CCTV cable at least 30 cm away from mains wiring to avoid interference, and never run it in the same conduit as power. Drill through walls at a slight downward angle from outside to inside so rainwater cannot track along the cable into the wall. Leave a small drip loop below each entry point. Label both ends of every cable before you pull it — untangling four identical cables at the NVR later is misery.
For Wi-Fi, the "cable" job is really a signal job. Before mounting, stand at each camera spot and check your phone's Wi-Fi signal there. Cameras behind a thick outer wall or at the far gate often sit at the edge of coverage; a mesh node or outdoor access point fixes this. A camera that keeps dropping off Wi-Fi is worse than no camera because you trust it and it is not there. See the smart home networking guide for extending coverage.
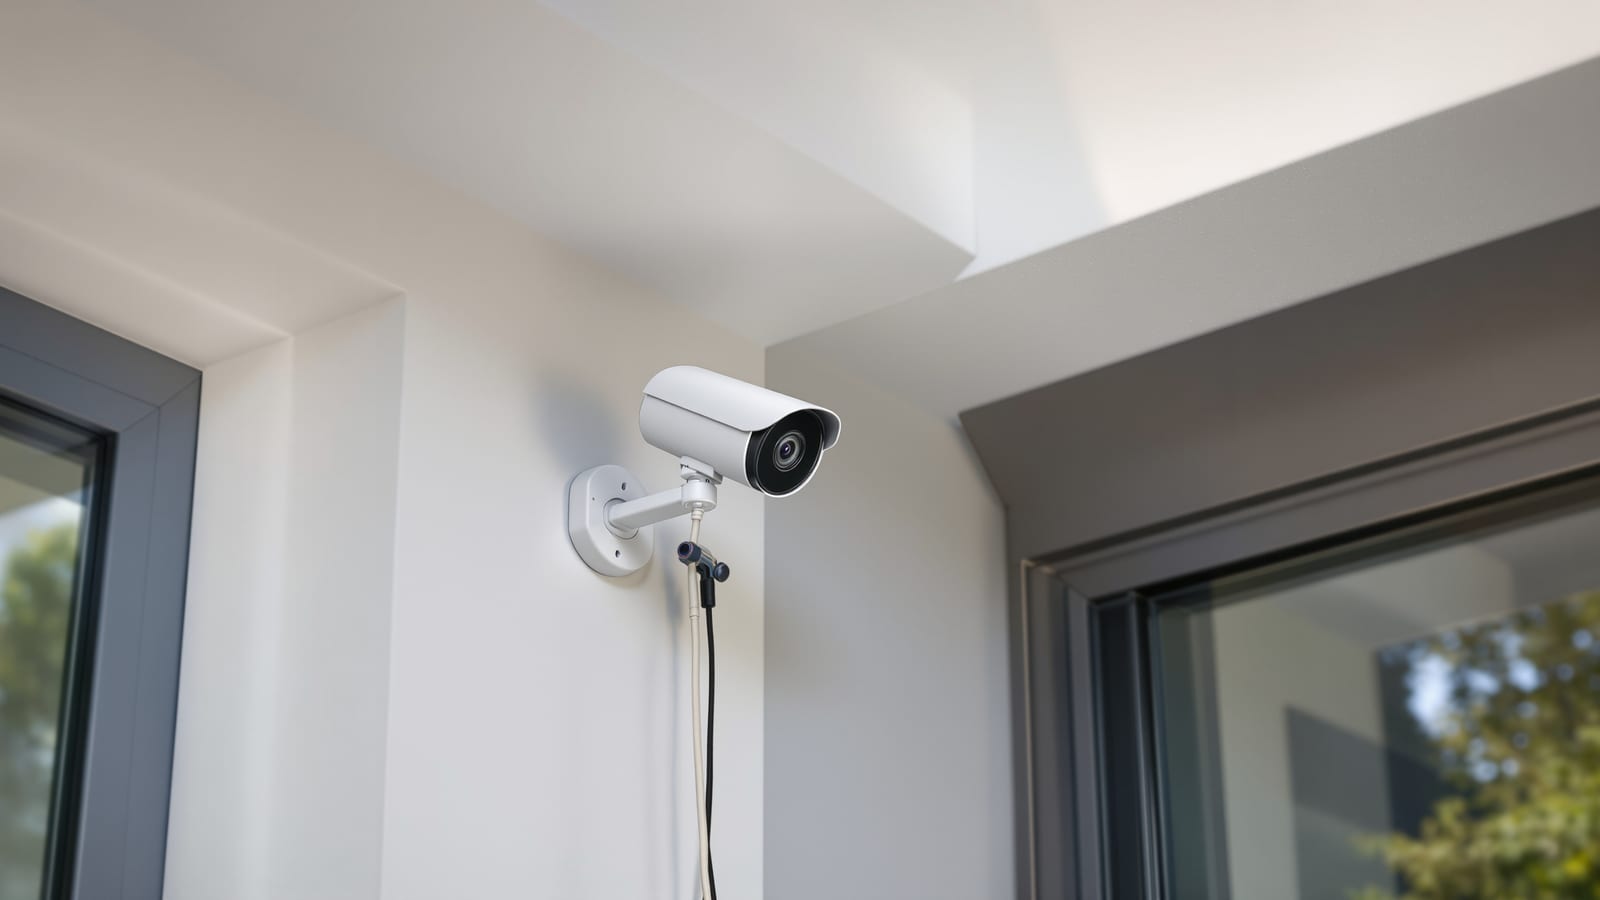
Step 5 — Mount the cameras
Hold the camera bracket to the wall, use the spirit level, mark the holes, drill, insert wall plugs, and screw the base firm. Masonry needs plugs; drywall needs anchors rated for the camera weight plus wind load on the arm. Before you fully tighten, open the app or NVR live view and adjust the aim so faces land in the middle third of the frame at the distance people will actually stand. Tighten the locking ring. For bullet cameras, angle the built-in sun-shade forward to cut glare and keep rain off the lens.
Weatherproofing matters in the Indian monsoon. Even IP66 cameras leak if the cable gland is left loose or the pigtail joint is exposed. Wrap RJ45 joints in self-amalgamating tape, tuck them under the eave, and point cable entries downward so water drips off rather than pools.
Step 6 — Power the cameras
| Method | How it works | Notes |
|---|---|---|
| PoE from NVR | NVR has built-in PoE ports | Simplest for 4–8 cameras; one cable per camera |
| PoE switch | Separate switch powers cameras, feeds NVR | For more cameras or long runs |
| DC adapter | 12V adapter at each camera | Needs a power point near each camera |
| Battery/solar | Rechargeable, no wiring | Wi-Fi cameras only; recharge every 1–4 months |
PoE is the cleanest because power and data share one cable — no electrician needed at the camera end. Check the PoE budget: a switch rated 60 W total cannot run eight cameras that each draw 10 W. If you use DC adapters, protect each with the same surge sense you would any electronics; India's grid spikes kill cheap adapters.
Step 7 — Connect the NVR/DVR and install the hard disk
Power down the NVR, open the case, and seat a surveillance-grade hard disk (WD Purple or Seagate SkyHawk — desktop drives are not built for 24×7 writes) into the SATA bay. Connect the SATA data and power cables, close the case, and power on. The NVR will prompt to initialise and format the disk. To pick capacity, run your camera count, resolution and retention days through the CCTV storage calculator before buying — a 2 TB disk holds roughly 8–12 days of four 4 MP cameras on motion recording, far less on continuous.
Connect the NVR to your router with an Ethernet cable so it can reach the internet for remote viewing, and connect a monitor via HDMI for the first-time setup wizard. Set a strong admin password immediately — the default password on internet-connected recorders is the single biggest CCTV security hole in India.
Step 8 — Network and app setup
Run the setup wizard: set date and time to IST, add the cameras (PoE cameras usually auto-detect), and confirm each live view. Then install the manufacturer app — Hik-Connect for Hikvision, gCMOB/CP Plus Connect for CP Plus, DMSS for Dahua, or the brand app for Wi-Fi cameras. Scan the QR code on the NVR or camera to bind the device to your account. Enable two-factor authentication on the app account. Prefer P2P/relay viewing over opening router ports; port-forwarding a CCTV recorder to the internet exposes it to automated attacks.
Step 9 — Configure recording, motion zones and notifications
Out of the box most systems either record everything (fills the disk fast) or notify on every leaf that moves. Tune it:
- Recording schedule — continuous for the gate and door during night hours, motion-triggered elsewhere, to stretch storage.
- Motion detection zones — draw the zone over your gate and path only. Exclude the road, the neighbour's wall, and swaying trees to cut false alerts.
- Sensitivity — start at medium; raise if you miss events, lower if you get flooded.
- Smart detection — if the camera supports person/vehicle detection, enable it so a passing cat does not ping your phone.
- Notifications — push alerts for the perimeter cameras; consider muting overview cameras at night.
Step 10 — Privacy and DPDP compliance
This is not optional and it is where home installers most often cross a line. Under India's Digital Personal Data Protection Act, camera footage of identifiable people is personal data. For a home system the practical rules are simple and mostly about being a decent neighbour:
| Do | Don't |
|---|---|
| Aim cameras at your own property | Point into a neighbour's window, balcony or door |
| Cover your gate, door, parking | Record a shared corridor without other flats' consent |
| Put up a "CCTV in use" sign | Cover public footpath faces you do not need |
| Use privacy masks to grey out overspill | Share footage of identifiable people casually |
| Keep footage only as long as needed | Post neighbours' clips to WhatsApp groups |
Most NVRs let you draw a privacy mask — a grey box that blanks part of the frame. Use it to blank a neighbour's window or door that unavoidably falls in shot. In a housing society, cameras in shared lobbies or lifts are a society decision, not an individual flat's. The smart home security systems guide covers the wider consent picture.
Step 11 — Test everything, especially at night
A daytime install that looks perfect can be useless after dark. Test in the conditions that matter:
- Night vision — stand at the gate at night and check you can read a face and, if relevant, a number plate. Adjust IR glare from nearby walls or the sun-shade if the image washes out.
- Coverage — walk each choke point and confirm you appear on the intended camera with your face visible.
- Motion alerts — trigger each zone and confirm the push notification arrives on your phone within a few seconds.
- Remote view — turn off Wi-Fi on your phone and open the app over mobile data to confirm outside-home access works.
- Recording and playback — pull up an event on the timeline and confirm it saved at full quality.
- Storage retention — after a week, check the oldest footage still on the disk matches the days you planned.
Troubleshooting common problems
| Symptom | Likely cause | Fix |
|---|---|---|
| No image on a PoE camera | Bad crimp or exceeded PoE budget | Re-test cable; check switch wattage |
| Camera keeps dropping (Wi-Fi) | Weak signal at mount point | Add mesh node; move router; lower resolution |
| Black/washed-out night image | IR bouncing off a wall or glass | Re-angle; disable IR through glass |
| Flood of false alerts | Motion zone too wide/sensitive | Redraw zone; enable person detection |
| No remote view | ISP CGNAT or P2P disabled | Enable P2P/relay in app; contact ISP |
| Footage only lasts 2 days | Continuous recording + small disk | Switch to motion; add bigger surveillance drive |
| Time stamp wrong | NTP/timezone not set | Set IST and enable NTP sync |
When to DIY and when to call a pro
A one-to-three-camera Wi-Fi system is a comfortable DIY weekend for most people. A four-plus-camera wired PoE system with cable runs through ceilings, exterior drilling, and an NVR is where many homeowners are happier paying an installer ₹500–₹1,000 per camera for labour — especially for first-floor mounts needing a ladder, or when cable must be hidden in finished walls. Whichever route you take, insist on doing the app account, password, motion zones and privacy masks yourself; an installer who leaves the default password and points a camera at your neighbour has finished the job wrong. For a broader DIY-versus-pro framework across the whole home, see the smart home installation guide.
References
Export this guide
Related Guides — Deep-dive reading
PoE vs Wi-Fi CCTV: Which Home Security Cameras Are Better?
One camera type runs power and video down a single Cat6 cable to an NVR and almost never drops out; the other clips to a wall in minutes and streams over your home Wi-Fi. This guide settles PoE vs Wi-Fi CCTV for Indian homes — reliability, video quality and bandwidth, cabling and power, retrofit versus new-build effort, NVR versus SD and cloud storage, hacking risk, real rupee costs, scalability and outdoor use — and gives a clear verdict for each kind of home.
Smart HomeHow to Choose CCTV for Your Home in India (2026 Buyer's Guide)
Camera types, resolution, IP vs analog, night vision, storage and AI — a decision framework plus a method to work out how many cameras and how much storage you actually need.
Smart HomeCCTV vs Video Door Phone: Which Does Your Home Need?
They look similar and get confused constantly, but a CCTV camera and a video door phone do different jobs — one watches the whole property and records, the other answers your door and controls who comes in. This guide settles CCTV vs video door phone for Indian homes: what each is for, where they overlap, real rupee costs, apartment versus villa relevance, and why most homes end up wanting both.
Smart HomeRelated Tools — Try Free
Material Schedule Generator
Generate a room-wise finish schedule — walls, floors, ceilings, trim, and joinery by location.
Material ScheduleFalse Ceiling Cost Estimator
Live ₹/sqft across 8 ceiling types — POP, gypsum, designer, metal, PVC, wooden — with cove and spot lighting for 20 Indian cities.
Cost CalculatorWindow Cost Calculator
Estimate window price plus installation by type, frame material, size, glass and quantity.
Window Calculator