
TV & Media Wall Finishes: The Complete Guide for Indian Homes
Finish plus hidden engineering — the anatomy of a media wall, the finish options, getting the proportions right, hiding wires and cooling devices, and three budgets.
The TV wall is usually the living room's main feature wall — the surface the whole room is arranged around — and it is the one wall where a beautiful finish alone is not enough. Behind that fluted wood or stone slab lies a hidden layer of engineering: wires that must disappear, devices that must breathe, a screen that must sit at the right height, and lighting that saves your eyes. Treat a media wall as decoration only, and you end up with cables snaking down the wall, a set-top box overheating in a sealed box, and a TV mounted too high. Treat it as finish plus engineering, planned together, and it looks effortlessly built-in.
This is the complete guide to TV and media wall finishes for Indian homes — the room-specific companion to the master wall-finishes guide, and a partner to our modern TV unit ideas. We will open up the anatomy of a media wall, run through the finish options, get the proportions right, solve wires and device cooling, and lay out three budgets.
Anatomy of a media wall
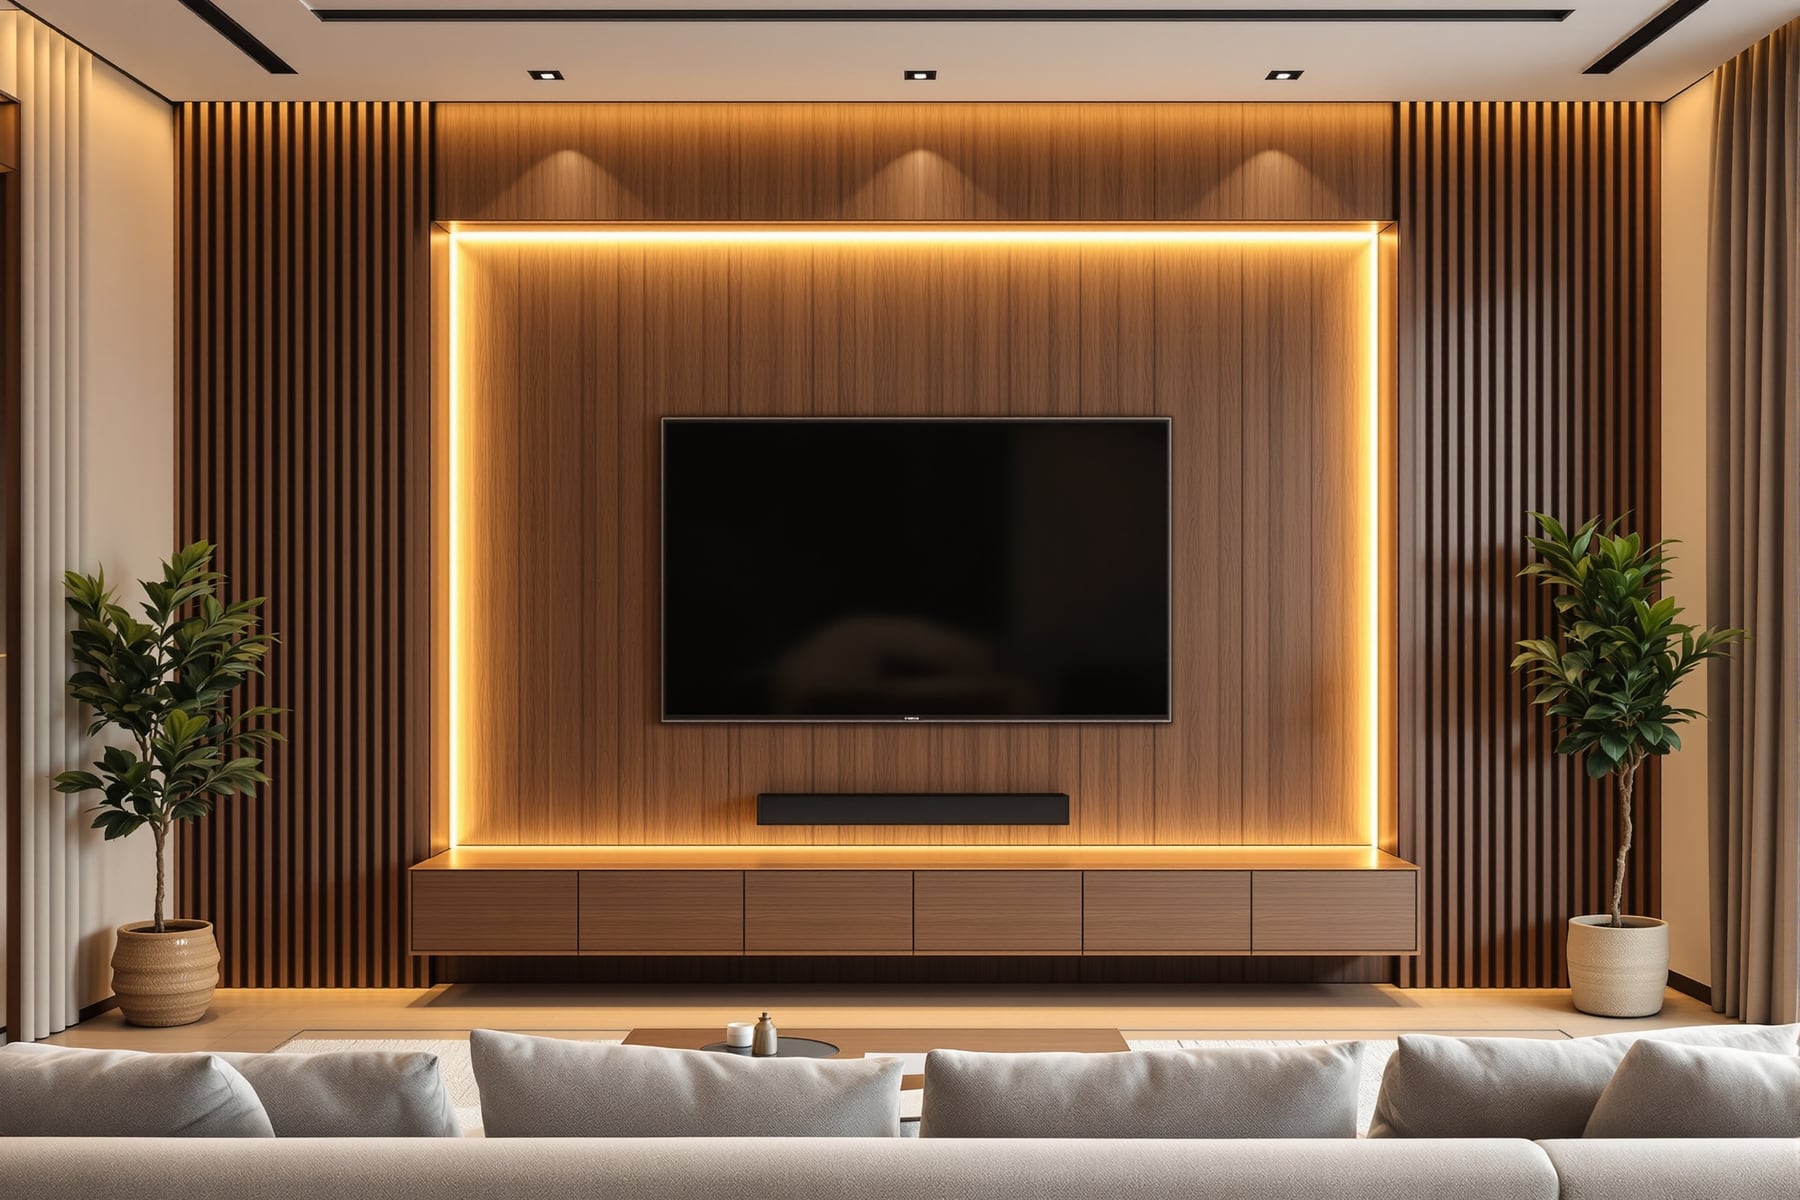
A media wall is finish and engineering in one, and seeing the hidden parts is what separates a built-in look from a stuck-on one.

The parts: the TV on a bracket, set at seated eye level; a hidden wire route (conduit behind the panel to a recessed socket box); a ventilation gap so devices do not overheat; an integrated console or shelving for the devices and storage; the finish itself (fluted wood, stone, microcement or panels); and cove or backlighting for a soft glow that reduces eye strain. The rule that saves the most grief: a media wall is finish plus engineering — plan the wiring, ventilation and mounting before the finish goes on, because you cannot easily add them afterwards.
TV wall finish options
With the engineering planned, the finish is where the drama lives — and a media wall can carry a bolder finish than any other wall in the room.

The options: fluted WPC or wood (warm, and it even hides wires in the grooves, ₹180–320/sq ft — the popular pick), stone or marble slab (a luxe, dramatic backdrop, ₹300–900), microcement (seamless and modern, ₹300–450), panel moulding or 3D panels (classic or sculptural, ₹150–500), brick or stone veneer (rustic and characterful, ₹120–350), and paint with floating shelves (budget and clean, ₹30–70). Fluted wood is the go-to; stone and microcement go luxe; paint-and-shelves keeps it budget.
Getting the proportions right
More media walls are spoiled by bad proportions than by the wrong finish — and the fixes are simple rules.

The rules: set the TV height with the centre of the screen at seated eye level (roughly 100–110 cm from the floor); make the feature panel wider than the TV so it frames the screen with margin rather than fighting the wall edges; leave a comfortable console gap (about 15–30 cm between the console top and the TV bottom); and keep it centred or deliberately balanced with shelving. The most common mistake is a TV mounted too high (above a mantel), which strains the neck — seated eye level is the rule, and the finished panel should frame the TV, not fight it.
Wires, sockets and cooling
This is the invisible half of the job, and the half people most regret skipping.

Do this in the carcass, before the finish: run conduit before cladding (so you can pull cables later), fit recessed sockets (so the TV mounts flush and close), leave a ventilation gap (enclosed devices overheat and fail), plan for future cables (an extra empty conduit), and route a soundbar or in-wall speakers properly. The number-one media-wall regret is wires you cannot hide and devices with nowhere to breathe — solve both in the structure, before the finish goes on.
Three budgets for a TV wall
A media wall scales widely, but budget for the hidden work at every level, not just the visible finish.

Value: a contrast paint colour with floating shelves and a slim console, wires hidden in a surface trunk — clean and cheap. Mid: fluted WPC panelling with an integrated console and cove backlight — the popular designer look. Premium: a stone/marble slab or seamless microcement with fully concealed wiring, integrated lighting and custom joinery — a luxe showpiece. At every level, remember the finish is only half the cost: budget for the concealed wiring, ventilation and joinery that make it look built-in rather than stuck-on.
A TV wall is the one feature wall where planning the inside matters as much as choosing the outside: eye-level screen, a framing panel, hidden cables, breathing devices, and soft light behind it. Get the engineering right first and any finish — fluted wood, stone or paint — looks intentional and built-in. For each finish in depth, follow the deeper guides; for the wider decision, return to the master wall-finishes guide.
Export this guide
Related Guides — Deep-dive reading
50 Modern TV Unit Ideas for Indian Homes
Floating consoles, fluted feature walls, marble backdrops, warm-wood cladding, and dark eclectic columns — with dimensions, lighting, and cost guidance
Room PlanningLiving Room Wall Finishes: The Complete Guide for Indian Homes
The room's walls, zone by zone — one hero wall and calm supporting walls, the finish menu and the mood each gives, choosing a feature wall, colour and light, and three budget combinations.
Wall FinishesBathroom Wall Finishes: The Complete Guide for Indian Homes
Wet, splash and dry walls each need a different finish — the bathroom's zones, the best finish for each, why waterproofing comes first, tricks to enlarge a small bath, and three budget combinations.
Wall FinishesRelated Tools — Try Free
Apartment Interior Planning Checklist
51-item checklist across structural, ceiling, lighting, furniture, storage, electrical, kitchen, bathroom.
ChecklistFalse Ceiling Cost Estimator
Live ₹/sqft across 8 ceiling types — POP, gypsum, designer, metal, PVC, wooden — with cove and spot lighting for 20 Indian cities.
Cost CalculatorInterior Layout Planner — Printable Graph Grid
Printable graph grid to sketch room layouts to scale before committing to furniture placement.
Layout Tool