
 Lesson 0.4
Lesson 0.4 · Foundations
The Three Levers in One Room
Everything so far has been preparation. Now watch it pay off: one real, measured flat, redesigned move by move, with all three levers pulling at once. This is what the method looks like in action.
A small home isn't improved by one brilliant idea. It's improved by a dozen modest ones, each pulling a lever, all rowing in the same direction.
You have the whole method now. The three levers from Lesson 0.1. The four lenses from 0.2. The measuring discipline from 0.3. This lesson puts them together on a single real flat — and shows you that a transformation is never one big move, but many small ones, each tagged to a lever.
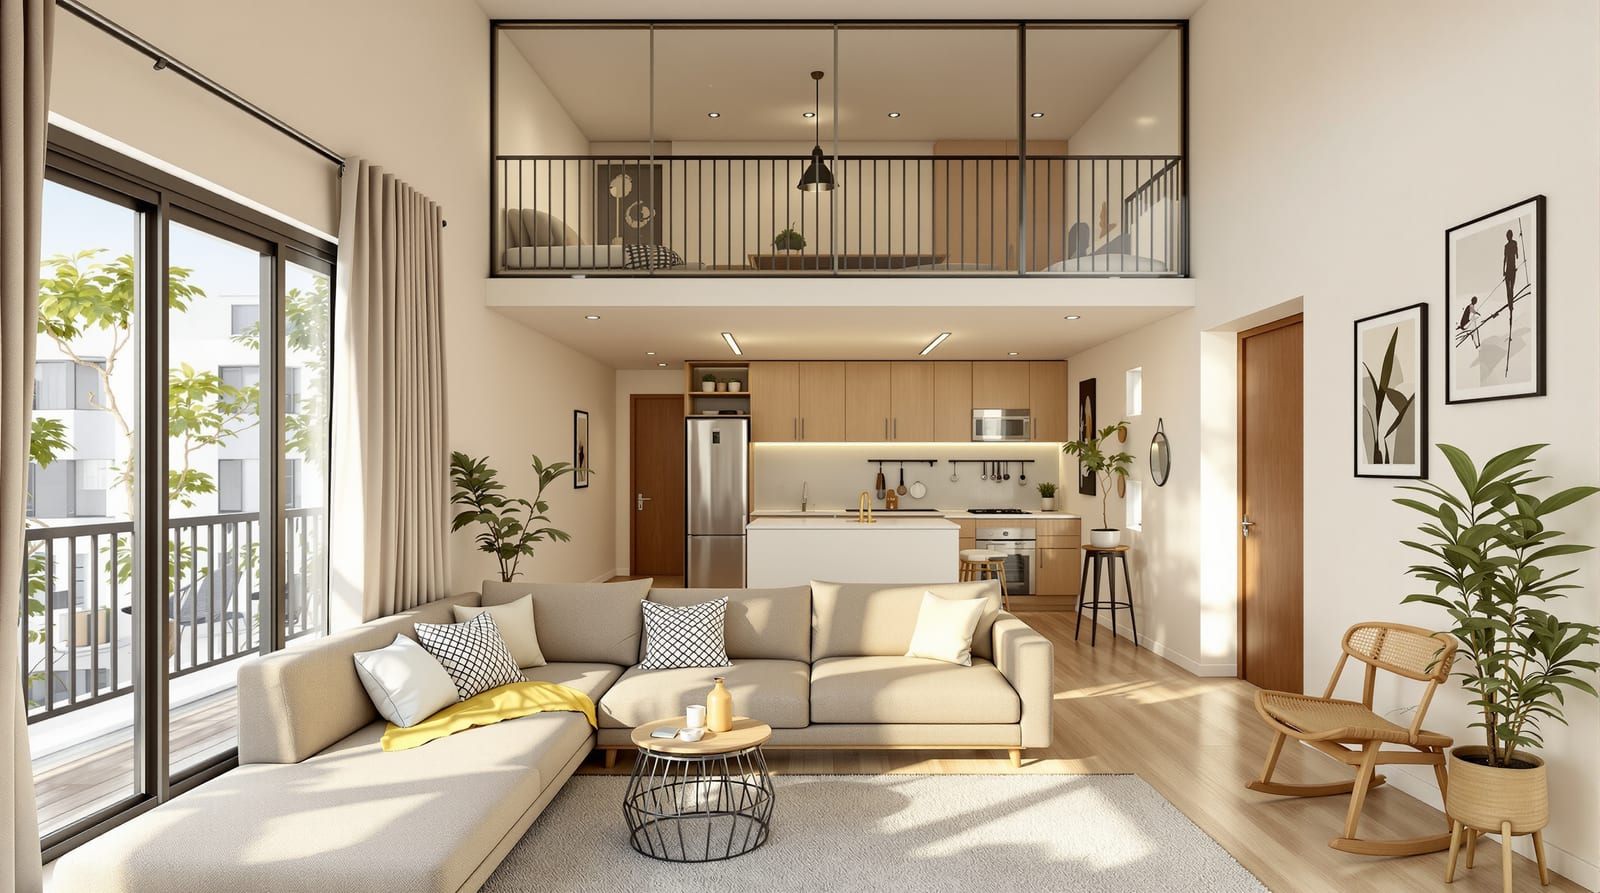
Meet the Sharmas: a couple with a toddler in a 420 sq ft 1BHK in Pune. On paper it's “too small for three.” By the end of this teardown, it works — and not one wall was added. Watch the plan change.
Seven small moves, three levers
Here's the whole transformation, broken down. Notice how no single move is dramatic — and how each one is unmistakably a Subtract, a Layer, or an Extend. This is the method working exactly as designed.
1 · Remove the bedroom partition (Subtract) — The non-structural wall splitting the flat in two went. It freed both its own footprint and the cramped circulation around it, turning two boxes into one flexible volume. + opened the whole plan · reclaimed ~18 sq ft
2 · Right-size the sofa (Subtract) — The oversized sofa that forced everyone to edge around it was swapped for one scaled to the room — giving back the circulation it was quietly stealing. + reclaimed ~12 sq ft of circulation
3 · The sofa becomes a bed (Layer) — That right-sized sofa converts to a double bed at night. The living room is now also the parents' bedroom — one footprint, two complete lives, split by time of day. + a whole bedroom's function, zero extra floor
4 · The old bedroom flexes (Layer) — Freed from holding a permanent bed, the former bedroom becomes a daytime play space for the toddler and a guest room when grandparents visit. It changes job with the hour. + play / guest / quiet room in one
5 · Glass instead of a wall (Extend) — Where the flexible room meets the living space, a glass partition replaces what would have been solid. Sightlines and daylight pass through; the eye reads one larger, brighter flat. + perceived space, borrowed light
6 · A loft over the kitchen (Extend) — The metre of dead air above the kitchen became a loft — the atta, modernised — swallowing suitcases, festival goods and the toddler's outgrown things. Pure volume, zero floor. + ~30 sq ft of storage from thin air
7 · The balcony becomes a room (Extend) — The drying-only balcony became a real work nook — a folding desk, good light, a door that closes on video calls. The work-from-home space they thought they didn't have. + ~40 sq ft, the largest single gain
Add it up: the flat measures the same 420 sq ft it always did, but the usable space — what the family can actually live on — rose by close to a third. Not one wall was built. Every gain came from a lever.
Go deeper — the order you pull the levers matters
Notice the sequence wasn't random. Subtract came first (remove the wall, right-size the sofa), because you can't layer or extend intelligently until you can see the true volume you're working with. Then Layer (the convertible furniture), because it decides how much floor each function actually needs. Only then Extend (glass, loft, balcony), because borrowing space is most effective once you know exactly what's still missing.
The rule of thumb for any small-space project: Subtract to reveal, Layer to multiply, Extend to reach. Run them out of order and you often pay to add space you'd have found for free by subtracting first. This is why every lesson from here builds the levers in that sequence — Modules 1 through 5 follow it exactly.
Module 0 complete — you have the framing
That's the end of the framing. You can now read any small home, see its waste, measure it true, and plan its transformation lever by lever. From here, the course goes deep on each lever in turn.
Module 0 complete. You can now read any compact home, see where it wastes space, measure it honestly, and plan its transformation lever by lever. That's the foundation every remaining module builds on. From here, we go deep — one lever at a time, starting with Subtract.
Before and after, one flat
Here's the Sharmas' flat as it was, and as it became. Toggle between them — watch the walls move, the furniture transform, the space open up. Each change is colour-tagged to its lever. Then we'll walk every move.
Fig 0.4 — Toggle to “After” to see the levers light up. No wall was added; usable space rose ~30%.
Fig 0.4 — Toggle to “After” to see the levers light up. No wall was added; usable space rose ~30%.
A friend sees the Sharmas' after-plan and says “we should knock down a wall and buy a sofa-bed too.” What's the most important thing they're missing?
Run the method yourself
You now have everything you need to do for your home exactly what we did for the Sharmas'. Bring out your measured plan from Lesson 0.3 with the waste overlaid.
- 1List your moves. For your hardest room, write down every change you could make. Don't filter yet — aim for at least seven, however small.
- 2Tag each one. Mark every move S, L, or E. If you can't tag it, it probably isn't a real space move — set it aside.
- 3Sequence them. Reorder: all your Subtracts first, then Layers, then Extends. This is your project plan.
- 4Find your headline number. Estimate the usable space each move gives back, and total it. That number — the space you'll reclaim without moving house — is your brief, and your motivation.
- A small-home transformation is never one big move — it's many modest ones, each pulling a lever, all aligned.
- The Sharmas' 420 sq ft flat gained ~30% usable space with no wall added — seven moves across the three levers.
- Every real space move is taggable as Subtract, Layer, or Extend. If you can't tag it, question whether it's a space move at all.
- Pull the levers in order: Subtract to reveal, Layer to multiply, Extend to reach.
Subtract is the first and cheapest lever. So where, exactly, does a compact home hide the most removable space — and how do you take it back without losing what you need?